Reuse a Single Email for all your Event Invitations in Customer Insights - Journeys
Triggers in Customer Insights - Journeys are great in many ways, and one of them is that they can drastically reduce the amount of time and energy you spend creating emails. A great example of this is for events. It’s already reasonably well known on how you can use triggers to automate the event registration confirmation, reminder and follow up as kindly demonstrated by Megan V Walker here.
I recently discovered how you can use a trigger to do the same to send event invitations to a segment of your choice. Which automatically personalises the invitation with the correct details for your chosen event. No customisations or flows required, just a ‘Custom’ Trigger and a single journey/email!

Create a Trigger

Create a ‘Custom’ Trigger
Create a new trigger, name the trigger ‘Send Event Invitation or Reminder’. For ‘What action will activate the trigger?’, select ‘When a customer interacts with a website/app’. I know it says it requires code integration by a developer, but trust me - you don’t!

Add attributes to the trigger
Add two additional attributes to the trigger:
Event - Entity Reference
Reminder - True or false
Set the trigger as ‘Ready to use’

Create an Invitation Email
Create an email for your event invitation, you may already have a template or a previous invitation you have used so grab a copy of that if you like or start from blank email. Add a button with your ‘Register’ call to action, then for the button URL select the ‘Personalisation’ icon (aka person being struck by lightening).

Link the email to the ‘Send Event Invitation or Reminder’ trigger
Customise the personalisation by referencing the ‘Event URL’ via the Trigger ‘Send Event Invitation or Reminder’ as shown in the steps below.

Add some more event information to the email
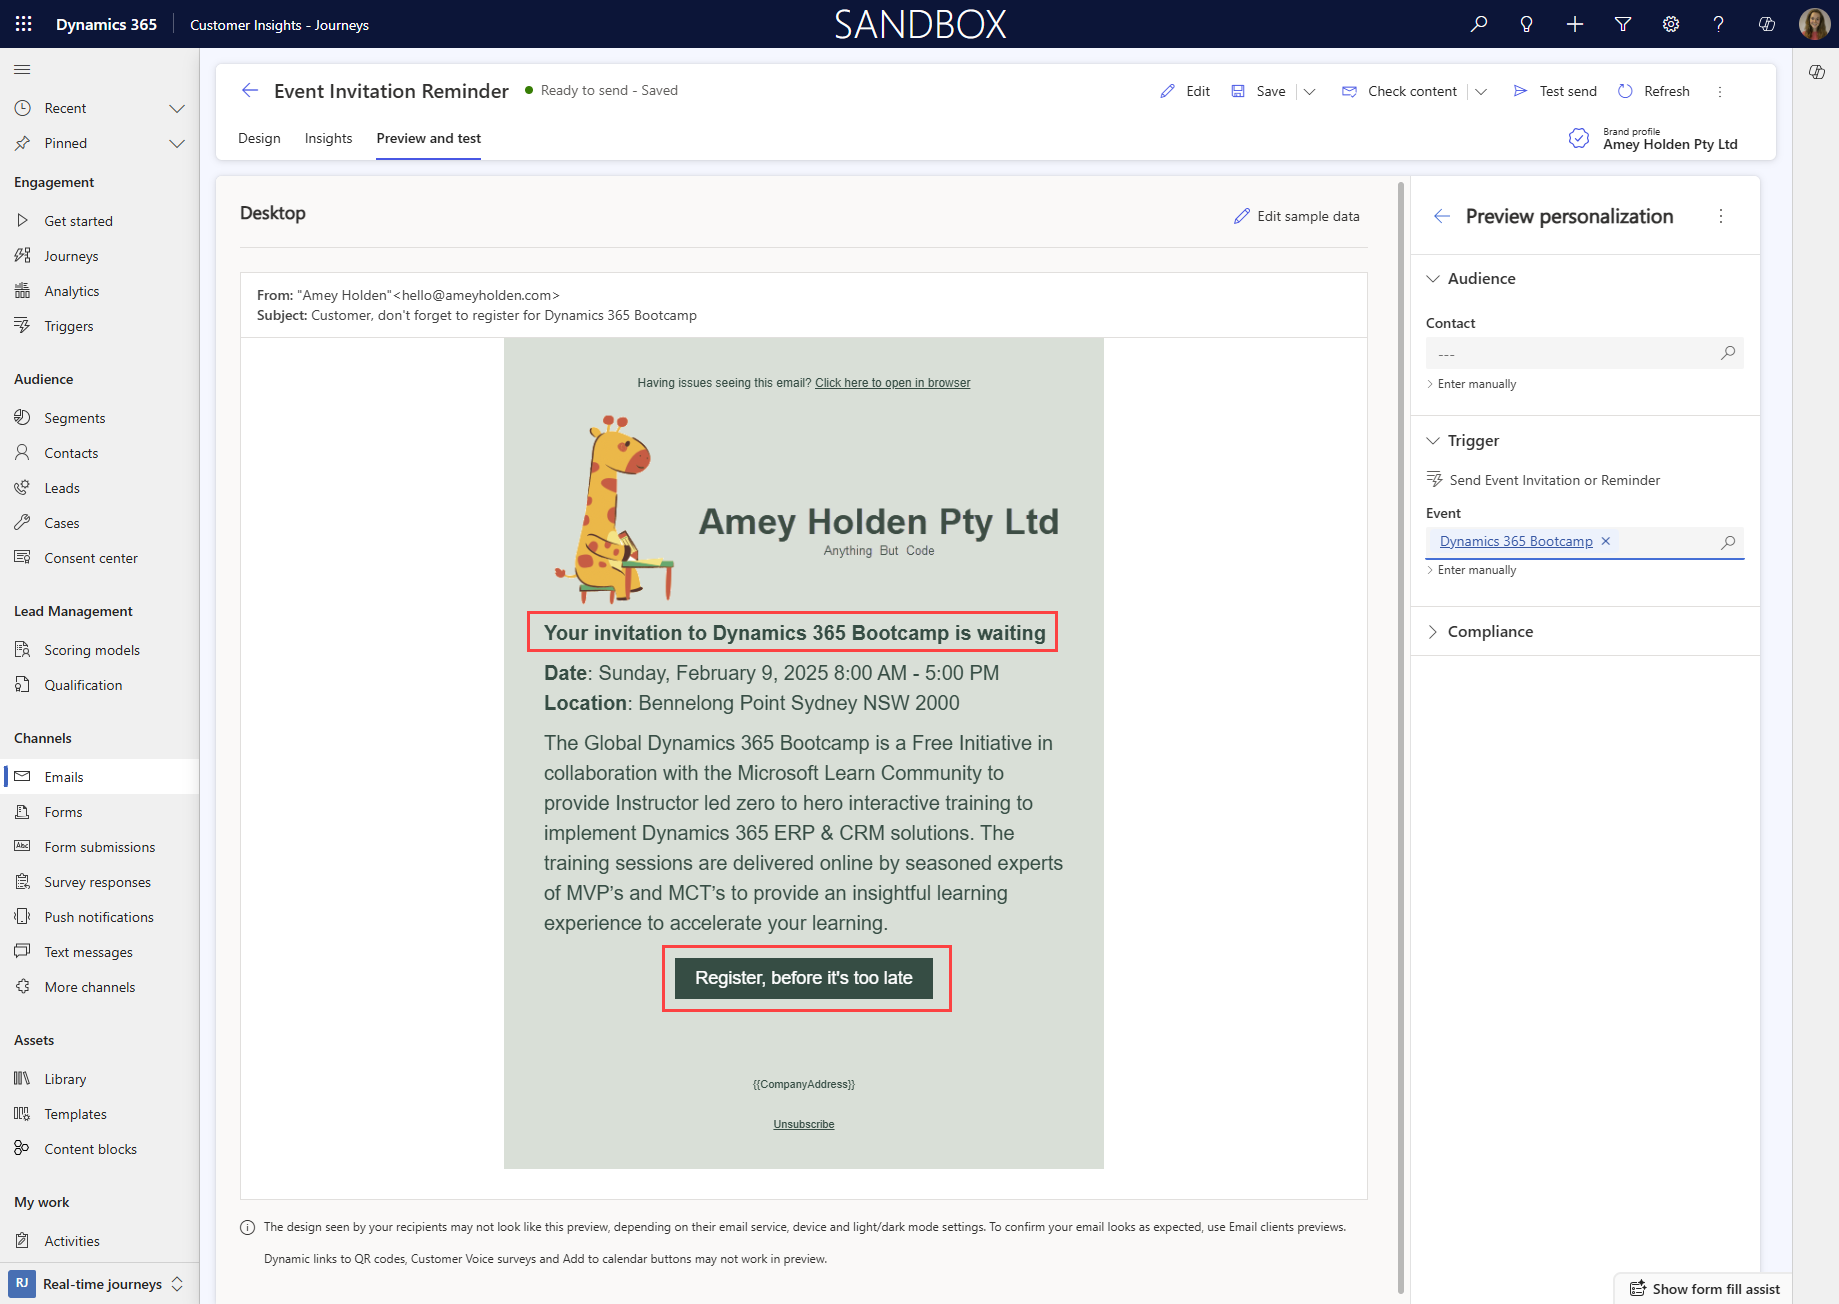
What you include in the email is entirely up to you. but just make sure that anything specific to the event is dynamically refences from the Event record, via the ‘Send Event Invitation or Reminder’ event entity reference as you can see below.
Also you want to consider how you handle sending invite for events which are online vs in person vs hybrid. You could use separate emails, or conditional content within the same email. That’s entirely up to you, you now have the trigger and dynamics content to do this however suits your needs best.

You can preview the email by selecting the ‘Preview and test’ tab, then selecting ‘Edit sample data’ and selecting an event from the lookup.

Create an Invitation Reminder Email (optional)
I will show you how the trigger can be used for invitations and reminders but you don’t have to do both. But if you want to automate reminders for those who ddin’t register as well, take a copy of your invitation email and adjust the wording/messaging as you so wish.
Create a trigger based journey to send the invitation
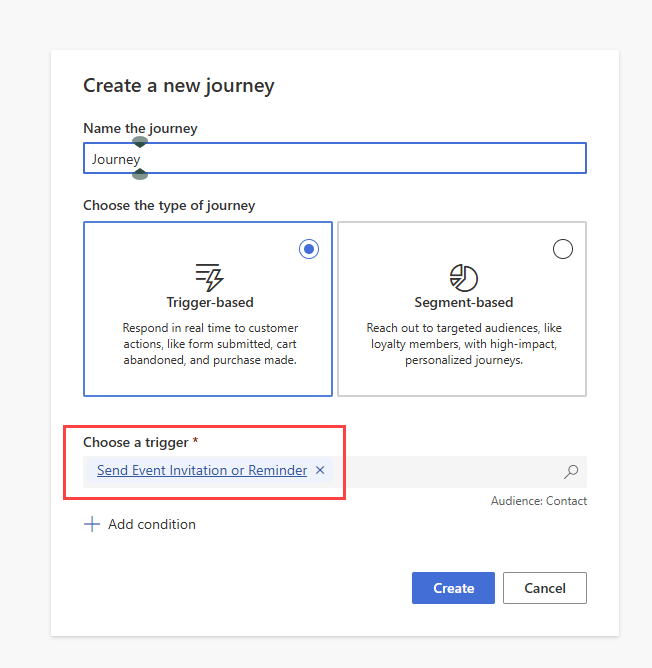
Create a new journey which is ‘Trigger-based’. Choose the trigger you created earlier called ‘Send Event Invitation or Reminder’.
Filter the trigger
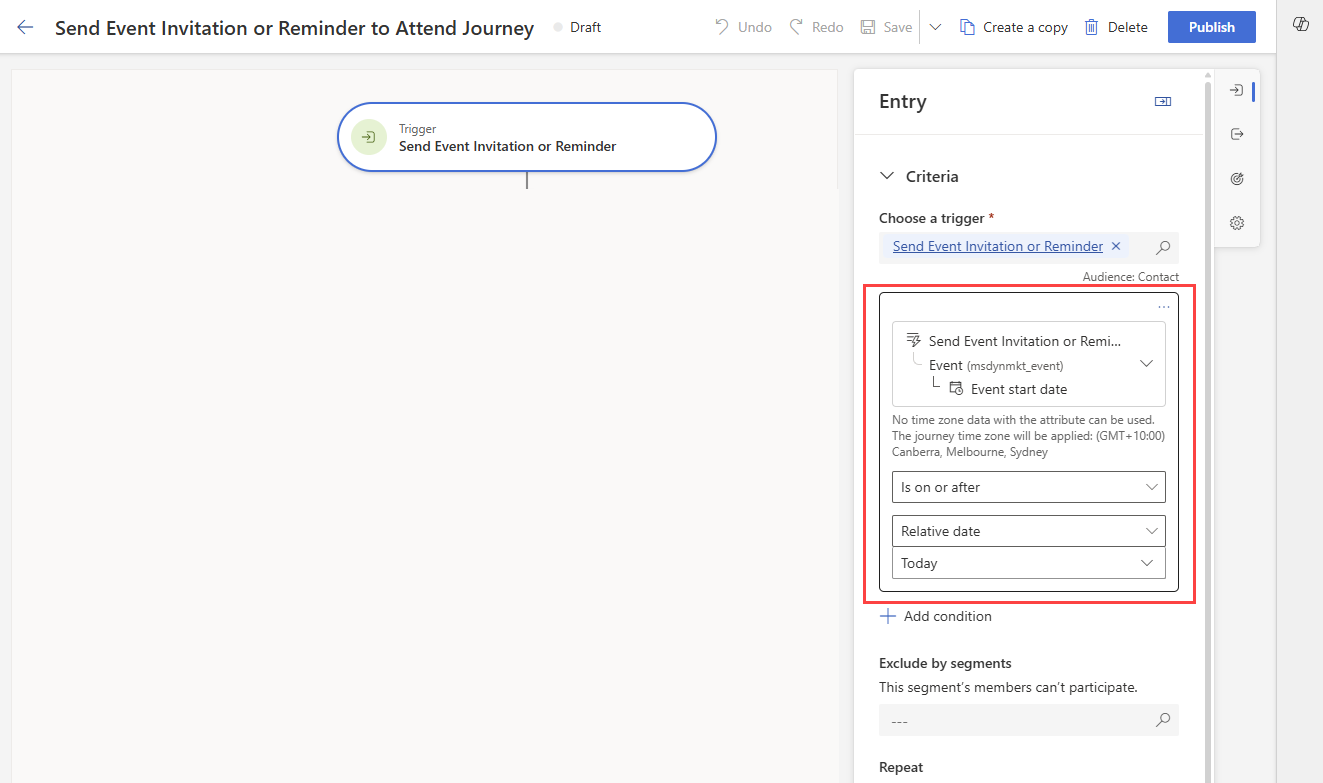
This is what I like to call a safety net, mistakes happen sometimes. So here I have added a filter to the trigger to not send invitations or reminders for events which have passed their start date, unless this is a valid scenario for your uses, its a good back stop to have in place.
Set up the journey to send invitations or reminders, based on trigger inputs
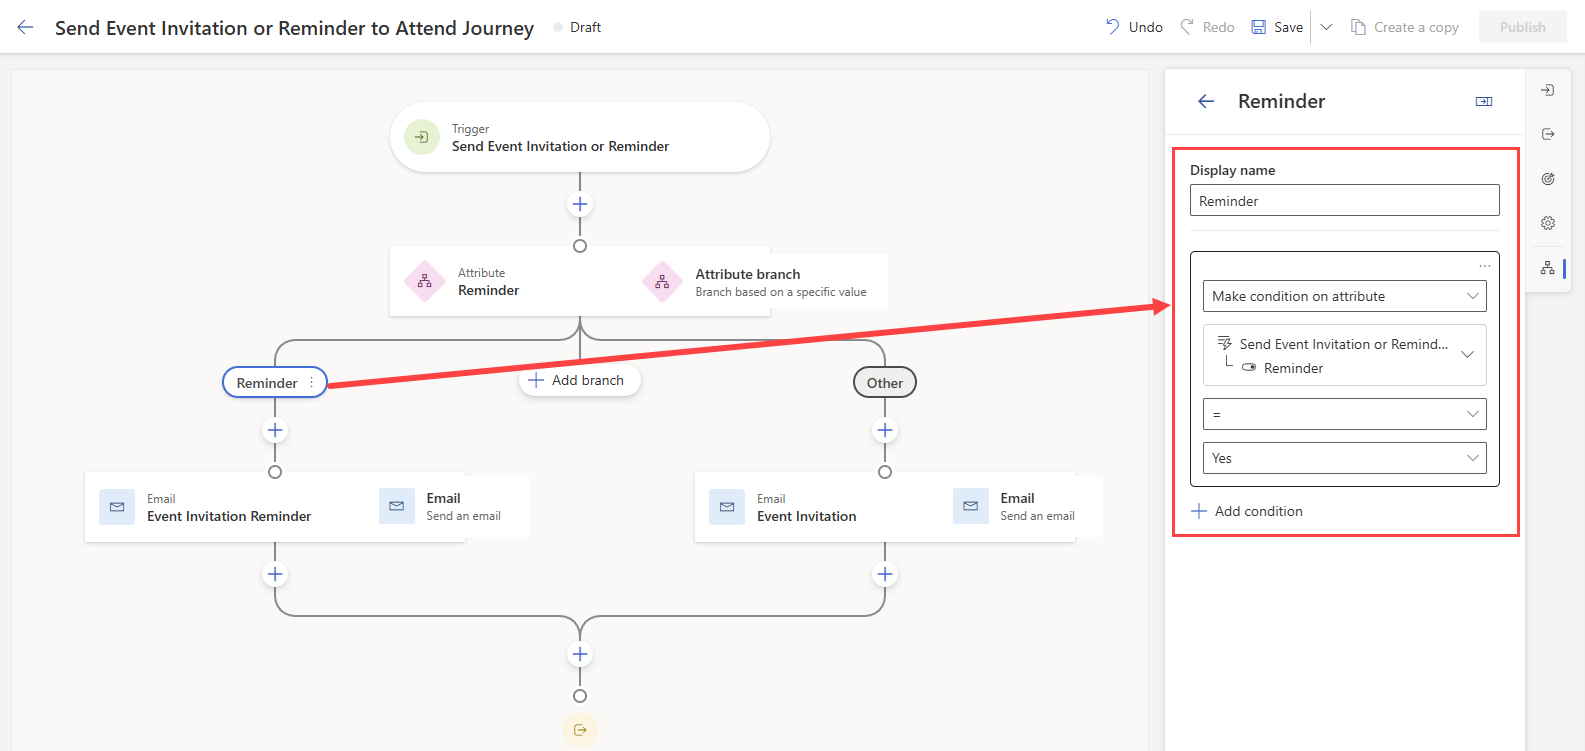
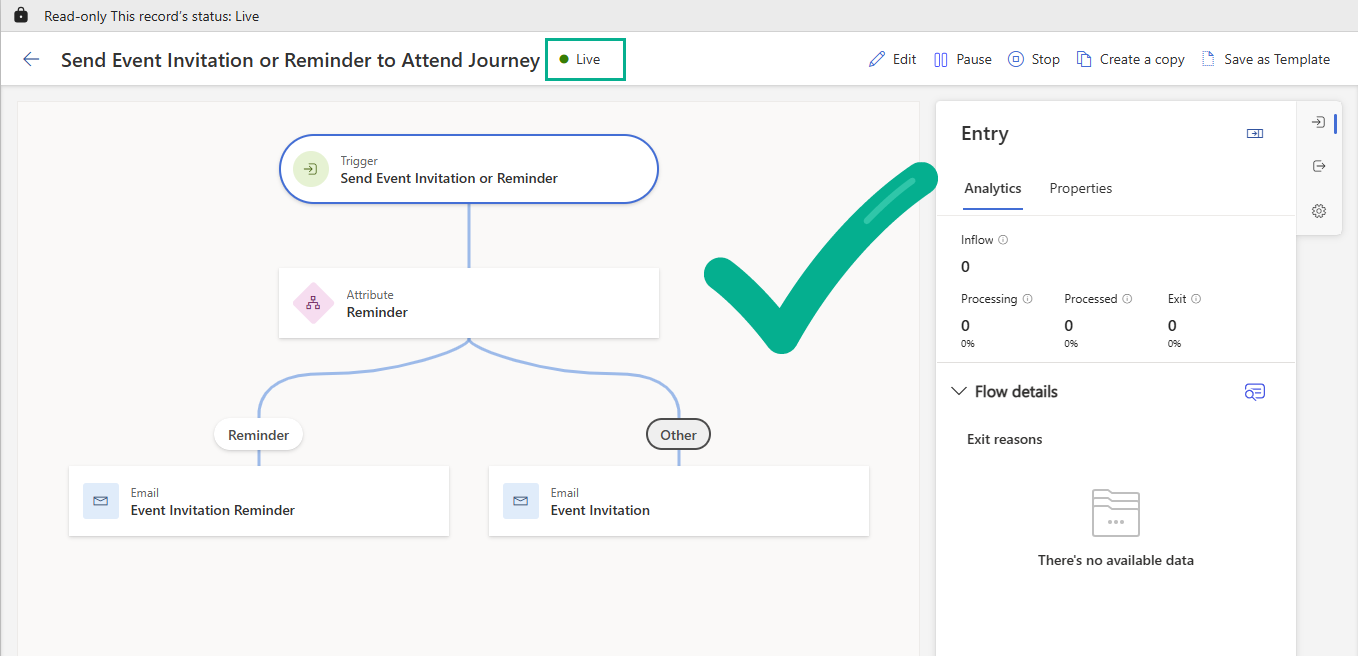
Add an ‘Attribute Branch’ to the journey, add a branch for ‘Reminder’ using the inputs from the trigger. Have one branch for reminder invites and use the ‘Other’ branch for standard invitations. Add the emails you created earlier in the email tiles, as shown below.
Publish the Journey
Make sure this journey is Live and ready to go before you start trying to send invitations. This journey will remain live indefinitely and will run for all invitation/reminders for all the events you need it to.
Send invitations and reminders to a Segment and Event of your choice
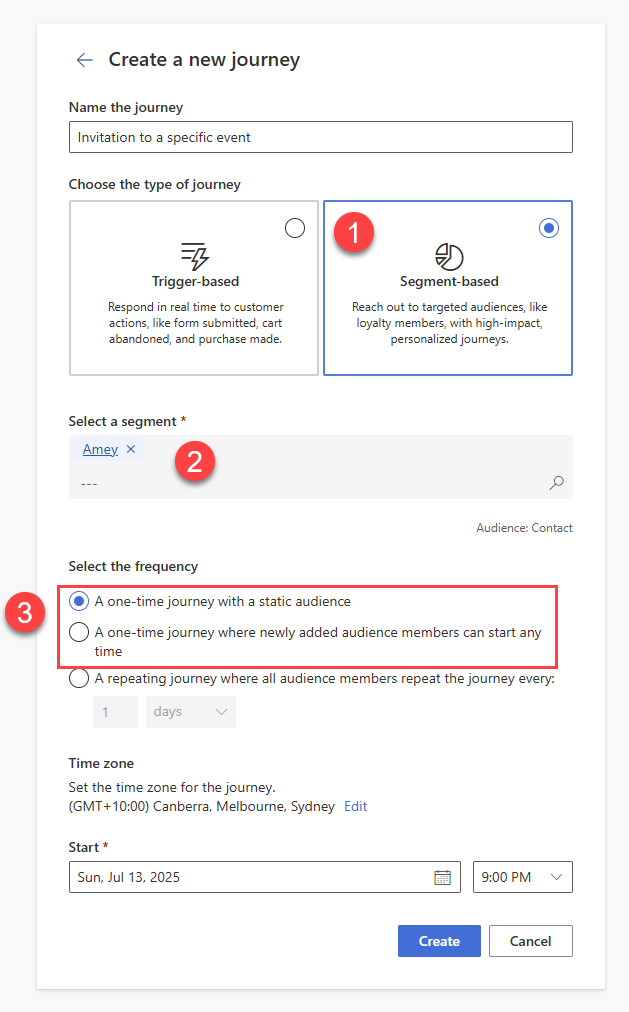
Now that the trigger based journey is live, we can use a segment based journey to trigger the invitations to send. Create a new ‘Segment-based’ journey. Choose a segment of contacts who you would like to invite to the event (you could also update this to be lead based by changing the audience of the trigger to be lead rather than contact). The frequency of the journey is entirely up to you, either works fine with what we are building.
You could also save this journey as a template so that its even easier for you to send event invitations for future events.
Trigger the ‘Send Event Invitation or Reminder’ journey
Add an ‘Activate a customer trigger’ tile to the journey. Select the trigger ‘Send Event Invitation or Reminder’. Configure the Event attribute to use a ‘Value’ and choose your event in the lookup input.
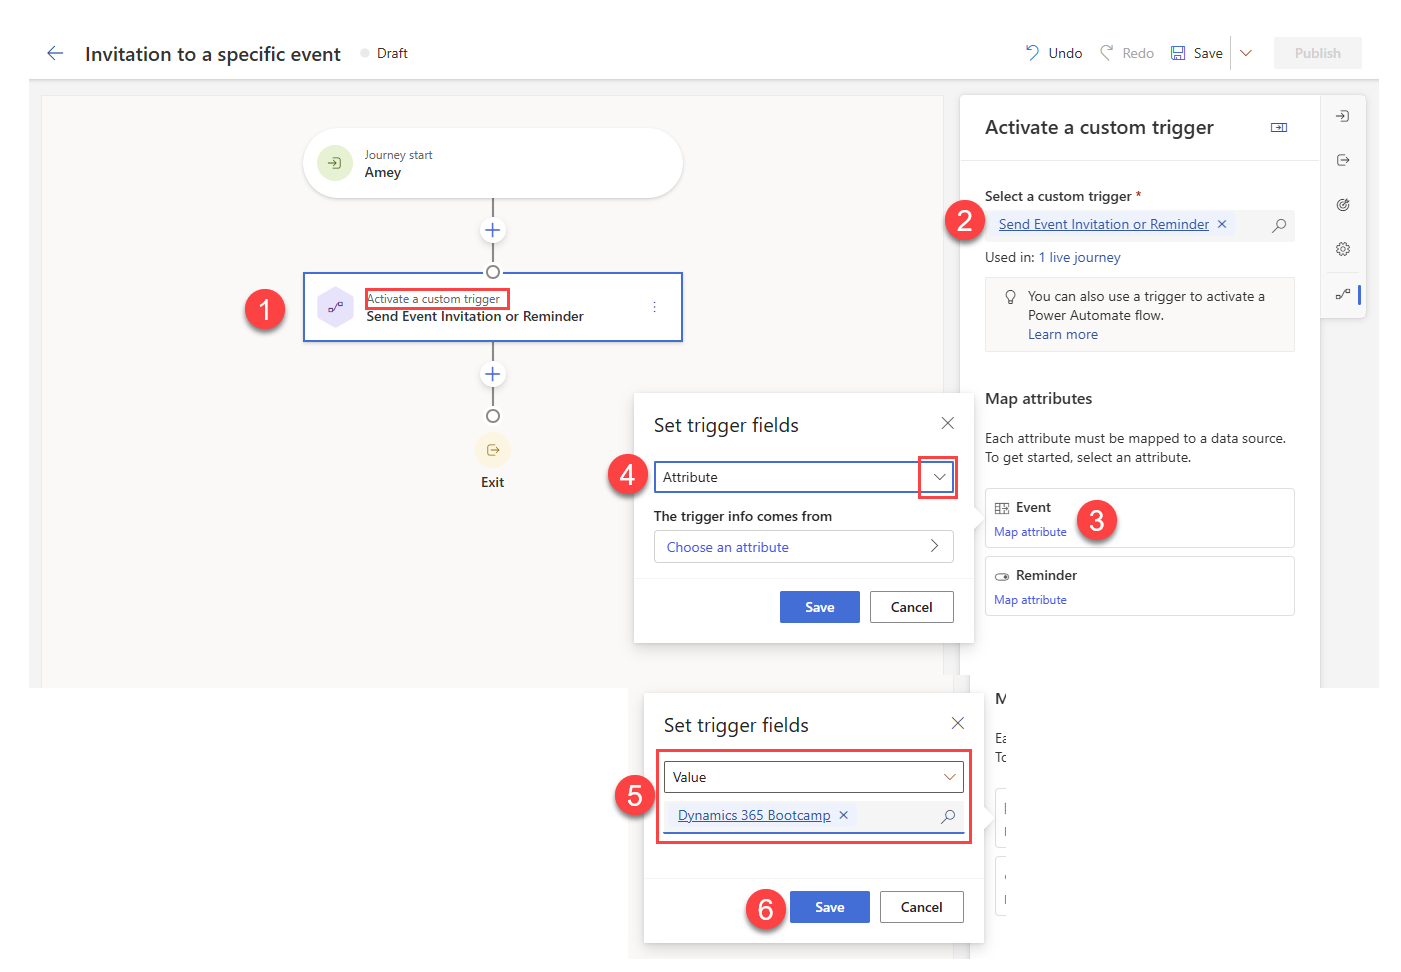

Set the ‘Reminder’ attribute to use a ‘Value’ and choose ‘No’
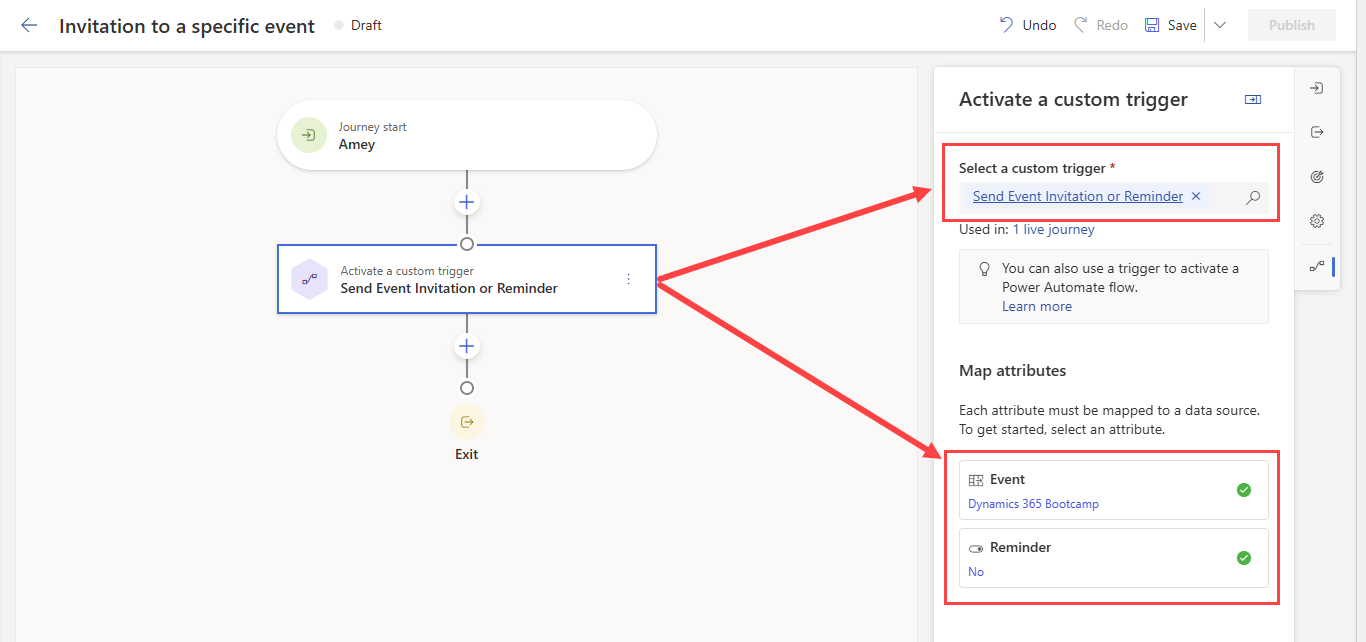
The configuration for the action should look like this when complete
Wait to see if they register
Add an action ‘Wait for a trigger’. Select ‘A trigger is activated’ for the branch condition type. Choose the trigger ‘Marketing Event Registration Created’ (this is an out of the box trigger so you don;t need to create this). Add a filter to check that the event registration is for the specific event you are inviting them to. Configure the time limit, this is how many days you want to wait before sending them a reminder (if they have not already registered).
If a journey member goes down the ‘Yes’ branch they have registered so we will not remind them. You may want to confirm their registration here, but I would generally recommend a separate trigger based journey for registration confirmation and reminders, as this ensure that even if someone is not invited, they will still receive confirmation/reminder communications.

Send a reminder
In the ‘No’ branch, add an ‘Activate a customer trigger’ tile to the journey. Select the trigger ‘Send Event Invitation or Reminder’. Configure the Event attribute to use a ‘Value’ and choose your event in the lookup input, just like you did for the first one. Set the reminder to ‘Yes’ this time.

Publish the journey to send the invitations
Once you are happy with your segment, and event set up then you are ready to send the invitations out. Publish the journey and watch the magic happen!

How’s that for inside of the box thinking?
So to send invites all you need to decide is a segment of people to invite, create a new journey from a template, update the event references for the trigger actions and publish. The end!