Configuring Relevance Search: where are my entities?
This article shares a little lesson I learnt from a troublesome situation I had when trying to enable & configure Relevance Search, but no entities were ‘available’ to include in the search configuration. Relevance Search for Dynamics 365 is awesome - you should definitely turn it on in your organisation.
What is ‘Relevance Search’?
It’s basically like google for you your Dynamics 365 instance. It is a global search across a specified set of entities but its powered by Azure search technology. The data is indexed externally (and securely) which means a more powerful and faster search experience for the users. The results returned are sorted by ‘relevance’ and easily refined using the filters and facets available. Plus it searches for text within documents attached to Notes, Emails and Appointments - hurahh! I have written about relevance search before on the good, the bad and the things to consider if you would like some further reading on it [1].
How to turn it on?
I won’t bore you with a step by step approach because there is a Microsoft Docs for that [2] which I was diligently following which was all going well
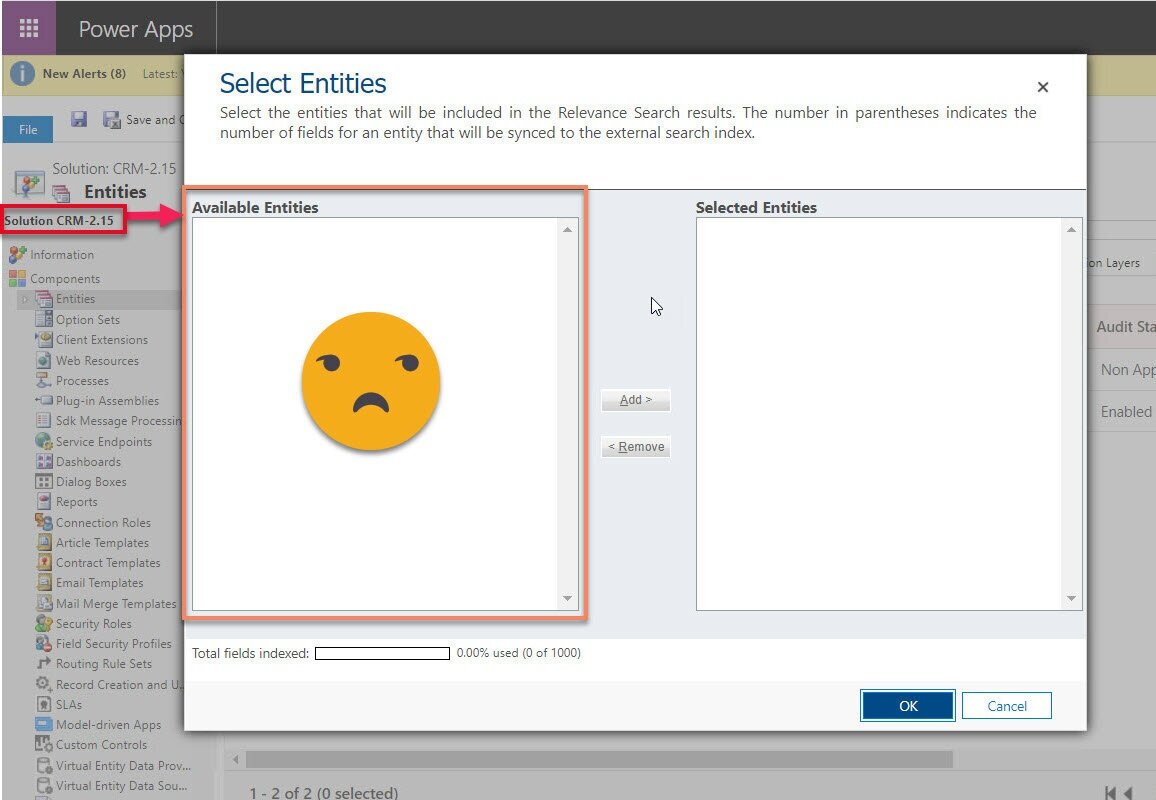
until I got to ‘Select entities for Relevance Search‘ and I’m left staring at a blank screen scratching my head with confusion
Where are my entities?
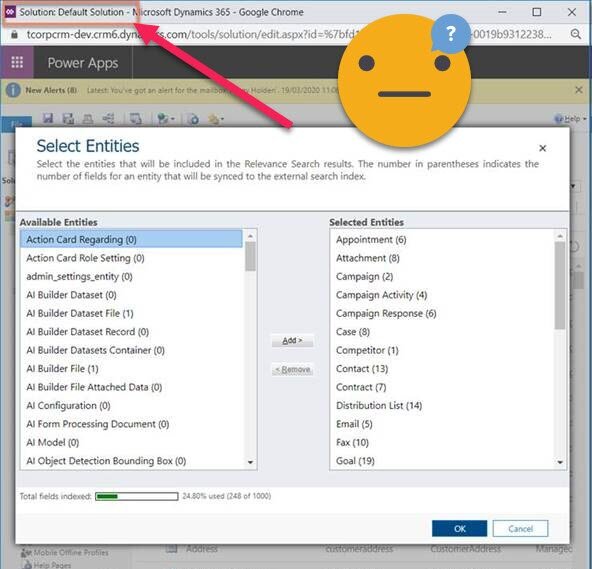
I’m a good Power Platform consultant so I customise in solutions (as should you). After turning Relevance Search ON in system settings, then waiting 24 hours for Azure to synchronise I tried to configure relevance search in my solution. I was faced with an empty list in the ‘Available Entities’ section, however when I looked in the default solution to configure relevance search there - I could see a whole heap of entities. How do we fix that?
NOTE: I don’t believe it is possible to configure these settings in the ‘new’ Power Apps Solution Explorer so you will need to ‘Switch to Classic’ to fix this one for now
Resolution: Part One
Open the default solution -> select ‘Configure Relevance Search’ -> for each entity shown in ‘Selected’ -> Add it to your target solution and ‘Include entity metadata’

You must include all the entities in the Selected list of the default solution, yes all of them. If you only include the ones you want to Select for relevance search, they will simply be added to the existing entities in the ‘Selected’ list. Even if you can’t see ‘Competitor’ in the Selected list in your solution – it will still be there. Relevance search will continue to search the entity.
So that solved half my problem – but I was still missing quite a few entities in the ‘Available’ list that I really wanted to include in the relevance search.

Resolution: Part Two
Custom entities need to be updated to be ‘Available’ for relevance search. In your target solution select the entity in question – Select ‘Managed Properties’ -> Set ‘Can enable sync to external search index’ to TRUE -> Publish -> Refresh

The entity will now show in the ‘Available’ for relevance search and you can proceed down the happy documented path – happy relevance searching!

[1] Relevance Search in D365 - the good, the not so good and the things to consider - https://www.linkedin.com/pulse/relevance-search-d365-good-so-things-consider-amey-holden/
[2] Enable and configure Relevance Search - https://docs.microsoft.com/en-us/power-platform/admin/configure-relevance-search-organization#enable-relevance-search