‘Distribution Lists’ in model-driven apps
The goal here is to help customers existing in an outlook address book & distribution list reliant world to move to a more modern way of customer relationship management with model-driven power apps or Dynamics 365. The answer is Custom Pages and Power Automate of course!
Things you should know:
Distribution lists in Outlook were launched in Office 2007. They are used to group email recipients into one single contact so you can easily send an email to a defined group without forgetting to send to Suzie again. Simple, common and yet incredibly useful.
Power Automate, Dynamics 365, Dataverse and Model-driven apps (plus probably many more things) do not give a stuff about their existence. Oh…
P.s. you can automate with Distribution lists using PowerShell commands and Azure Runbooks but if its that hard to automate, shouldn’t we be looking at other ways to meet the goal?
Distribution list table
Create your distribution list table, add a N:N relationship with Contacts, make it look pretty and you are good to go.

Custom page
Custom pages are a great way to craft the UI to suit specific scenarios where the model-driven app format is not so useful, and also to trigger flows in a way that is somewhat synchronous. The custom page I created allows the user to browse and select one or many distribution lists, review the contacts who belong to those lists, choose whether to create an appointment or an email (and the type of recipient - To, CC or BCC).
A fly through tour of the ‘Send an email’ function, send an invite fly through can be found at the end of this blog post too.
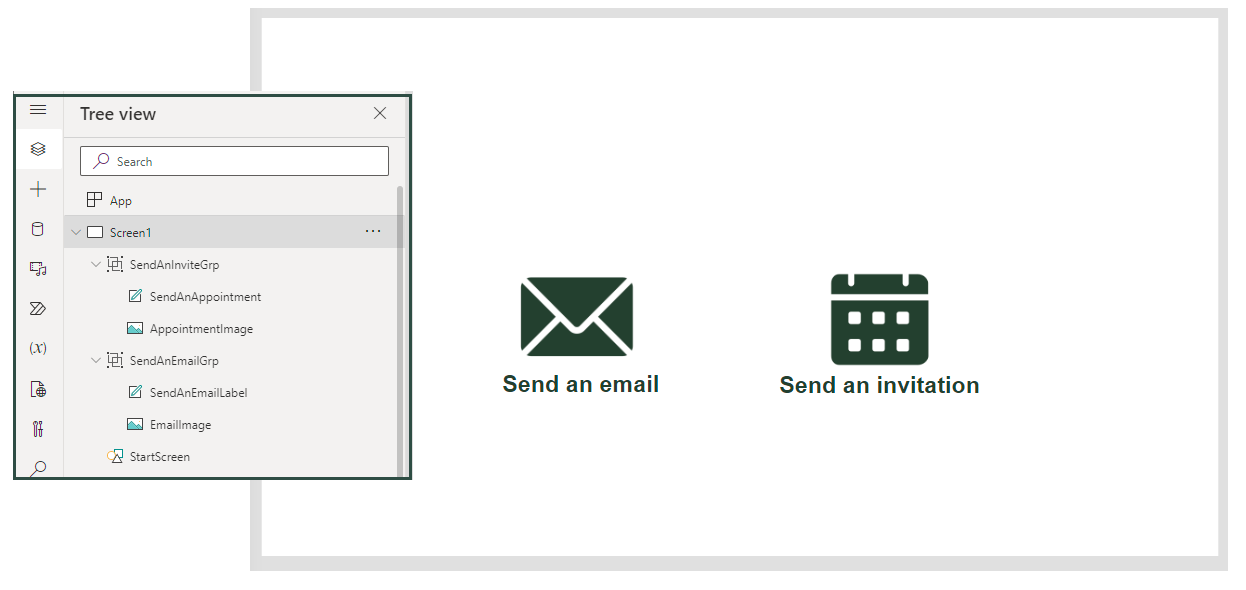
A simple start screen
Custom pages by design only have a single screen so I tend to use layering of shapes to show/hide things as the process moves along. It makes the order of your app components important but also means less navigating.
StartScreen
Visible: IsBlank(varEmailOrAppointment)
SendAnInviteGrp
OnSelect: Set(varEmailOrAppointment,"Appointment")
SendAnEmailGrp
OnSelect: Set(varEmailOrAppointment,"Email")
Select the distribution lists to send to
This gallery allows the user to browse the available distribution lists and select which list(s) they want to use. After far too many hours trying to work out how to get the uncheck to remove the Distribution List from the selected items, I gave up and made the checkboxes read only once ticked. I’ll work it out at some point but for now if you want to untick, you use that lovely big cross to go back to the start, I’m a little bit sorry.
Ps. if anyone wants to flex their PowerFX skills and help me fix it - yes please!

DistListLabel
Text: "Distribution Lists ("&CountRows(DistListGallery.AllItems)&")"
DistListGallery
Items: Filter('Distribution Lists', 'Distribution Lists (Views)'.'Active Distribution Lists')
DistListName
Text: ThisItem.Name & " ("&CountRows(ThisItem.Contacts)&")"
ClickMeCheckBox
OnCheck
Collect(colCategories,Text(ThisItem.'Distribution List'));
Set(varSelectedLists,varSelectedLists&ThisItem.Name& "<br>");
Collect(colCatContacts,ThisItem.Contacts);
ClearCollect(tempCol,ForAll(Distinct(colCatContacts,Contact), {Result: ThisRecord.Value}));
ShowHideCheckBox
Checked: If(ThisItem.'Distribution List' in colCategories,true,false)
Visible: If(ThisItem.'Distribution List' in colCategories,true,false)
Review combined list of members
This allows the user to see which contacts have been added based on the lists they have selected.

ListMembers (group)
Visible: And(CountRows(ContactGallery.AllItems)>0,!IsBlank(varSelectedLists))
ContactGalleryLabel
Text: "List Members ("&CountRows(ContactGallery.AllItems)&")"
ContactGallery
Items: Sort(Filter(Contacts,Contact in tempCol),'Full Name')
Name
Text: ThisItem.'Full Name'
Text: ThisItem.Email
Show selected lists
Just a nice little summary of the lists that have been selected.
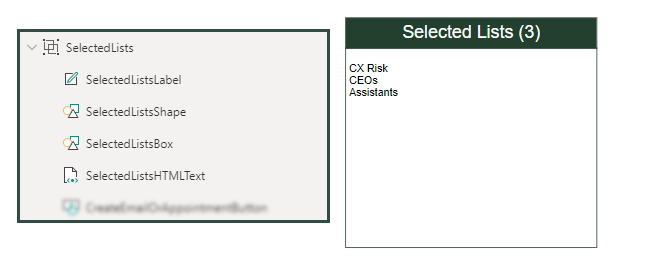
SelectedLists (group)
Visible: !IsBlank(varSelectedLists)
SelectedListsLabel
Text: "Selected Lists ("&CountRows(colCategories)&")"
SelectedListsHTMLText
HTMLText: varSelectedLists
Select recipient type for emails
This one only applies to emails of course. This allows the user to choose whether they want to set the email recipients as To, CC or BCC.

RecipientTypeGrp
Visible: And(!IsBlank(varSelectedLists),varEmailOrAppointment="Email")
ActivityPartyType
Items: ["To","Cc","Bcc"]
Create
This is where the magic happens, and where I run away to Power Automate to do the complicated things that I don’t understand in the world of Power FX. To create the email or appointment record we need to send over three things - the users email address (to say who the email or appointment is from), the type of activity to create (email or appointment), and the unique IDs for the Distribution Lists to send to. More details on the flow further down + to follow. We start using the varUploadInProg and varUploadComplete variables here, the next step explains why.

CreateEmailOrAppointmentButton
Text: "Create "& varEmailOrAppointment
Visible: !IsBlank(varSelectedLists)
On Select::
Set(varUploadInProg,true);
Set(DistListJSON, JSON(colCategories));
Set(EmailVariables,'Page|CreateEmailorAppointment'.Run(User().Email,If(varEmailOrAppointment="Email",ActivityPartyType.Selected.Value,varEmailOrAppointment),DistListJSON));
Set(varUploadComplete,true);
Set(varUploadInProg,false)
In progress screen
I like to hide all the components and give the user clear feedback to wait while you do the flow magic, I find it easier to slap a big white screen on to hide stuff rather than changing the visible state of everything. If your smart - insert spinner here too, people love watching those things! You will see in this expression we set a variable called ‘varUploadInProg’, this controls the show/hide of this screen. This won’t look quite right until you add the ‘HideScreenScreen’ component in the next step.

UploadInProgGrp
Visible: varUploadInProg
UploadInProgShapeLabel
Text: "Preparing "& Lower(varEmailOrAppointment) &", please wait"
Complete screen & open button
Once the flow has completed, we set varUploadComplete to true, which reveals the below label, icon and button. The flow passes back the URL for the newly created email/appointment row which is used in a Launch() command on the button. The HideScreenScreen is just a big white rectangle that fits the size of the screen. It is important that this layer sits above all the buttons/galleries above, but below the upload complete/upload in progress/exit/start screen components.
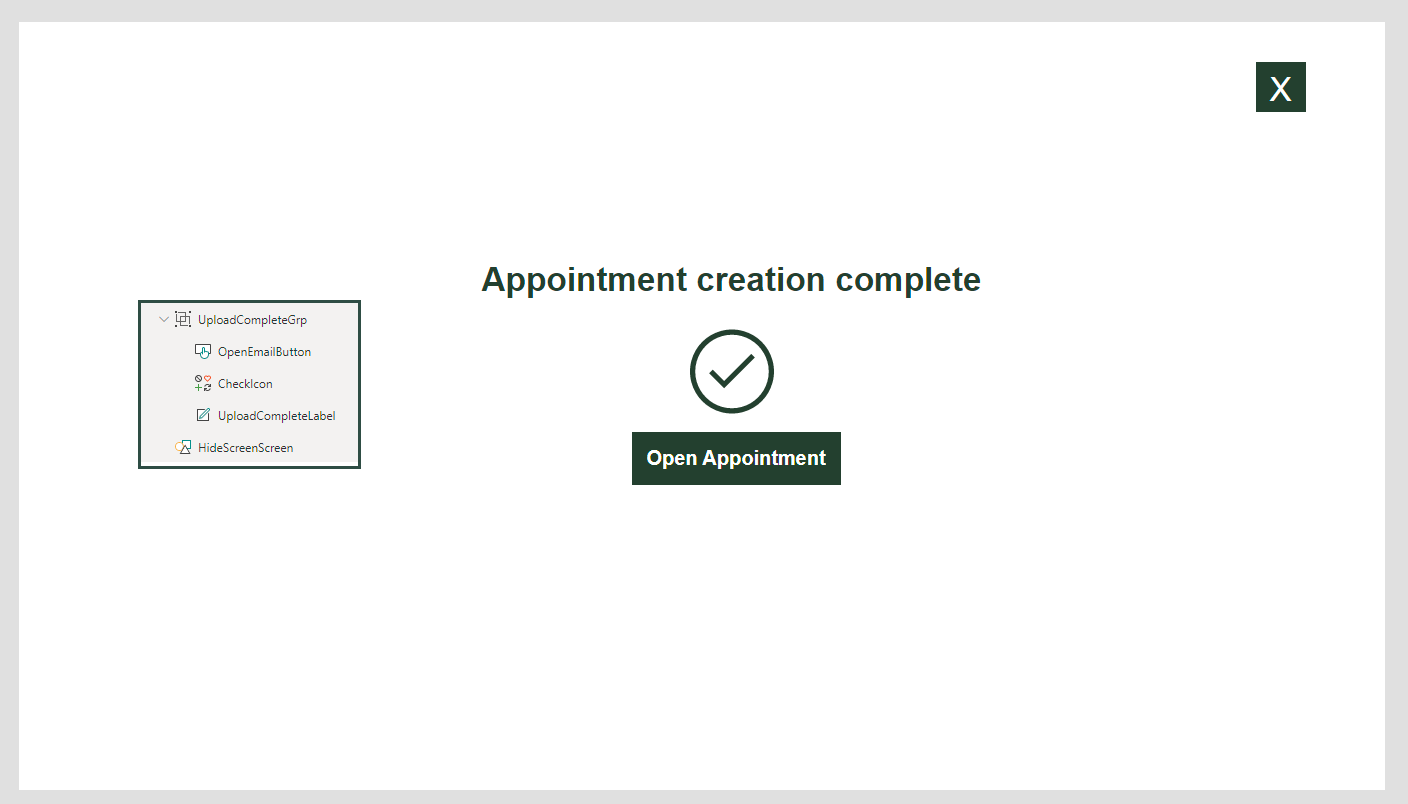
UploadCompleteGrp
Visible: varUploadComplete
OpenEmailButton
Text: "Open "&varEmailOrAppointment
OnSelect: Launch(EmailVariables.recordurl)
DisplayMode: If(varUploadComplete,DisplayMode.Edit,DisplayMode.Disabled)
UploadCompleteLabel
Text: varEmailOrAppointment&" creation complete"
HideScreenScreen
Visible: Or(varUploadComplete,varUploadInProg)
Exit strategy

Every page needs some kind of way to go back to the start. I have combined a shape/label into a group called ExitButtonGrp which on select sets everything back to the start.
ExitButtonGrp
OnSelect:
Set(varEmailOrAppointment,"");
Clear(colCategories);
Clear(colCatContacts);
Clear(tempCol);
Set(varSelectedLists,"");
Refresh('Distribution Lists');
Set(varUploadComplete,false);
Set(varUploadInProg,false)
Automate
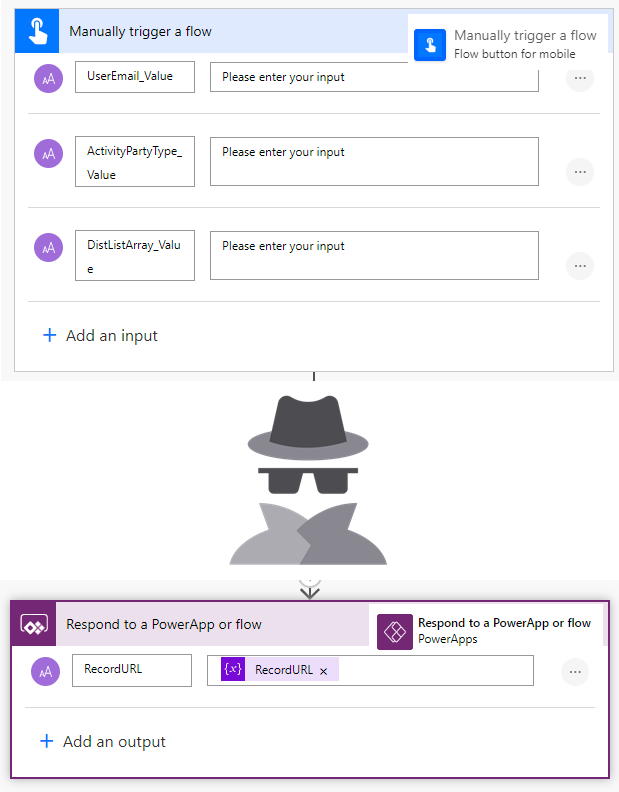
Now, for the magic behind the buttons. This flow is called from the custom page button to identify the member from the selected distribution lists and prepare the appropriately populated email or appointment row in Dataverse. I will help you build out the flow step by step in my next post, but to finish up the page section of things you can see below the inputs I send into the flow run from the CreateEmailOrAppointmentButton and what is returned to the OpenEmailButton button.
That’s all for now folks
I like it, I hope you like it too, and even if you don’t, I still like it. The end.
