ReCAPTCHA V3 and Cloudflare Turnstile for Customer Insights - Journeys Forms
In the February 2026 update for Customer Insights - Journeys, built‑in Google reCAPTCHA for Marketing & Event forms was announced, HIP captcha was also announced for deprecation in March 2026 and will be fully removed from all Customer Insights ‑ Journeys forms by June 30, 2026. You can find more information about setting up the reCAPTCHA keys here, and using the built‑in Google reCAPTCHA forms here. And a more detailed blog on how to set it up here (thanks Megan!).
BUT this only supports reCAPTCHA v2 whilst Google offers a more sophisticated v3 which is invisible to the user and has ‘advanced adaptive risk analysis based on user behaviour’. So capability wise may be overkill for simple marketing forms but its a much more seamless user experience and less form poking to make it look good.
This post will show you some options on how you can implement Google ReCAPTCHA v3 or Cloudflare Turnstile for Customer Insights - Journeys forms. You can do one or the other so skip irrelevant sections based on your bot protection method of choice!
WARNING: If you are using or plan to use a custom captcha (or other form submission validation) with Customer Insights - Journeys forms you must disable the plugin step ’Microsoft.Dynamics.Cxp.FormsReCaptcha.Plugins.ReCaptchaValidationPlugin: msdynmkt_validateformsubmission of any Entity’ as it will otherwise interrupt your custom validation causing all form submissions to fail even when the captcha is valid.

Full credits to the real developer George Doubinski who took my question about how might it be possible to implement Google ReCAPTCHA v3 for Customer Insights - Journeys marketing forms into a fully singing and dancing solution which is super easy to implement yet a wildly sophisticated set up. My role here was to ask lots of difficult questions to send him further into the developer rabbit hole and write the pretty explainer docs - ta dah!
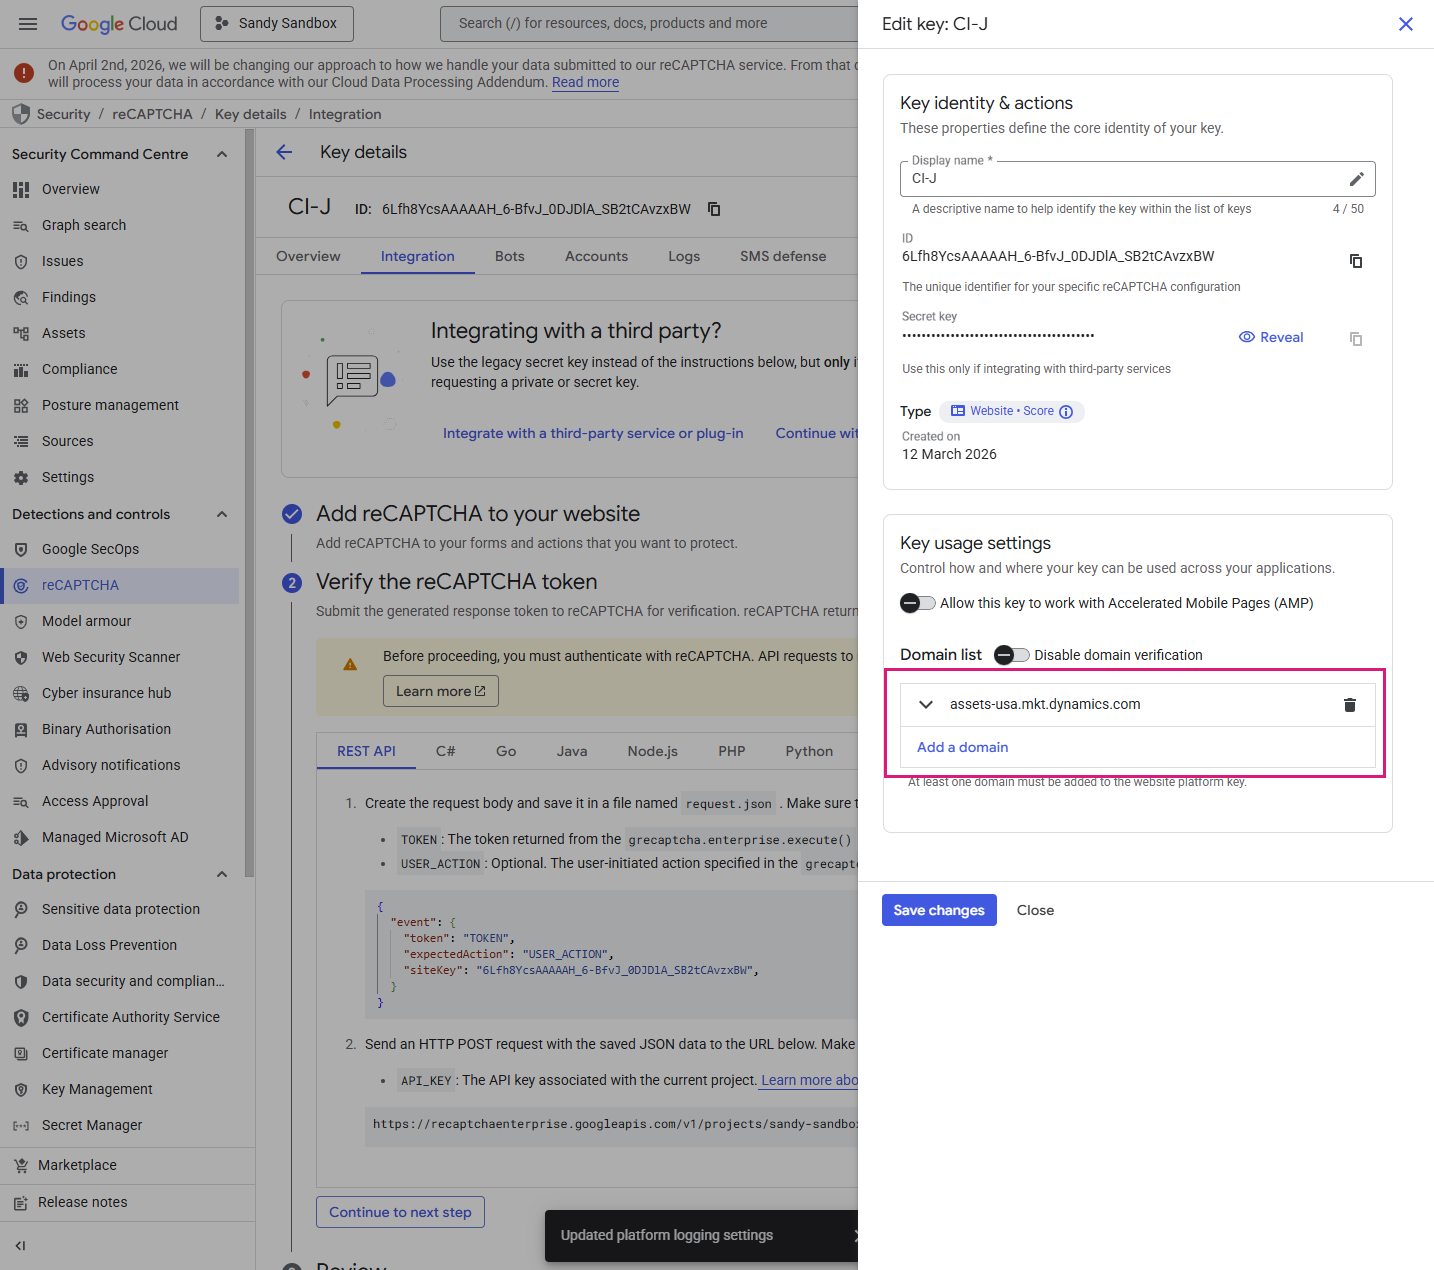
Generating Google ReCAPTCHA Keys
When setting up your ReCAPTCHA key make sure you add your CI-J domain (the base URL of any stand alone hosted form, which varies based on which region your environment is hosted in e.g. assets-usa.mkt.dynamics.com or assets-oce.mkt.dynamics.com) as well as your company domain(s) if hosting forms on your website too.
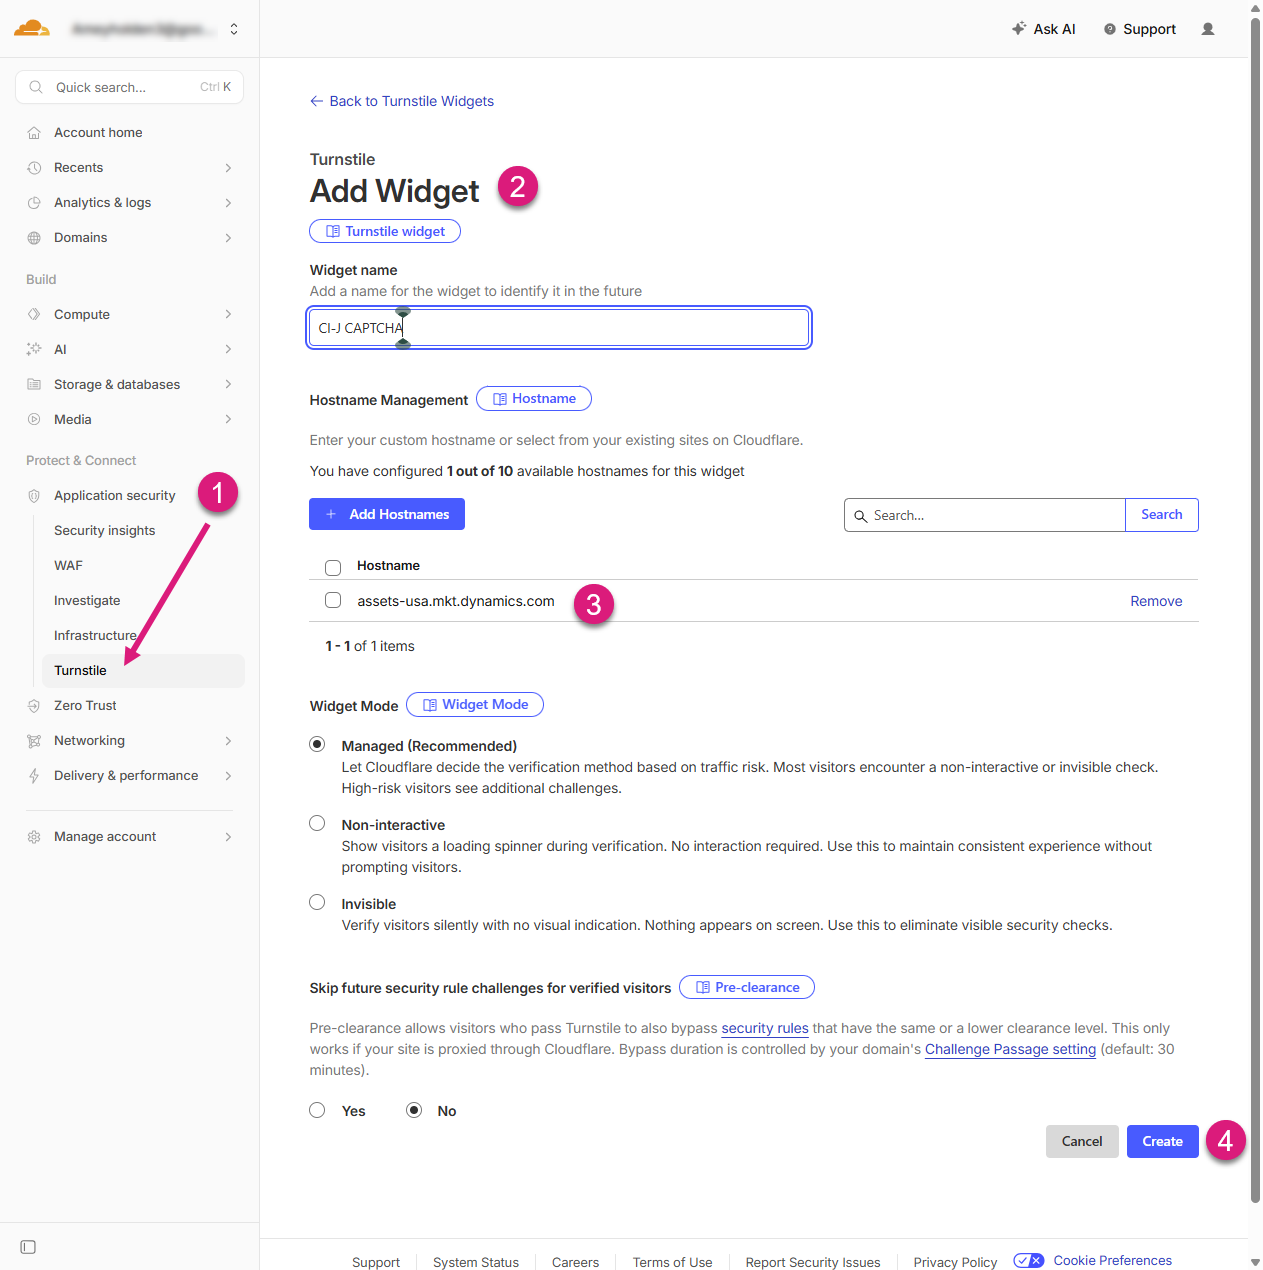
Generating Cloudflare Turnstile Keys
Go to the Cloudflare website to create a free account.
1) Under Application Security → Turnstile
2) Add a new widget.
3) Add all your domains as ‘Hostnames’ and remember to add your CI-J domain (the base URL of any stand alone hosted form, which varies based on which region your environment is hosted in e.g. assets-usa.mkt.dynamics.com or assets-oce.mkt.dynamics.com).
4) Create the site and secret key.
Note: getting the keys back again later is a bit of a nightmare, so make sure you copy and save them somewhere safe!
Configuration
We need to install a solution which includes a plugin that handles the ReCAPTCHA validation, similar to what is documented here but with enhanced capabilities for Google ReCAPTCHA V3 and Cloudflare Turnstile Captcha
1) Download CIJ_Captcha_managed.zip and import it into your Customer Insights - Journeys environment.
2) Open the imported solution
3) Select Overview tab
4) Select View page link under Configuration page.
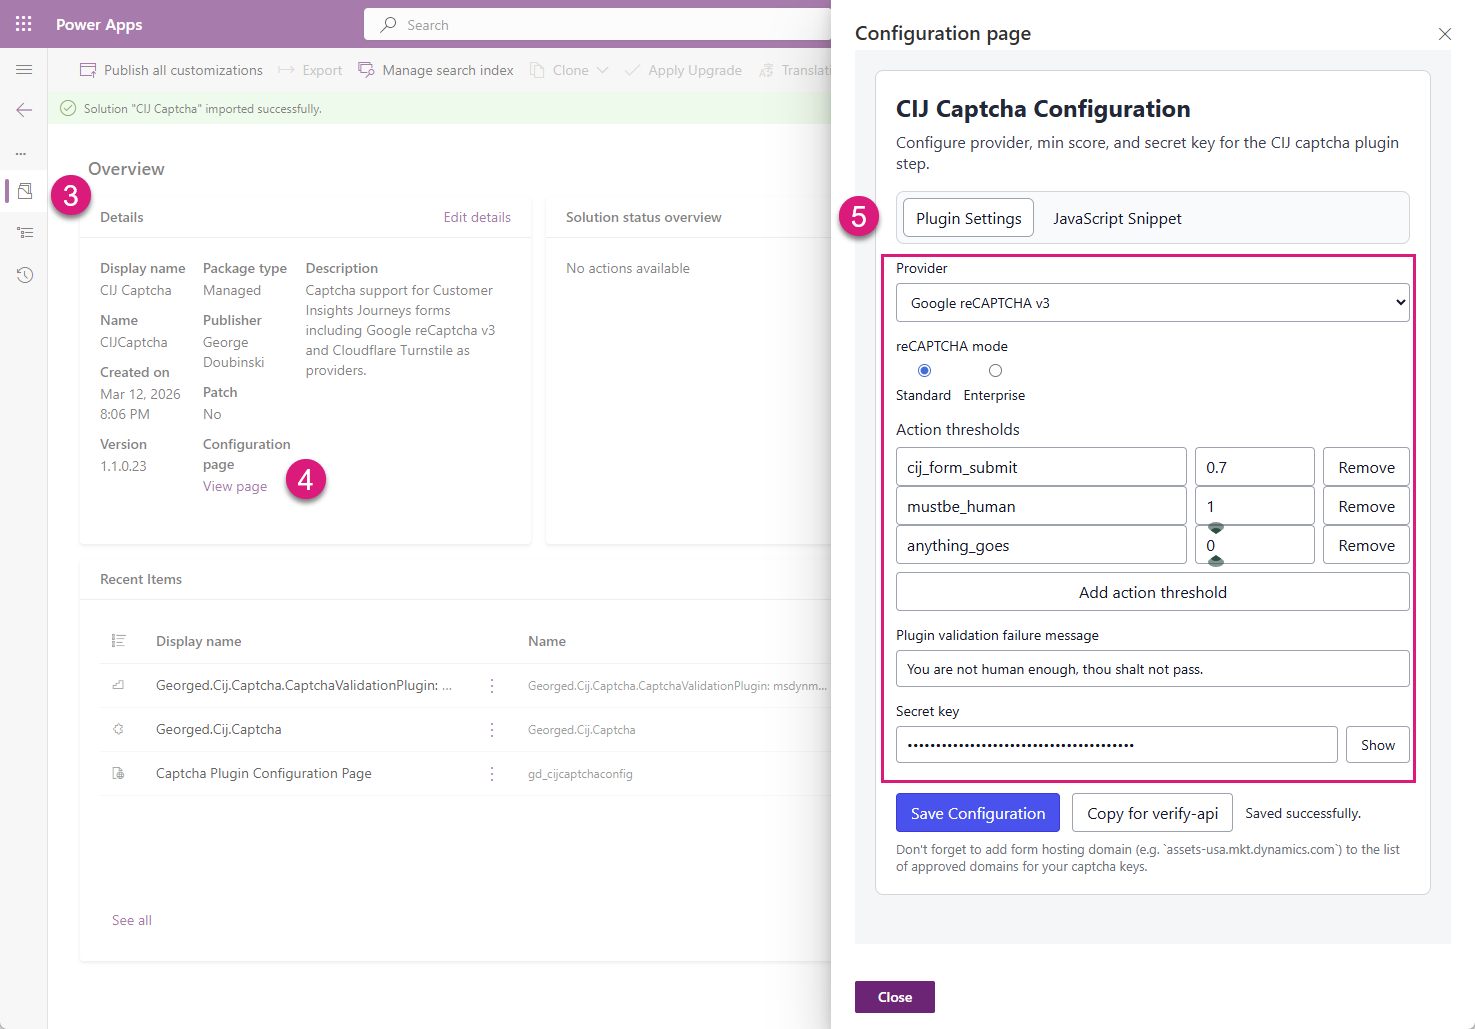
5) Configure Plugin Settings - the values added here are essential to the CAPTCHA validation to work properly
Provider - Google ReCAPTCHA v3
reCAPTCHA mode: Enterprise or Standard (features are similar it just depend son whether your account is Enterprise or Standard)
Action thresholds: By default you will have the action ‘cij_form_submit’ configured to value 0.7, you can add as many as you like, this allows you to configure different thresholds for the CAPTCHA depending on the scenario, 1.0 is very likely a good interaction, 0.0 is very likely a bot. There is some nice detailed guidance on interpreting the score and the scenarios here. So you might add another action for a subscribe form that is a lower threshold than a ‘contact us’ form for example. You can also add these actions in google to allow you to report on ReCAPTCHA action per form/threshold type.
Plugin validation failure message: The message that shows in the post submit reCAPTCHA validation fails
Secret key: ReCaptcha v3 Secret key
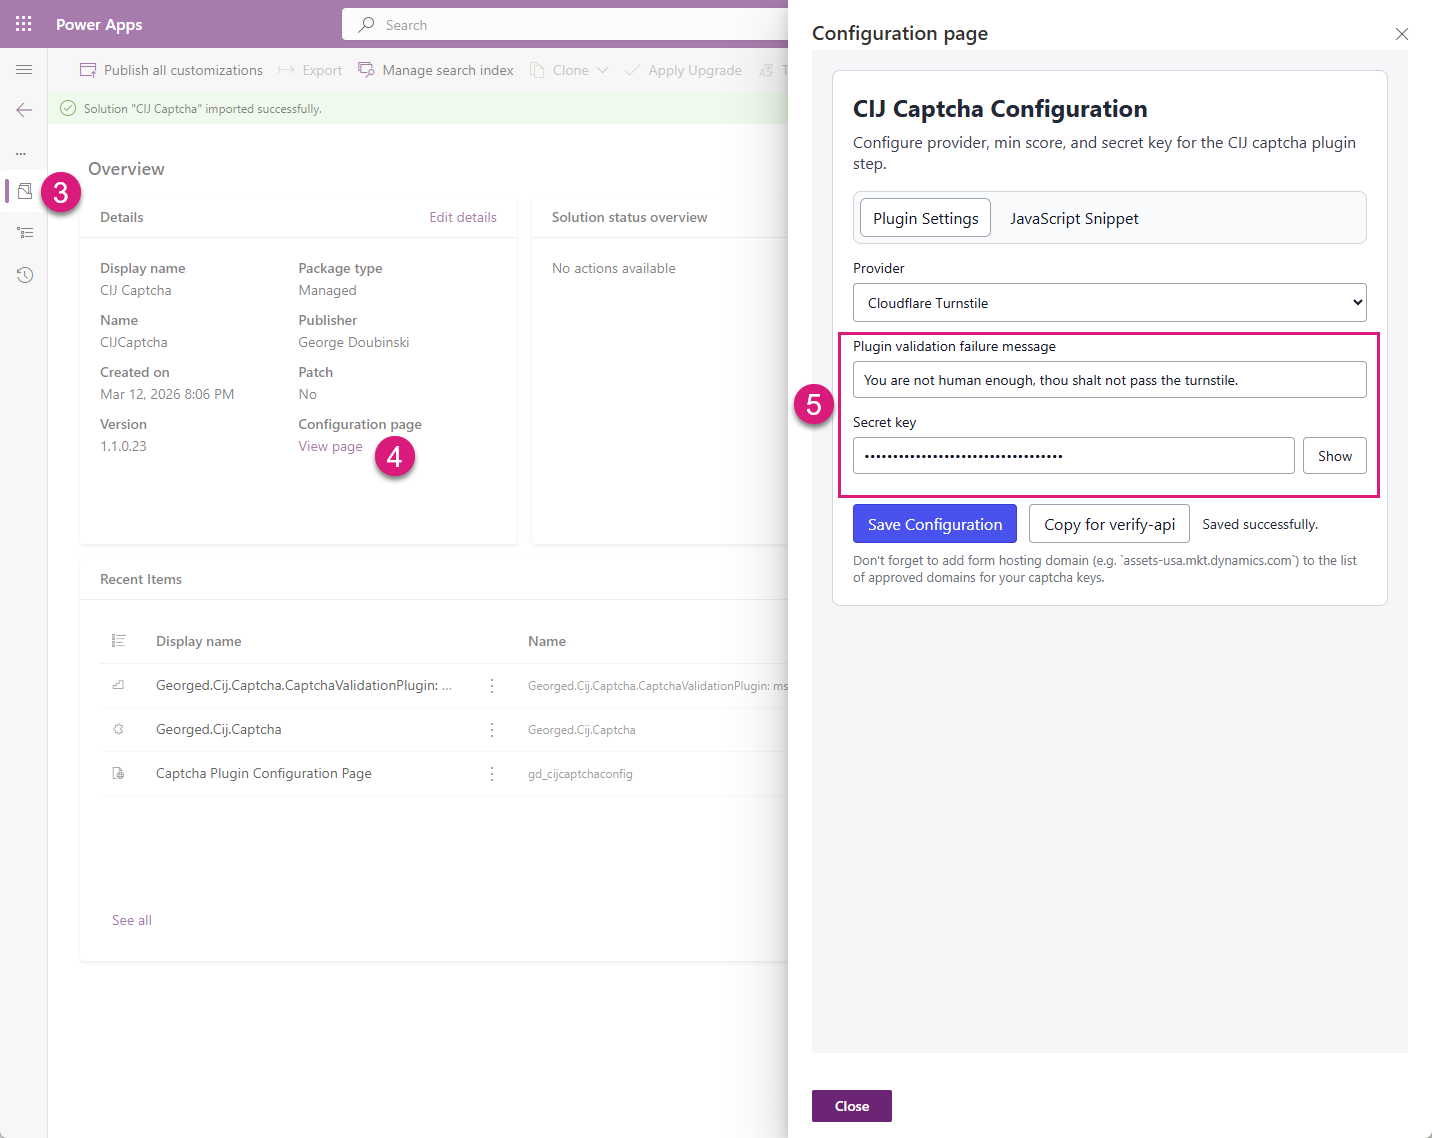
Provider - Cloudflare Turnstile
Plugin validation failure message: The message that shows in the post submit reCAPTCHA validation fails
Secret key: Cloudflare Turnstile Secret key
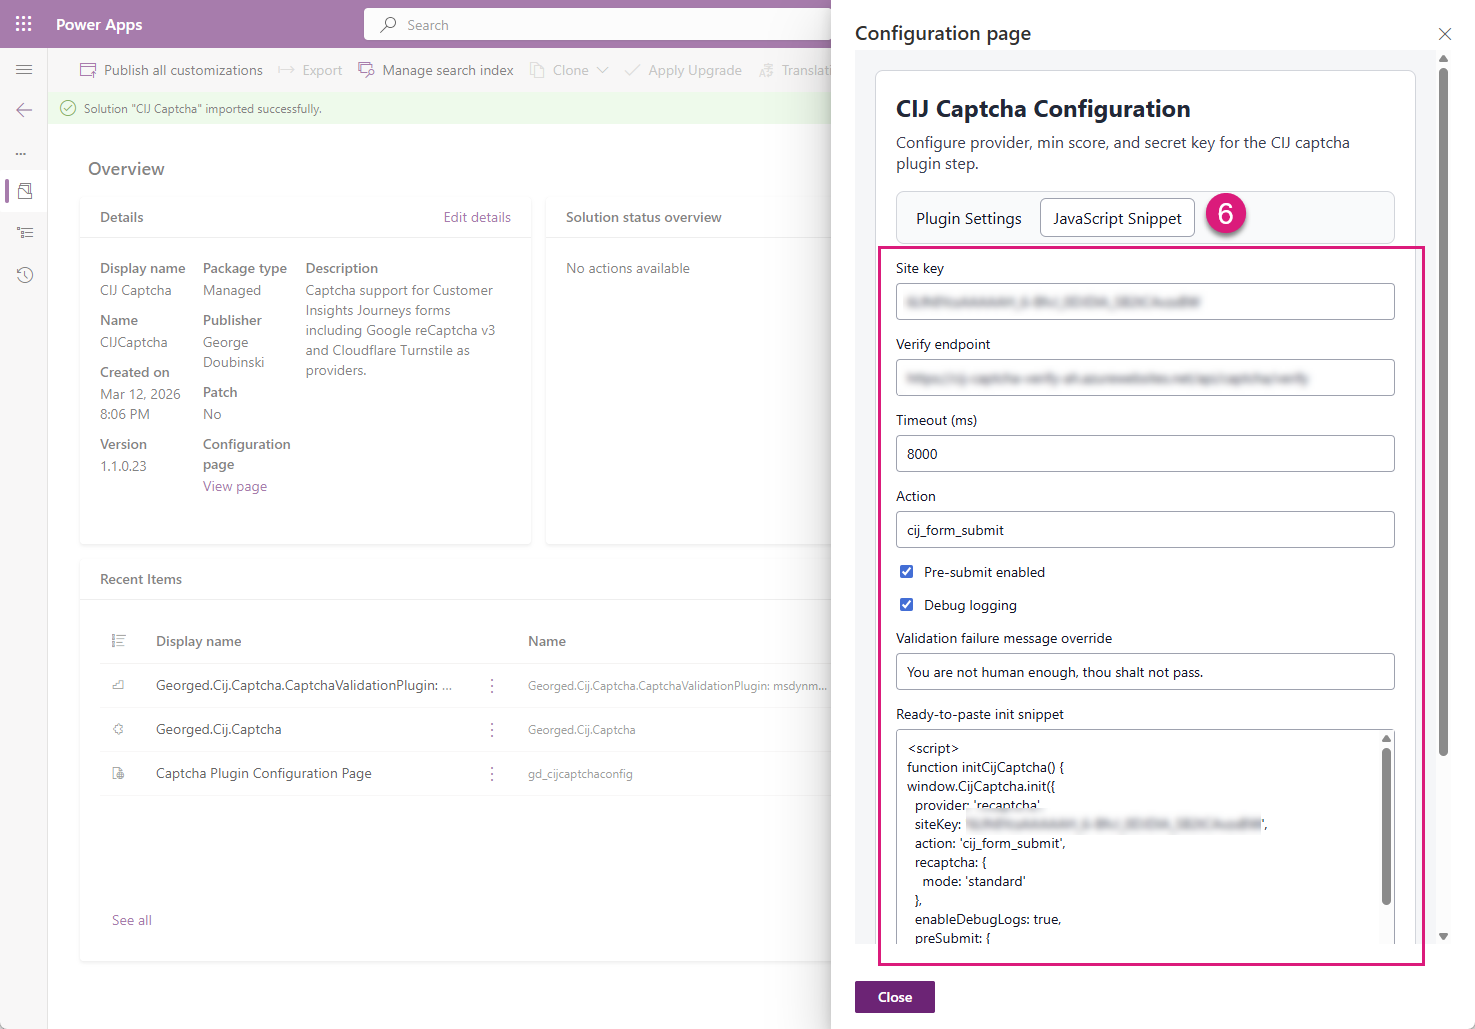
6) Configure JavaScript Snippet - the values added here are transient and purely to help you build the JavaScript snippet for your marketing forms
Google ReCAPTCHA v3
Site key ReCaptcha v3 Site key
Verify endpoint (optional): this is required if you want to use pre form submission validation but it requires additional development of a pre-submit endpoint (Azure function or similar) as detailed here
Timeout (ms): how long should the form try to complete the CAPTCHA validation before failing/timing out.
Action: the name of the action you want to use in this form (as per actions configured on the ‘Plugin Settings’ tab)
Pre-submit enabled: activates pre-submit validation when the ‘Verify endpoint’ is correctly configured
Debug logging: shows logging in the developer console so great for testing/verifying functionality but should removed for production usage
Validation failure message override: the message that shows in the pre submit reCAPTCHA validation fails
Ready to past snippet: use this in the ‘Form Set Up’ section to insert into your marketing forms
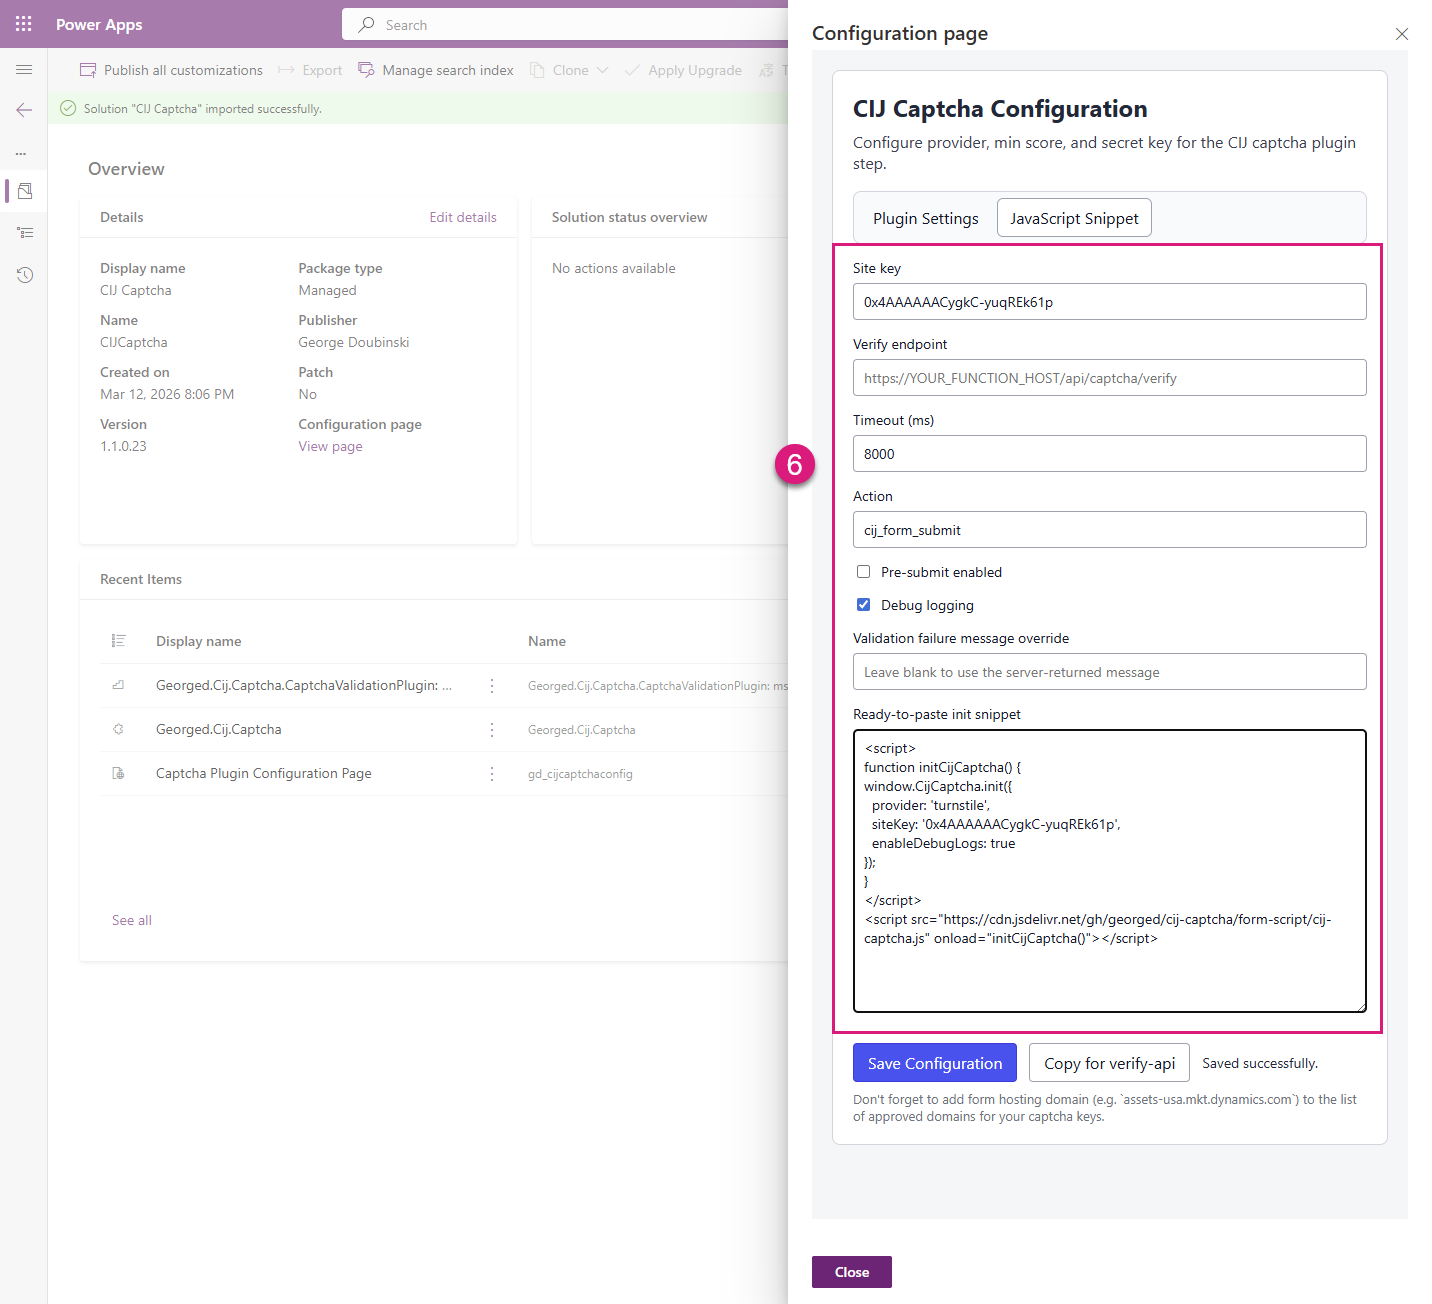
Cloudflare Turnstile
Site key Cloudflare Turnstile Site key
Verify endpoint (optional): this is required if you want to use pre form submission validation but it requires additional development of a pre-submit endpoint (Azure function or similar) as detailed here
Timeout (ms): how long should the form try to complete the Cloudflare Turnstile validation before failing/timing out.
Action: the name of the action you want to use in this form (as per actions configured on the ‘Plugin Settings’ tab)
Pre-submit enabled: activates pre-submit validation when the ‘Verify endpoint’ is correctly configured
Debug logging: shows logging in the developer console so great for testing/verifying functionality but should removed for production usage
Validation failure message override: the message that shows in the pre submit reCAPTCHA validation fails
Ready to past snippet: use this in the ‘Form Set Up’ section to insert into your marketing forms
Form Set Up
Regardless of which validation configuration you choose, adding the validation to the form is exactly the same and super easy too!
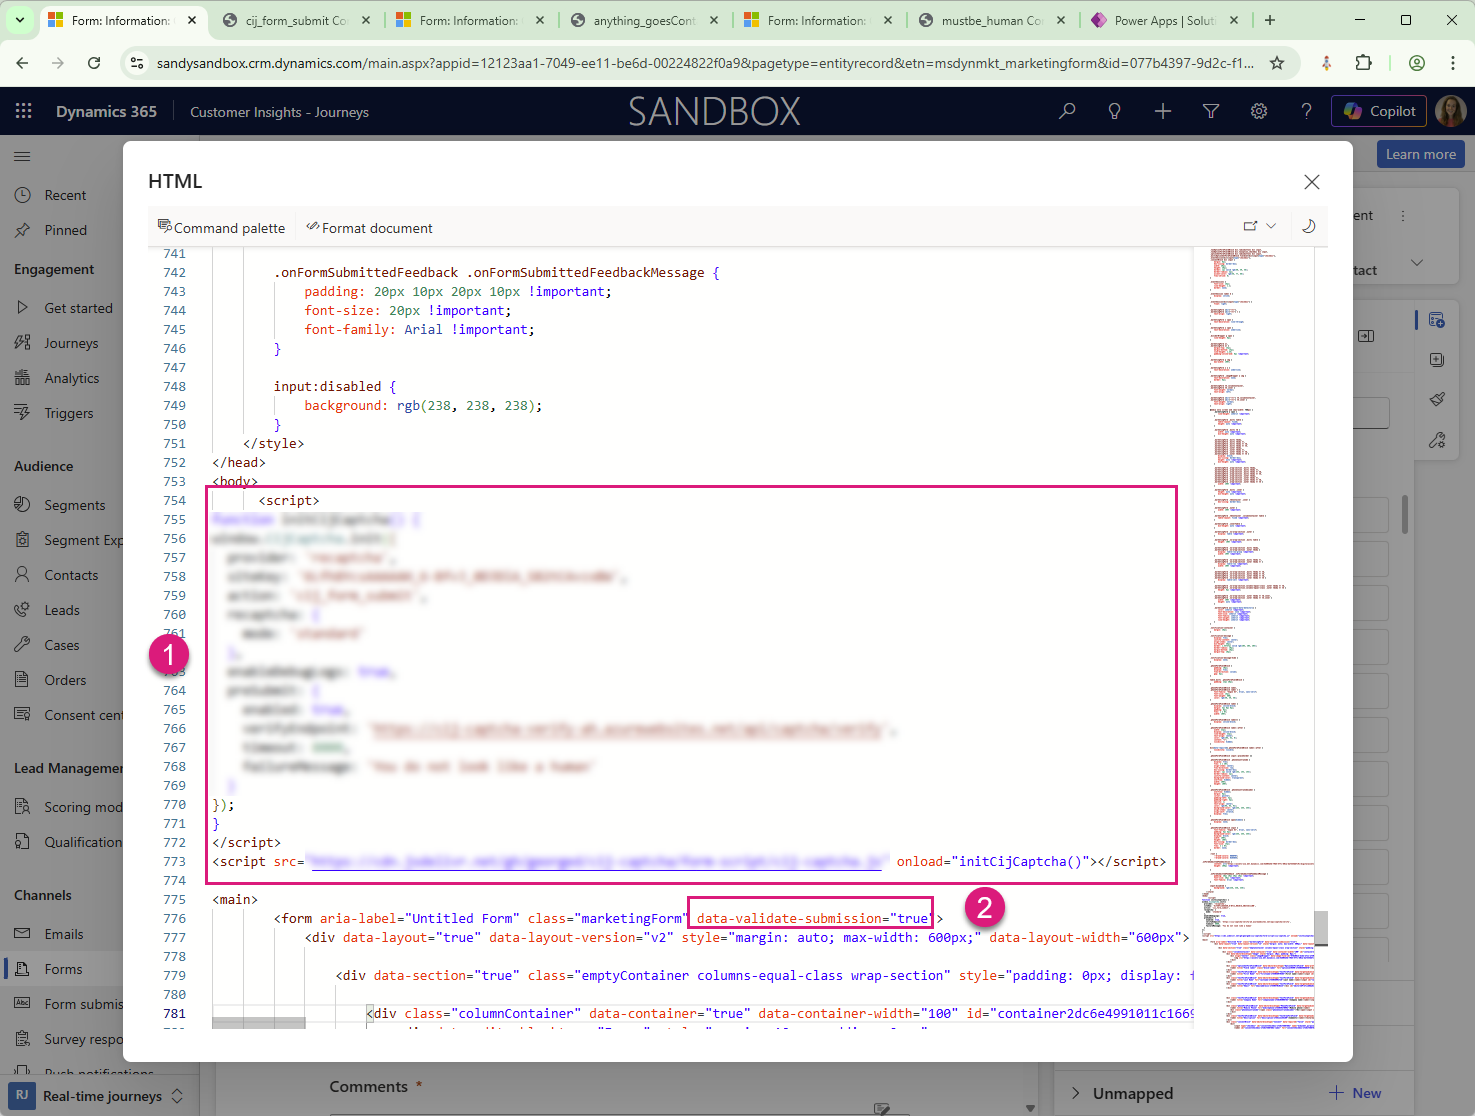
Use the ‘JavaScript Snippet’ helper to generate your script, copy it from the ‘Ready to paste snippet’ box, and paste it into the form HTML between the <body> and <form.. tags
Add data-validate-submission="true" to <form…> tag
You don’t need to make any other HTML changes to the form like you do with V2, yay!
Save the form and ensure the status is ‘Live’ - it won’t look any different on the preview to tell whether CAPTCHA is enabled or not.
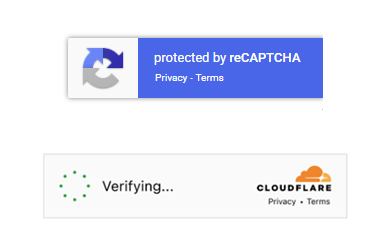
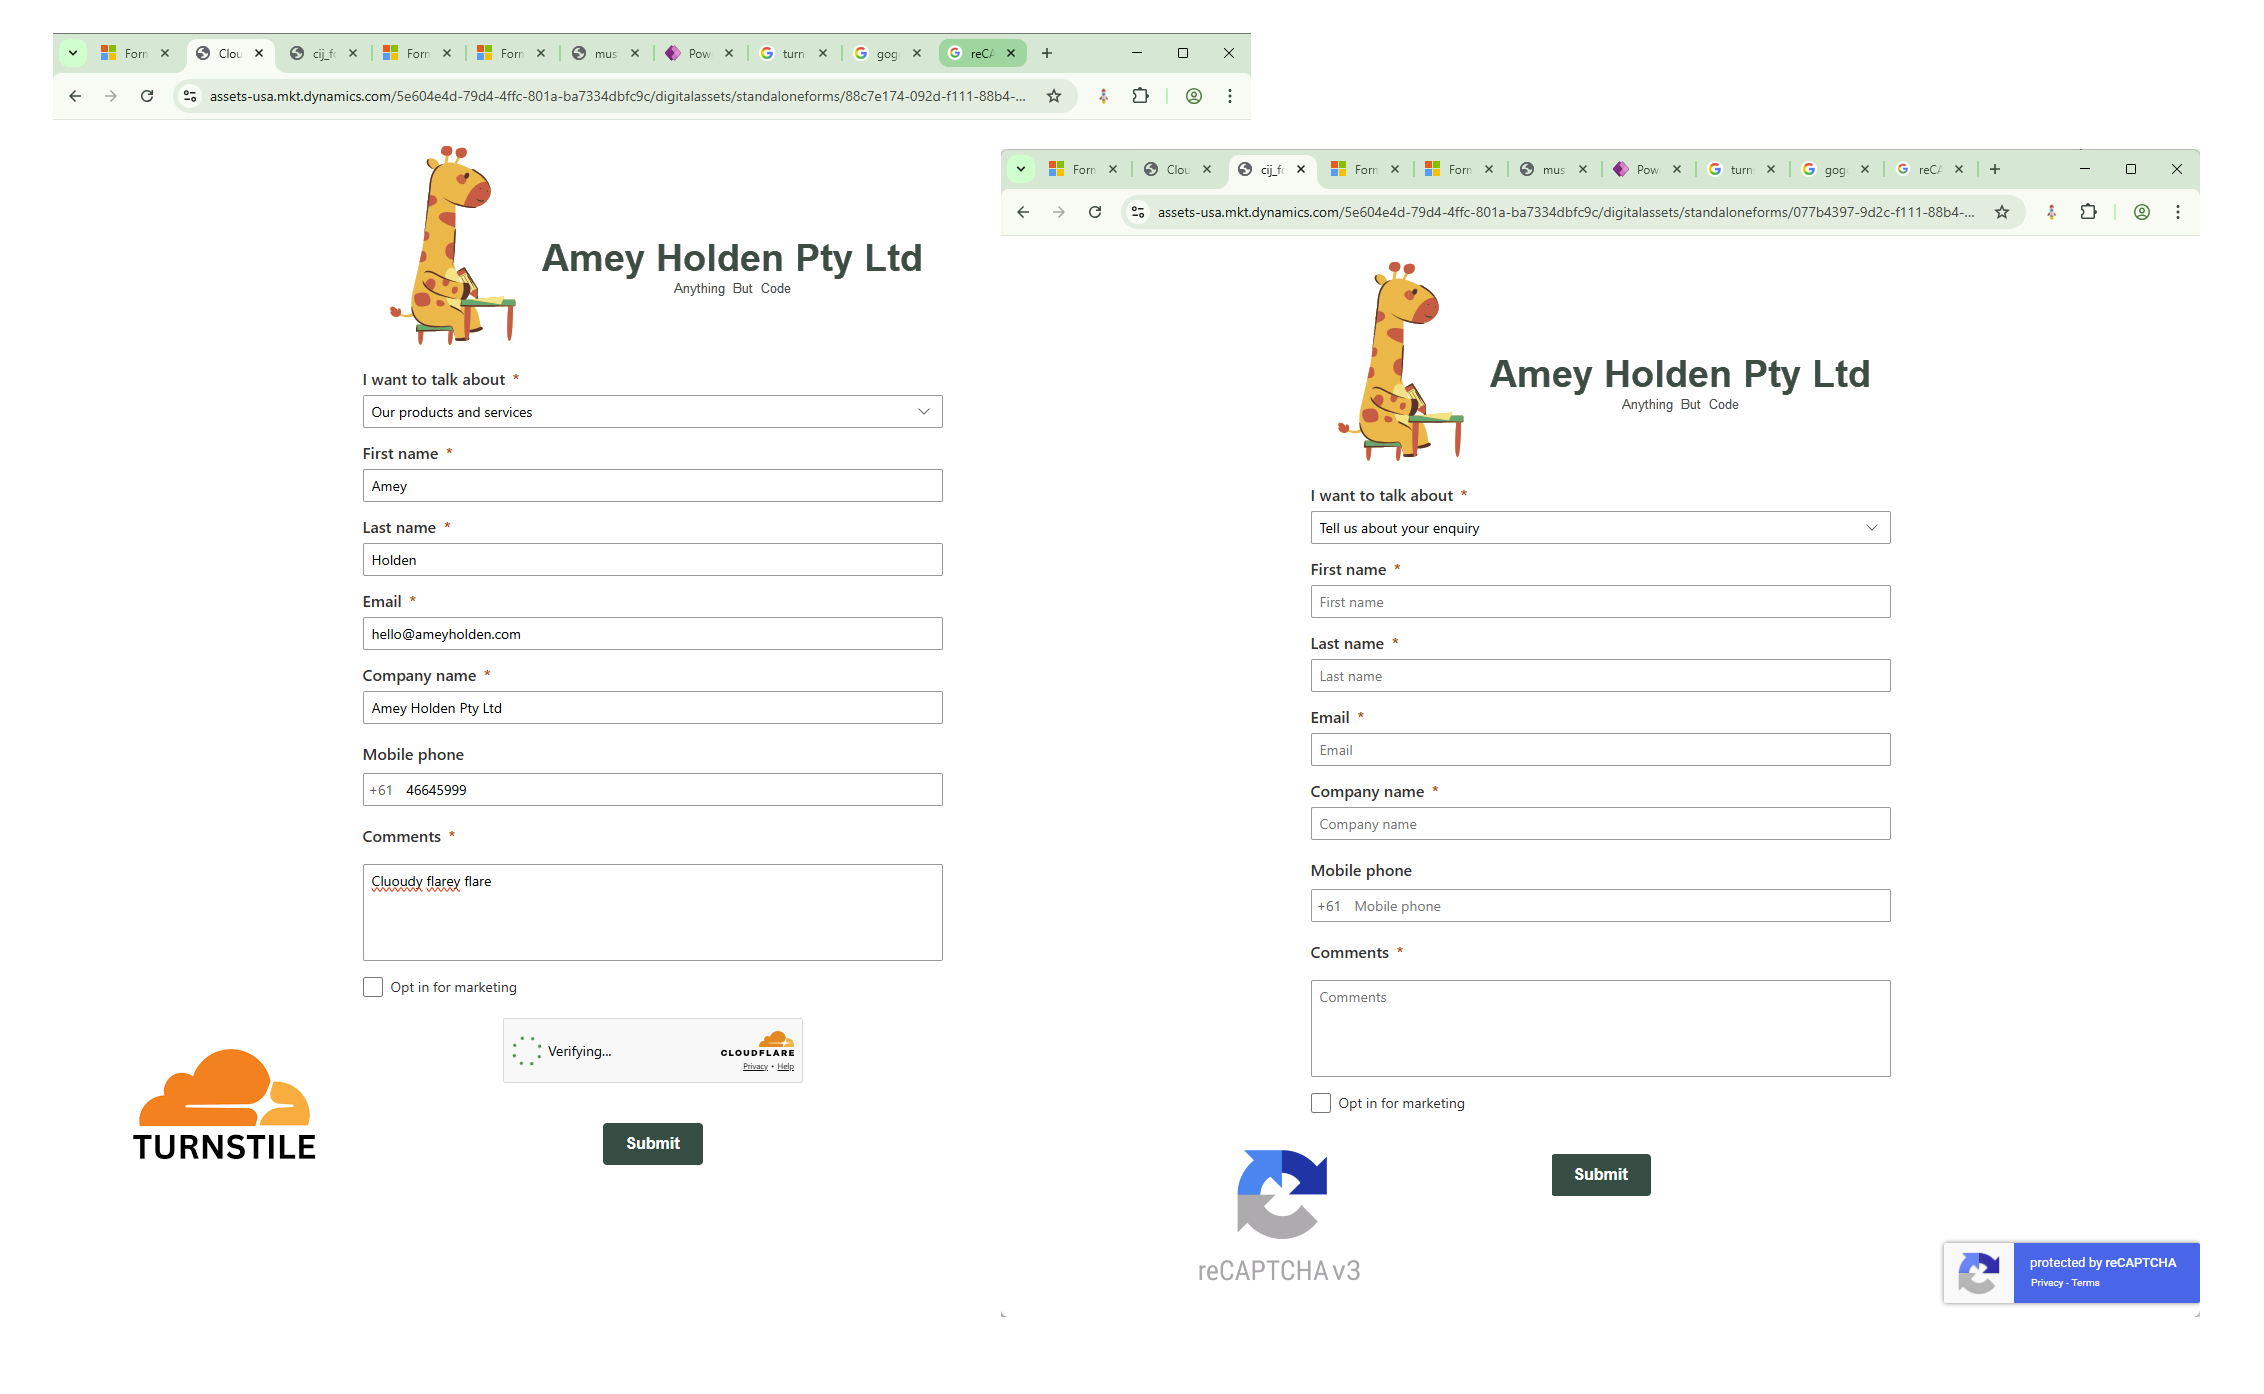
Access the form on the standalone page or on your website if using the embedded form hosting option, append #d365mkt-nocache to the URL to ensure you are accessing the latest configuration on the form. e.g. https://assets-usa.mkt.dynamics.com/5e604e4d-79d4-4ffc-801a-ba7334dbfc9c/digitalassets/standaloneforms/077b4397-9d2c-f111-88b4-7c1e52fe157b#d365mkt-nocache- if you are using google reCAPTCHA you should see the ‘protected by reCAPTCHA’ floaty icon somewhere.

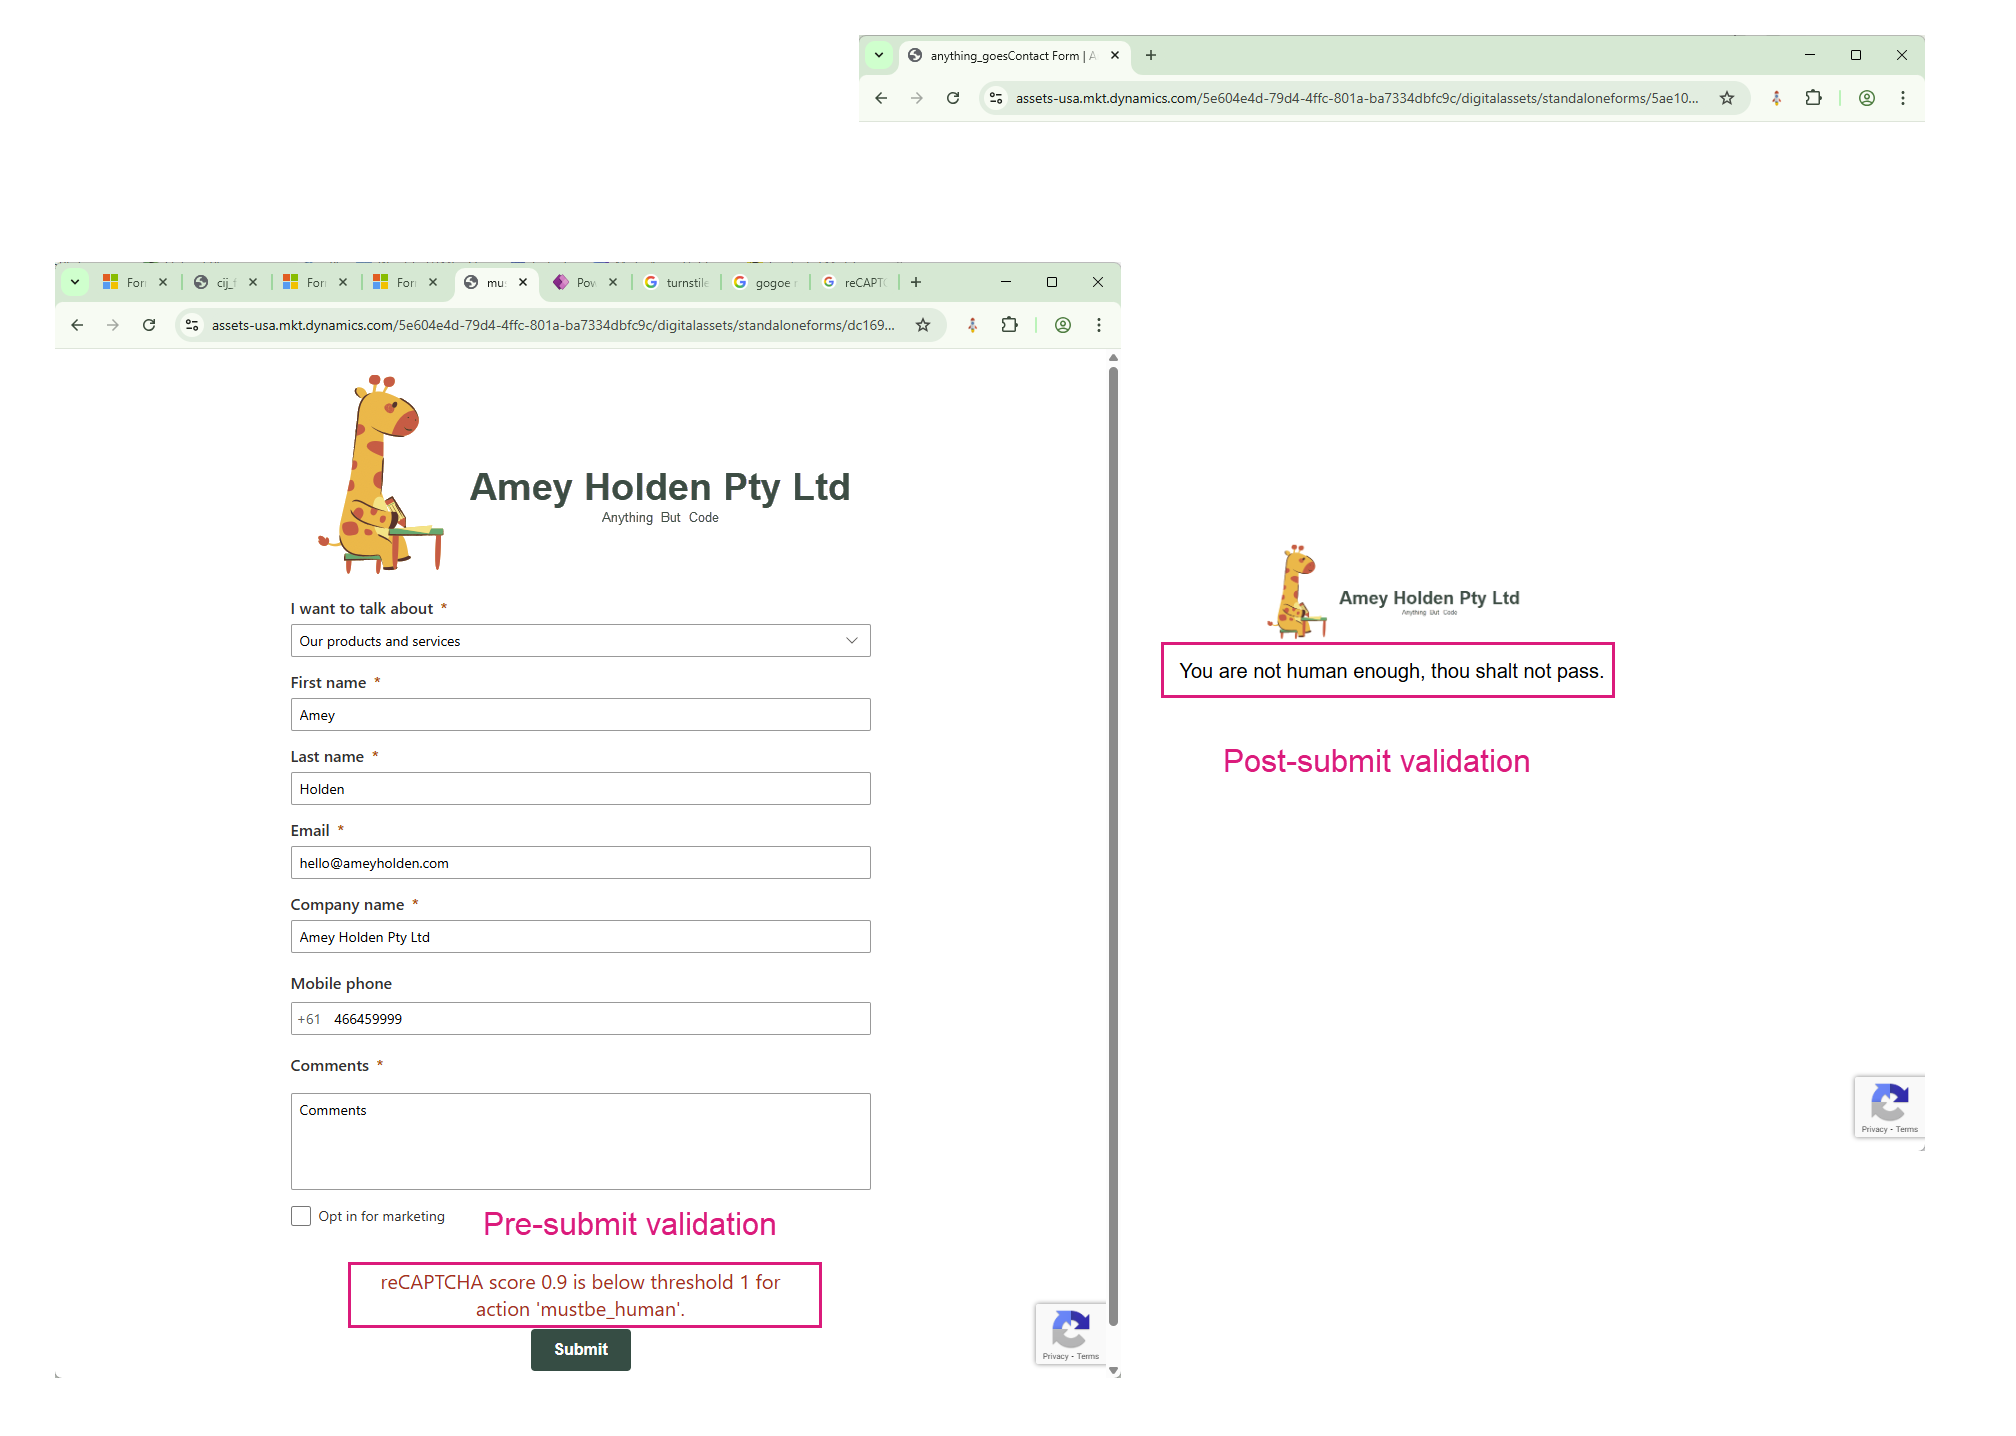
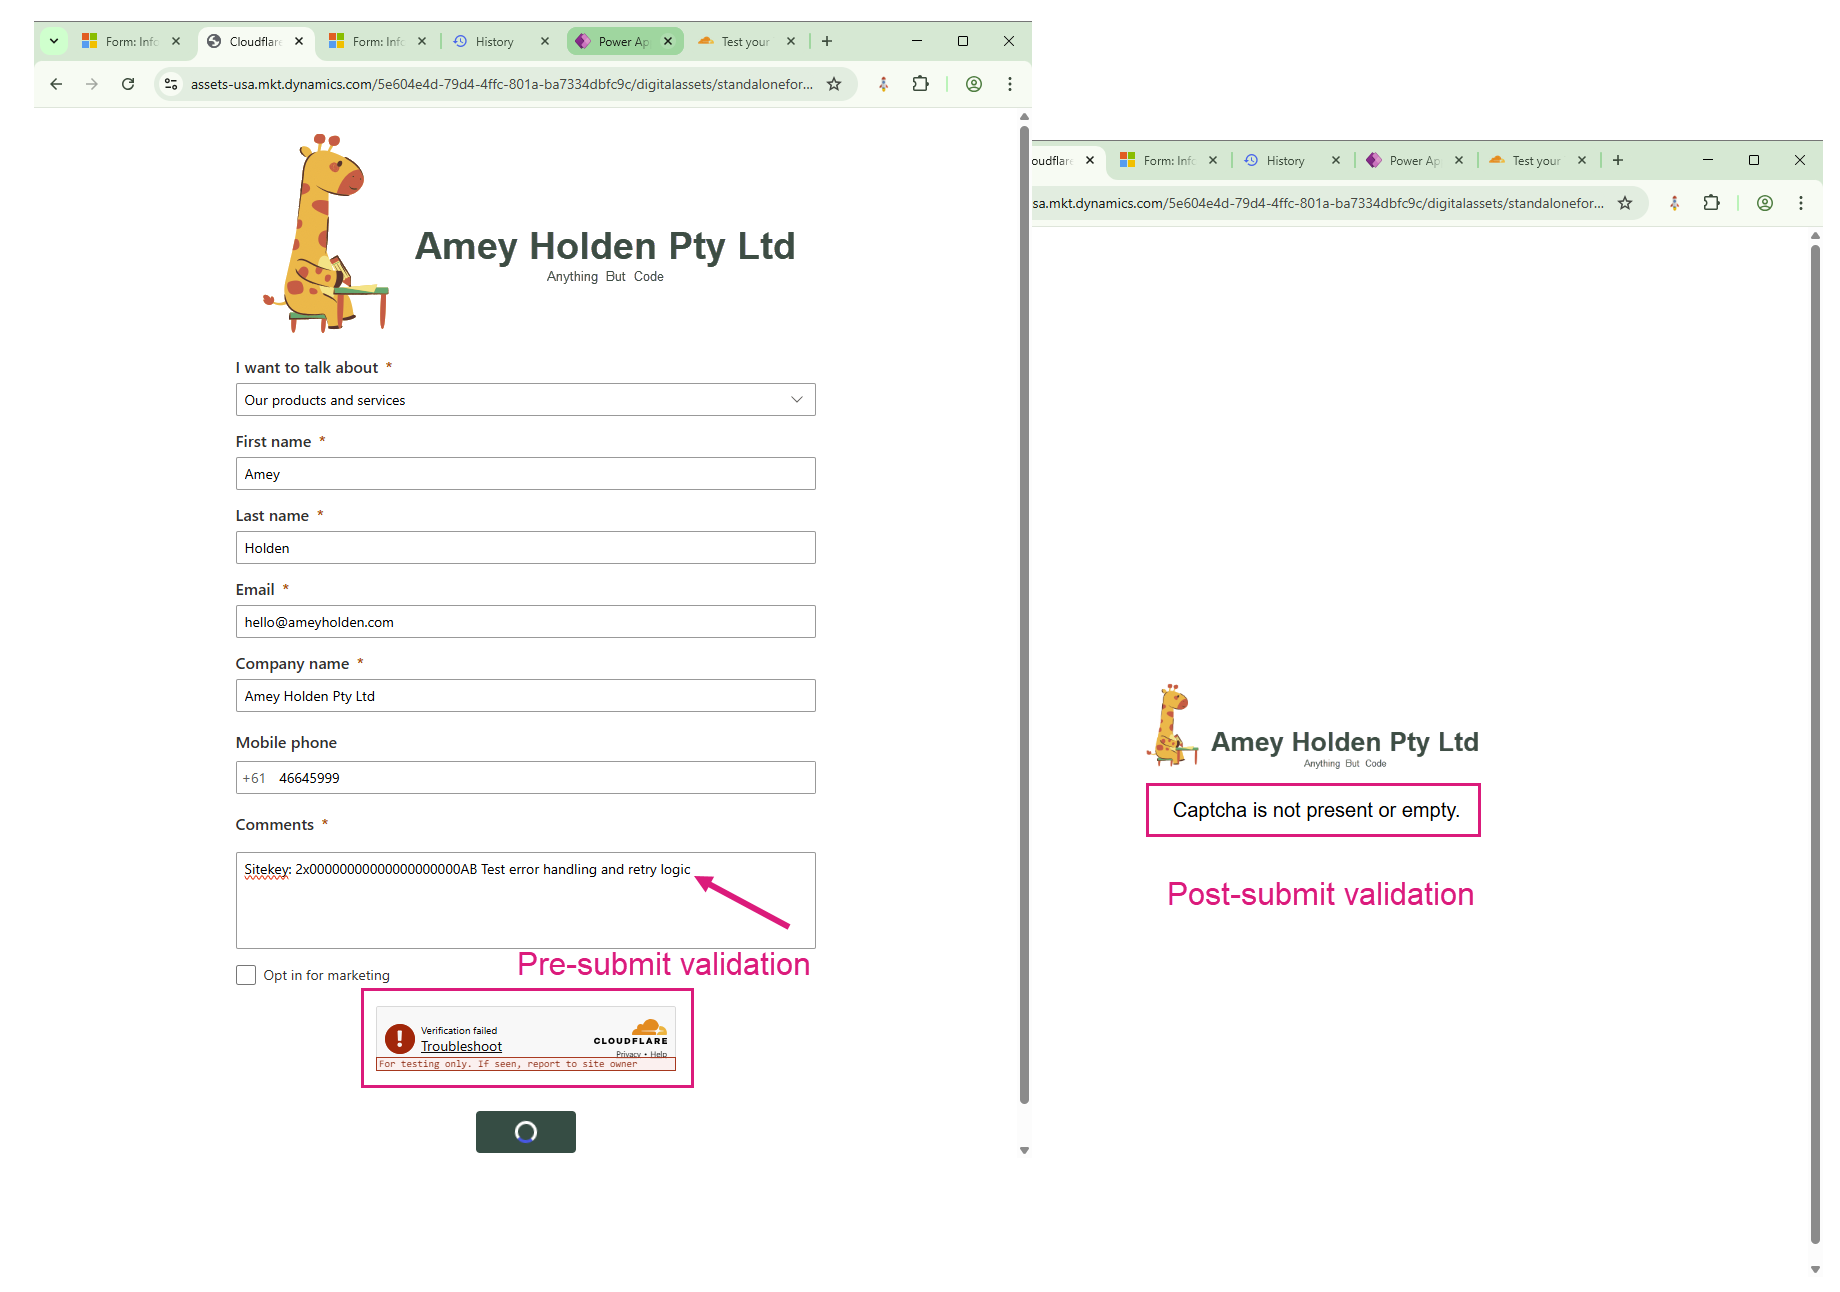
To validate before or after form submit? I choose… both!
Post-submit Validation
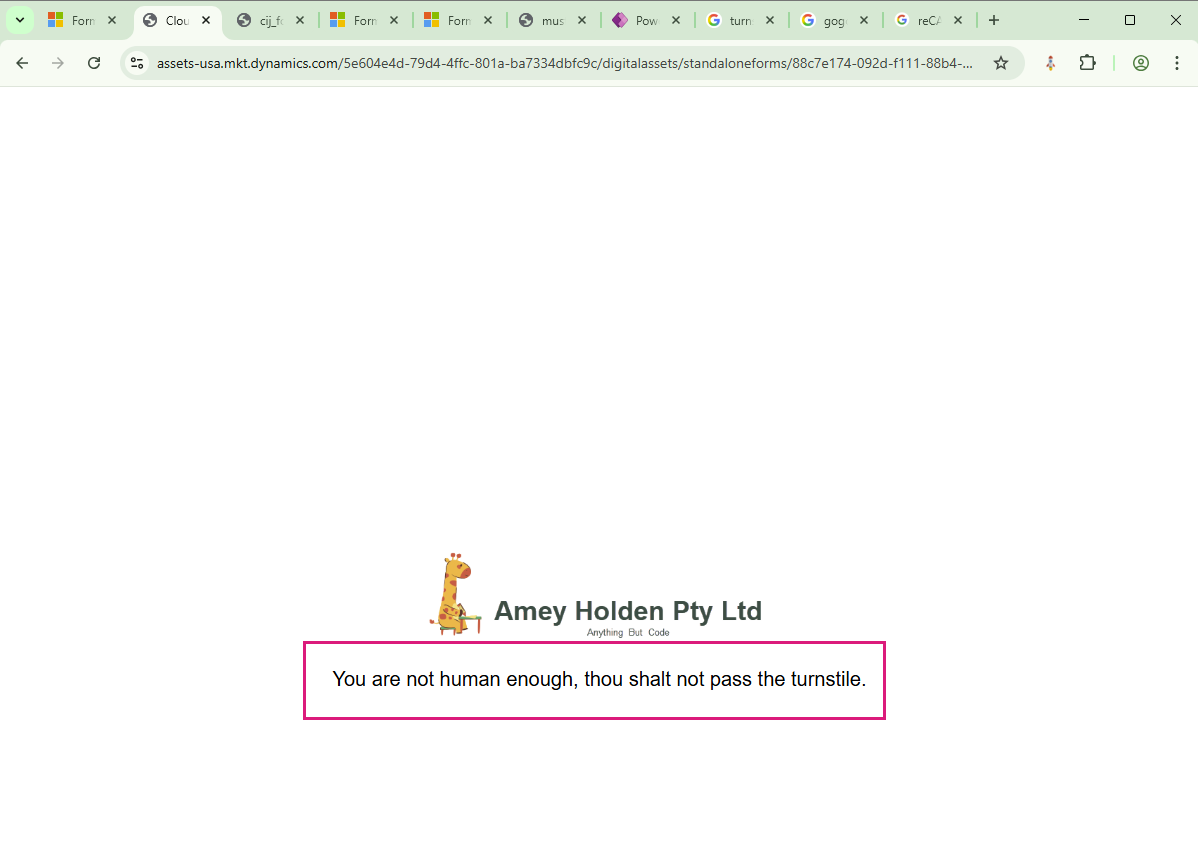
This is the standard/basic implementation where the validation happens after the form has been submitted. This means that as a form filler my data is submitted, then the form checks if I’m a bot, if it decides I’m a bot, my form submission is not sent to Dynamics 365 CI-J but the data is lost and the form is on the post submission page. . It’s good because its secure and server side so difficult to bypass. If a form filler wants to try to re-submit the form they have to fill the form again, not a bad thing if I’m actually a robot but if I am a real human/potential customer, its a lot of friction and poor user experience.
Post & Pre-submit Validation
This is a little bit more fancy as it runs the validation before the form is submitted, so the submission never even hits the database until the bot checks have passed. This is good because if there is an issue, the form submission can be halted before the submission actually happens, so the form can be attempted to submit again, plus clear feedback can be provided to the customer, and a chance to easily retry the submission.
Remember that the Pre-submit validation requires a little bit of extra development work with an Azur Function, the source code can be found documented here.
Generally you would always you use pre and post submit validation together or just post submit, never pre submit on its own as it’s too vulnerable to script injections to bypass the validation.
Google ReCAPTCHA v3
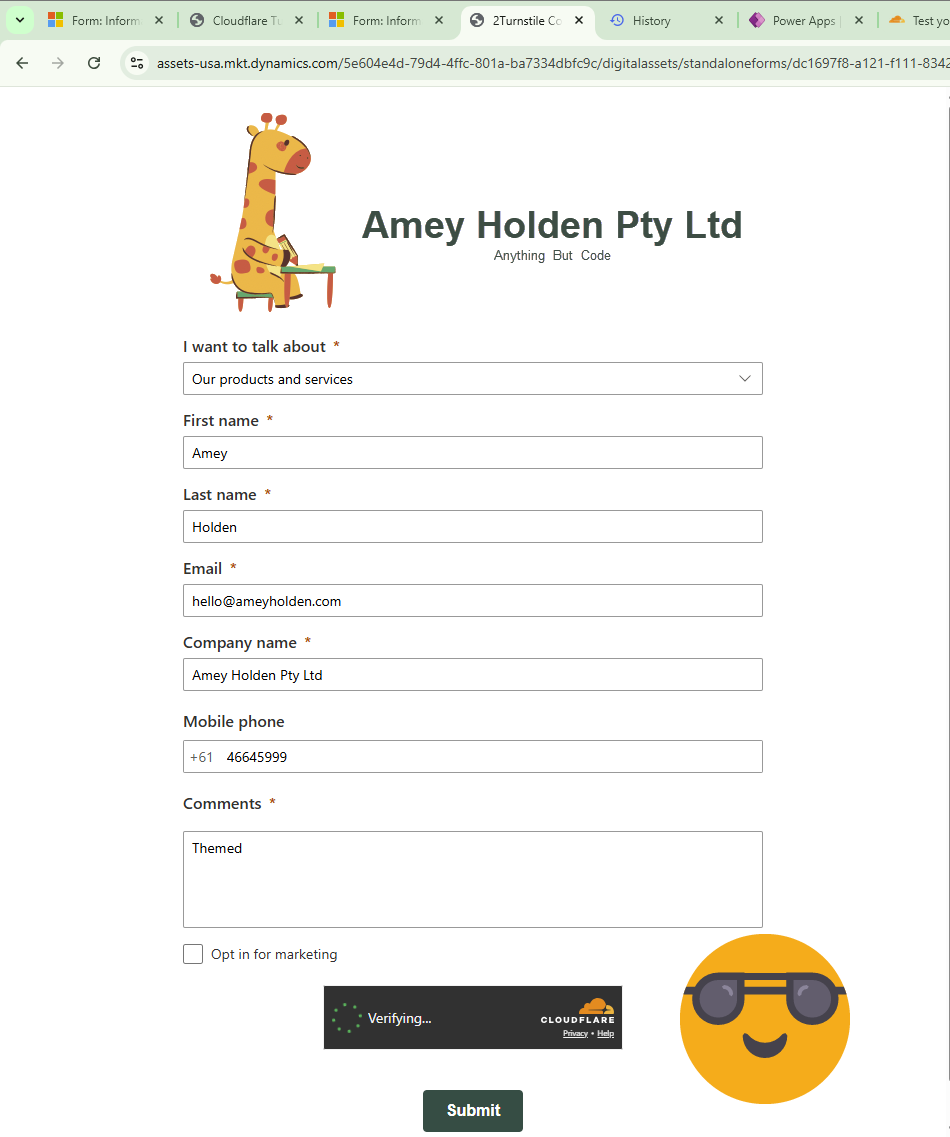
Cloudflare Turnstile
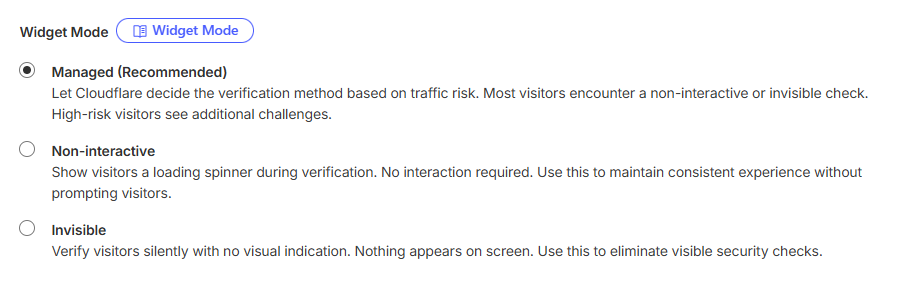
This is a CAPTCHA alternative that you might have seen on your journeys around the internet and online shopping. They have various plan options including a free one (and a much more enjoyable set of documentation too). There is no concept of defining score thresholds like you see in the Google ReCAPTCHA v3, instead there are 3 configuration options - Managed, Non-interactive or Invisible.
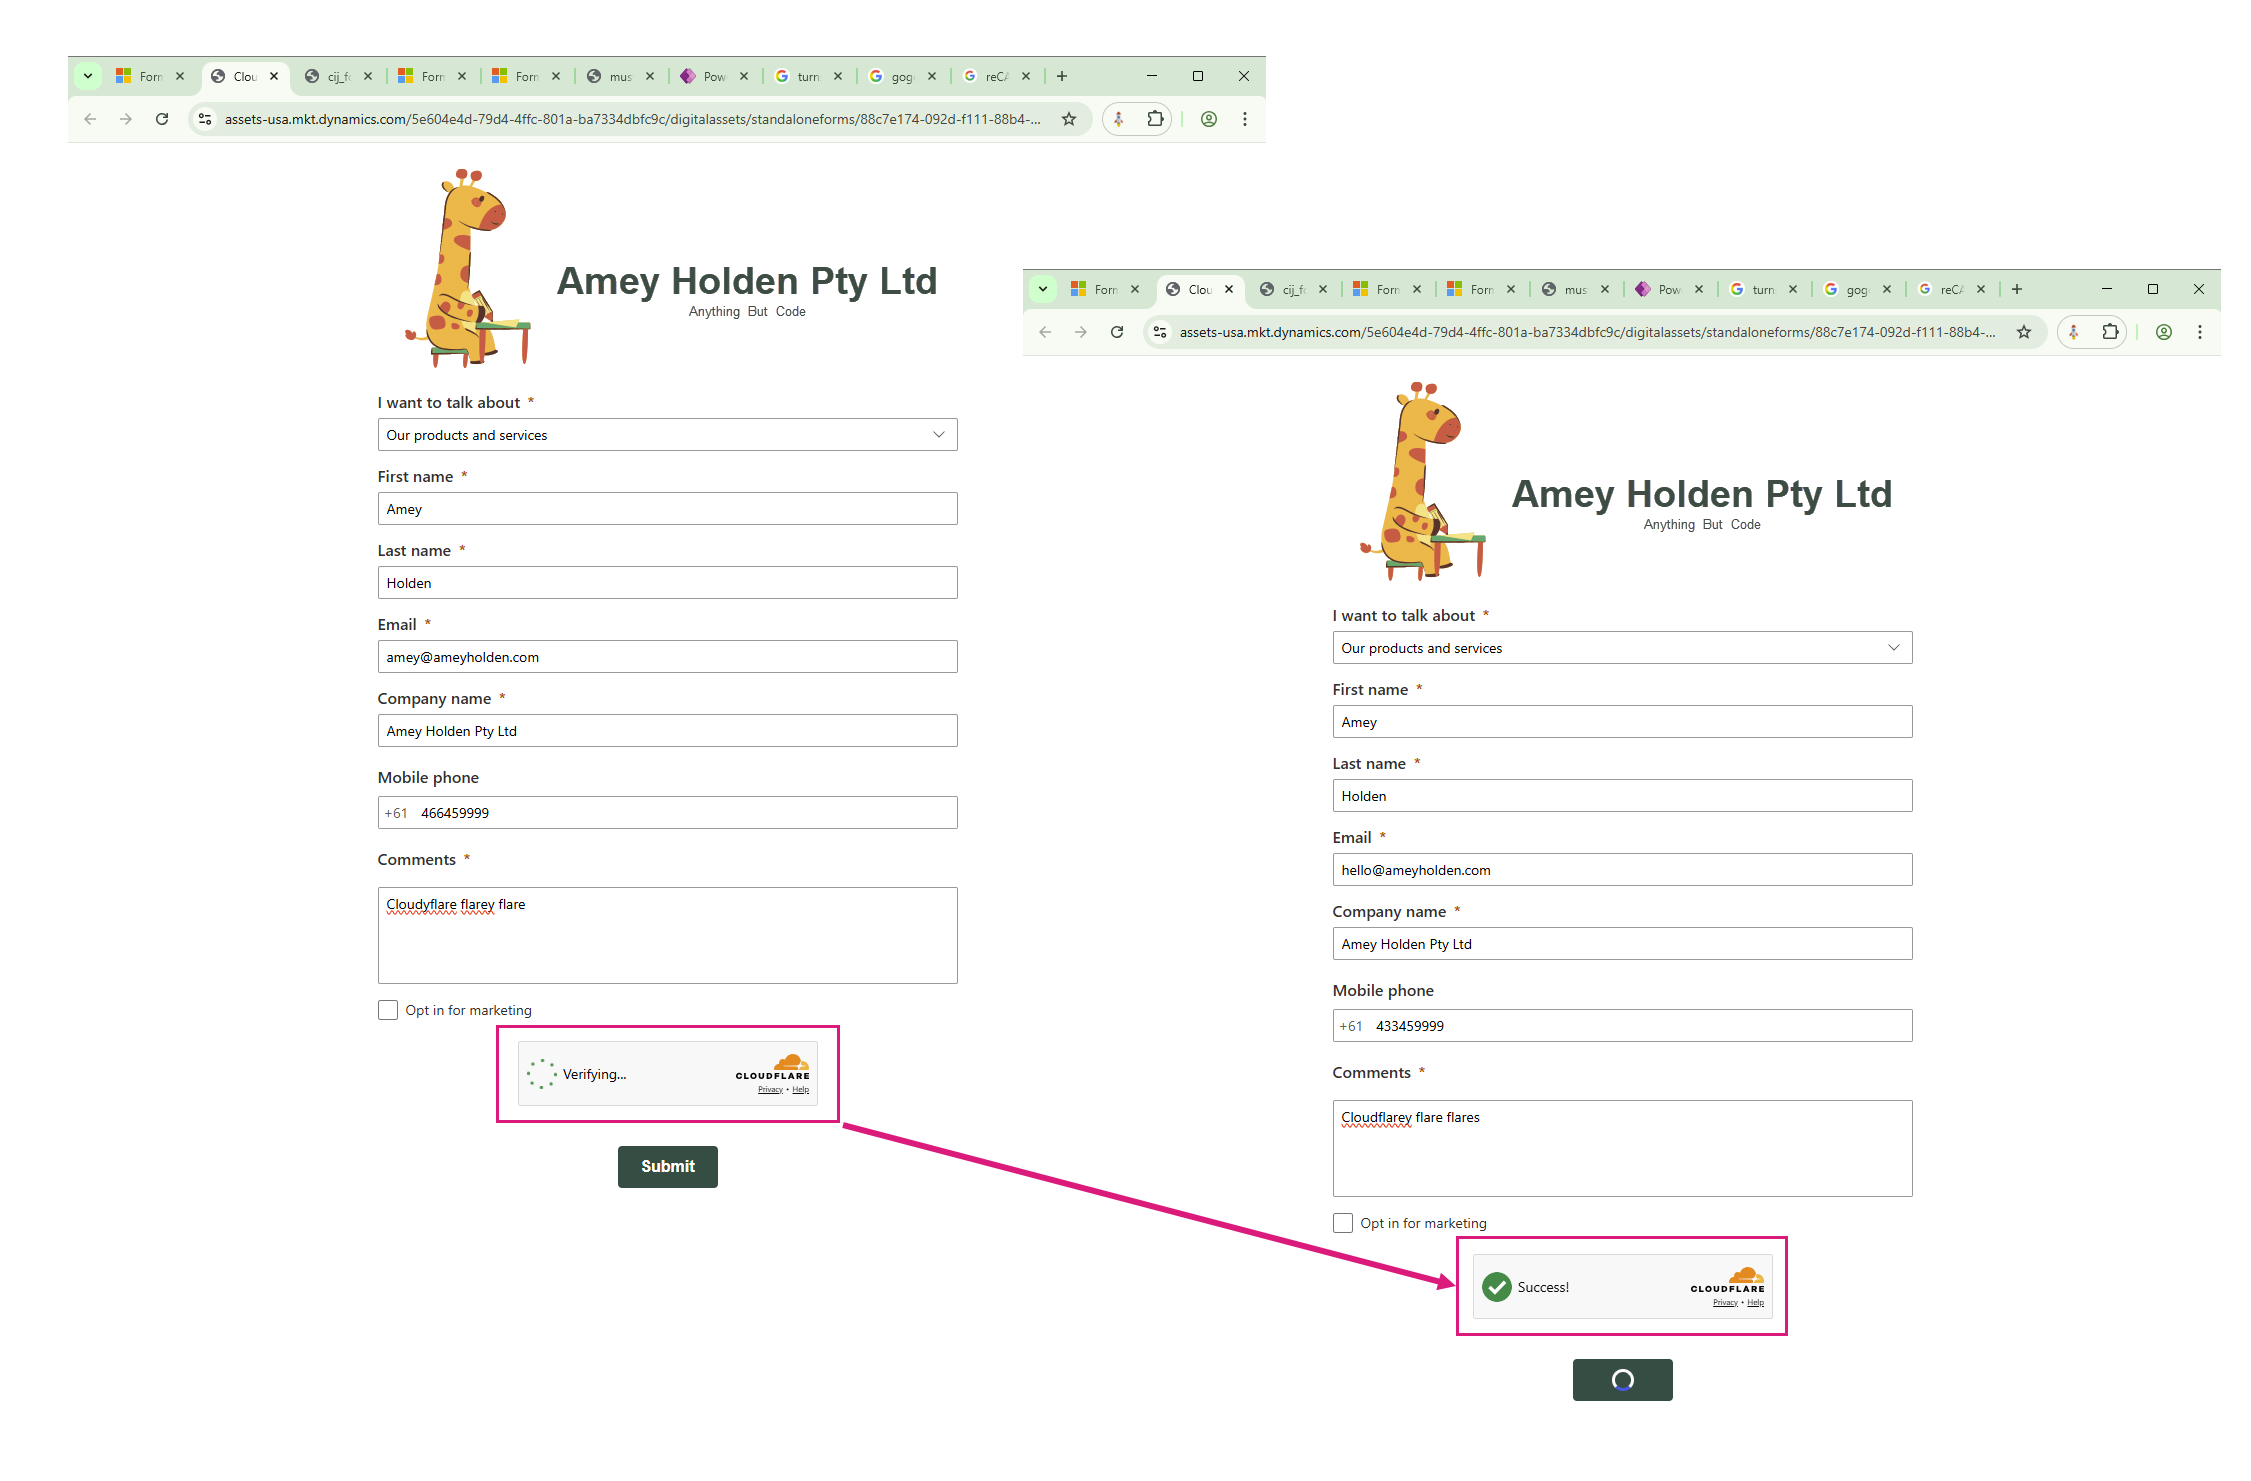
Since this one is sometimes visible, you may have the check box experience show for the less trustworthy actors. But there is some very detailed documentation here on how you can change the look, feel and behaviour of the widget such as size, light/dark mode and languages. See below code snippet with added code for dark mode.
,turnstile: {
language: 'es',
theme: 'dark'
}
<script>
  window.CijCaptcha.init({
    provider: 'turnstile',
    siteKey: 'YOUR_TURNSTILE_SITE_KEY',
    enableDebugLogs: true,
    preSubmit: {
        enabled: true,
        verifyEndpoint: "https://endpoint.bla.com/verify",
        failureMessage: 'Go away, bot'
    },
  turnstile: {
        theme: 'dark'
    }
  });
</script>
How do I test it?
Good question, generally if you are using Goggle ReCAPTCHA, update the score in the configuration to 1.0 and it will most likely fail so this allows you to see the failed scenarios as well as successful ones. For Cloudflare Turnstile, you can use the Test secret keys to verify the failure scenarios.
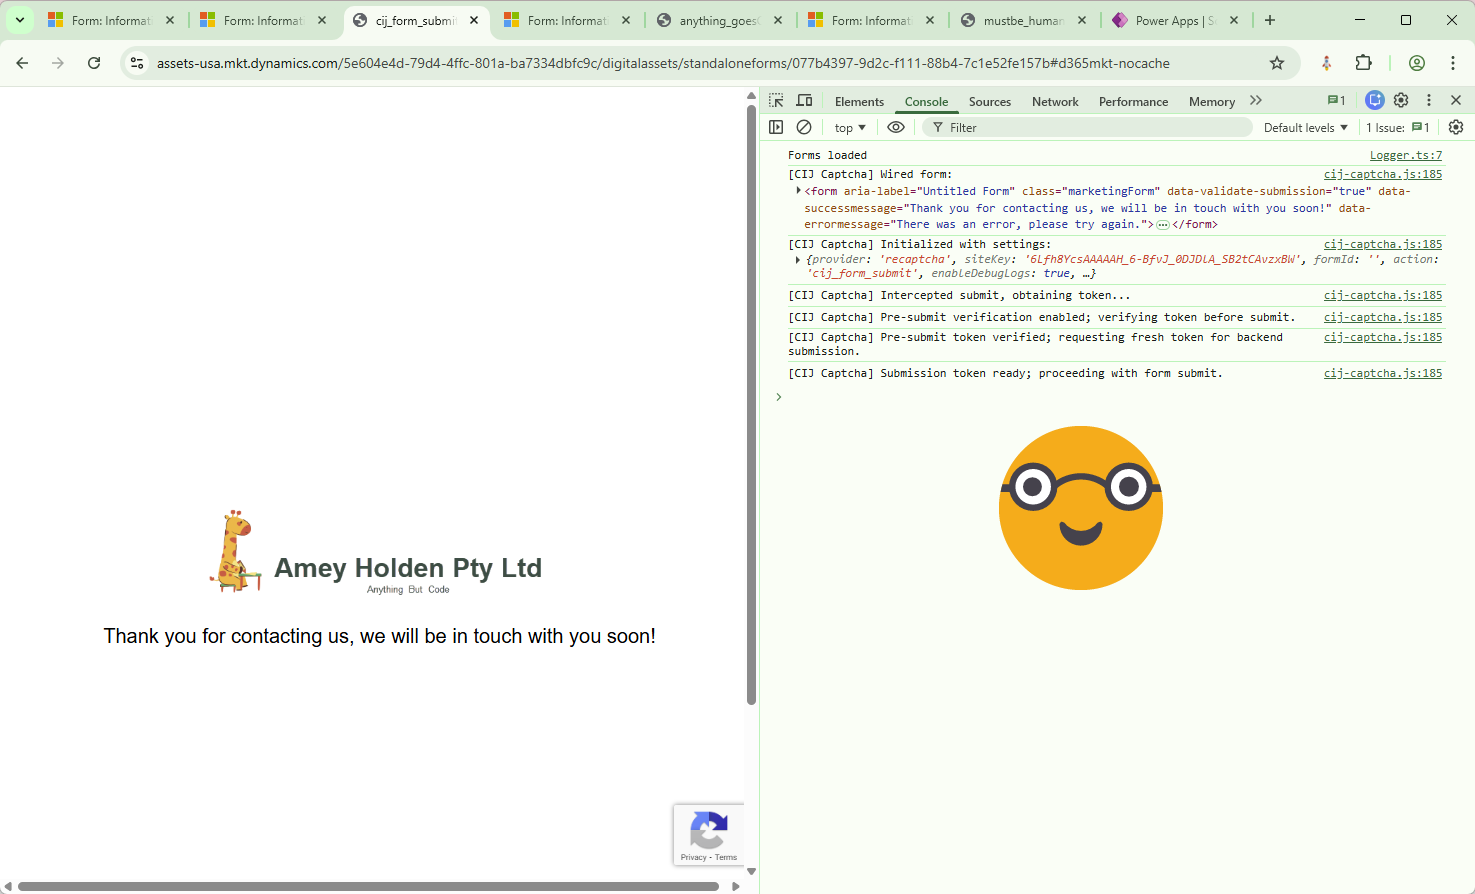
You can check that the CAPTCHA is actually doing stuff it’s meant to do for successful submissions in a few places, here are some suggestions.
Browser Developer Console (Ctrl + Shift + J to launch in most browsers) ensure that ‘Debug logging’ is checked on the configuration page, or add enableDebugLogs: true, above the preSumit:{ line in the JavaScript snippet. The console provides logging/feedback on what happened/did not happen.
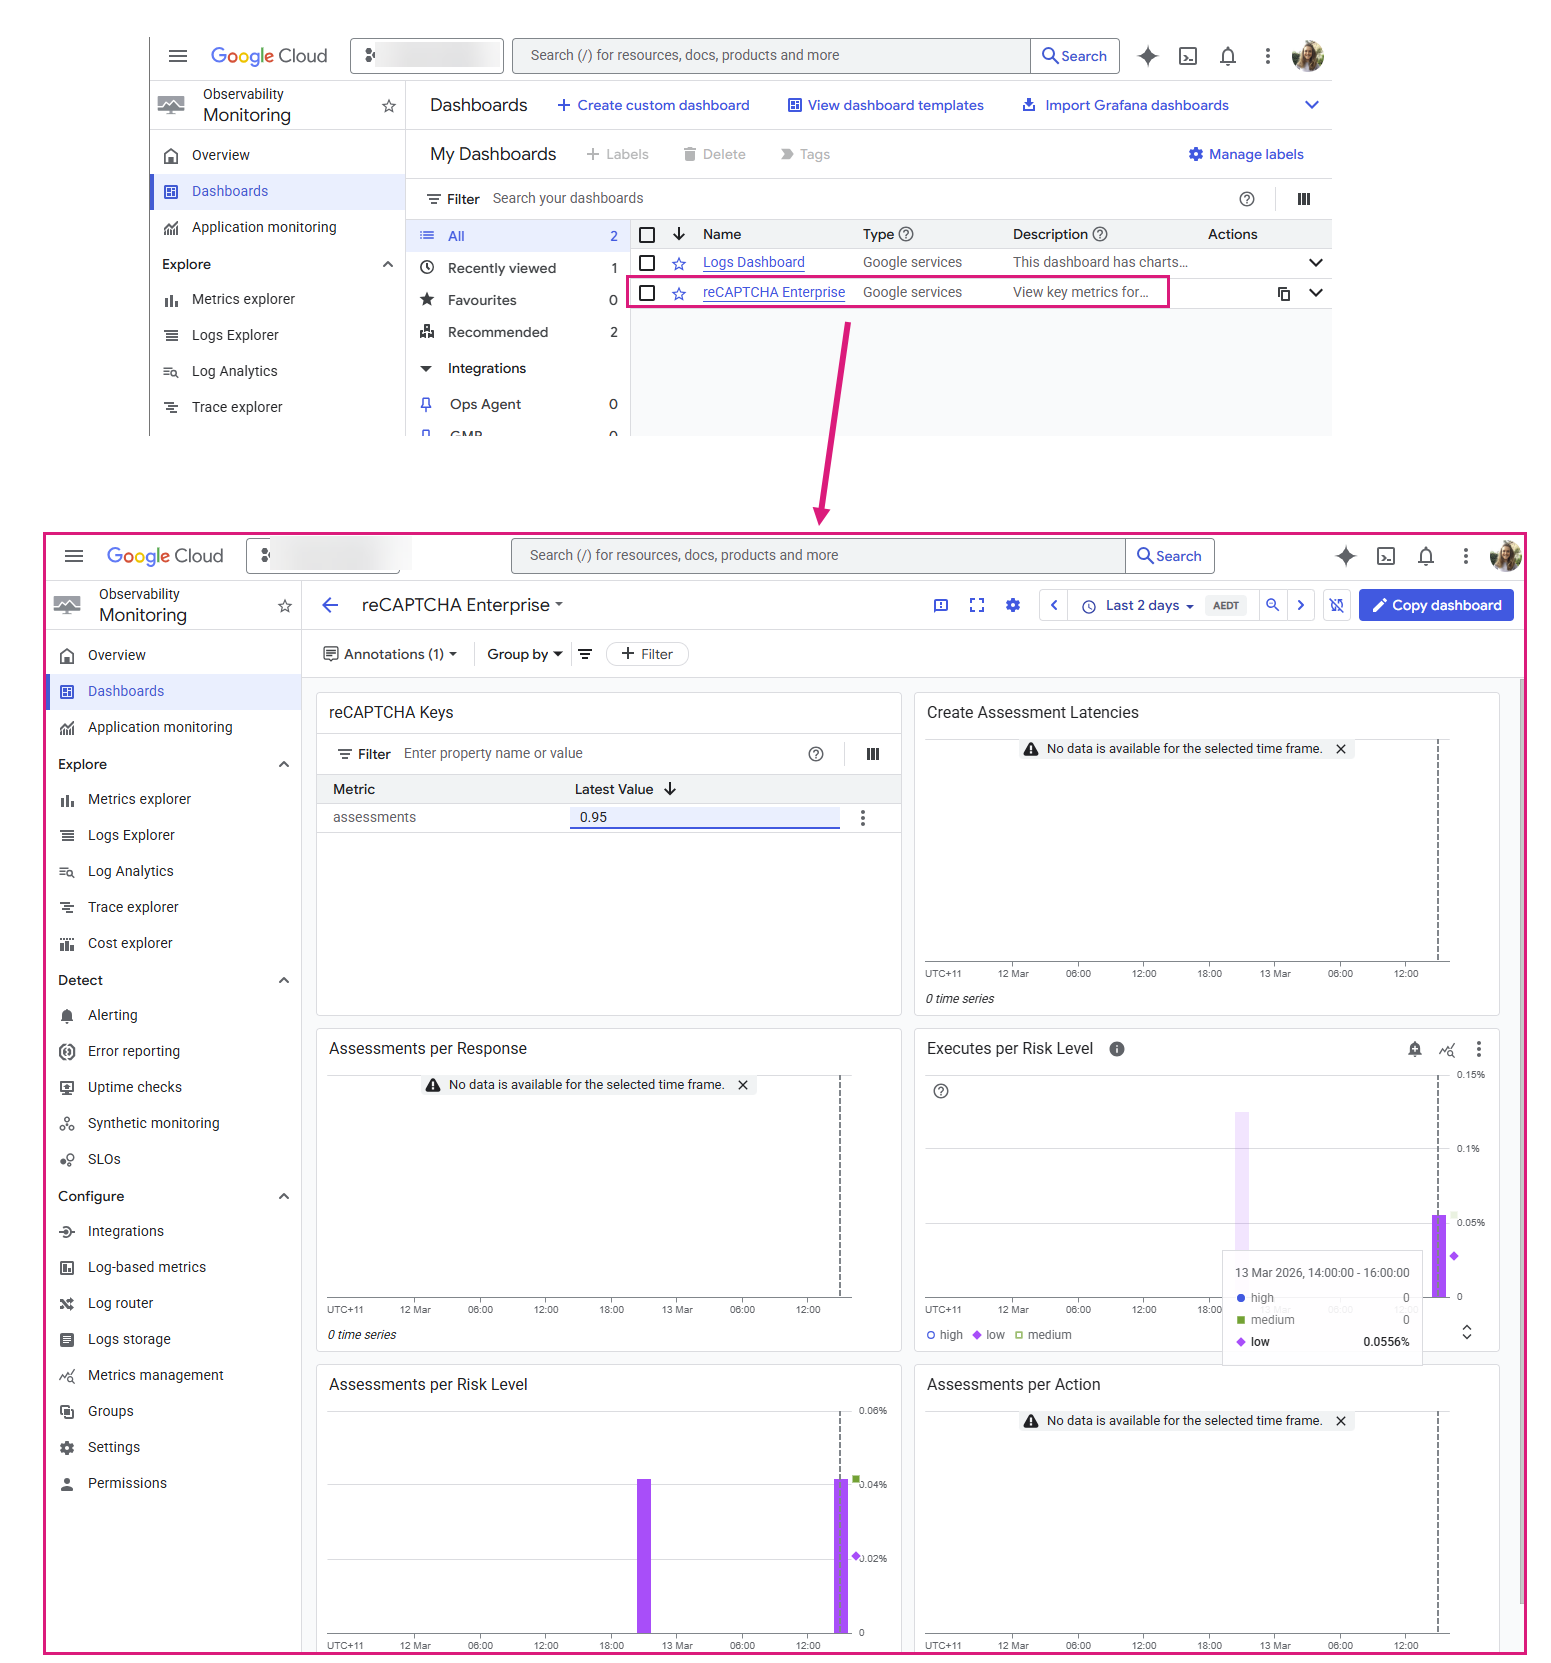
Google Console Dashboards -> https://console.cloud.google.com/monitoring/dashboards look for the reCAPTCHA Enterprise dashboard
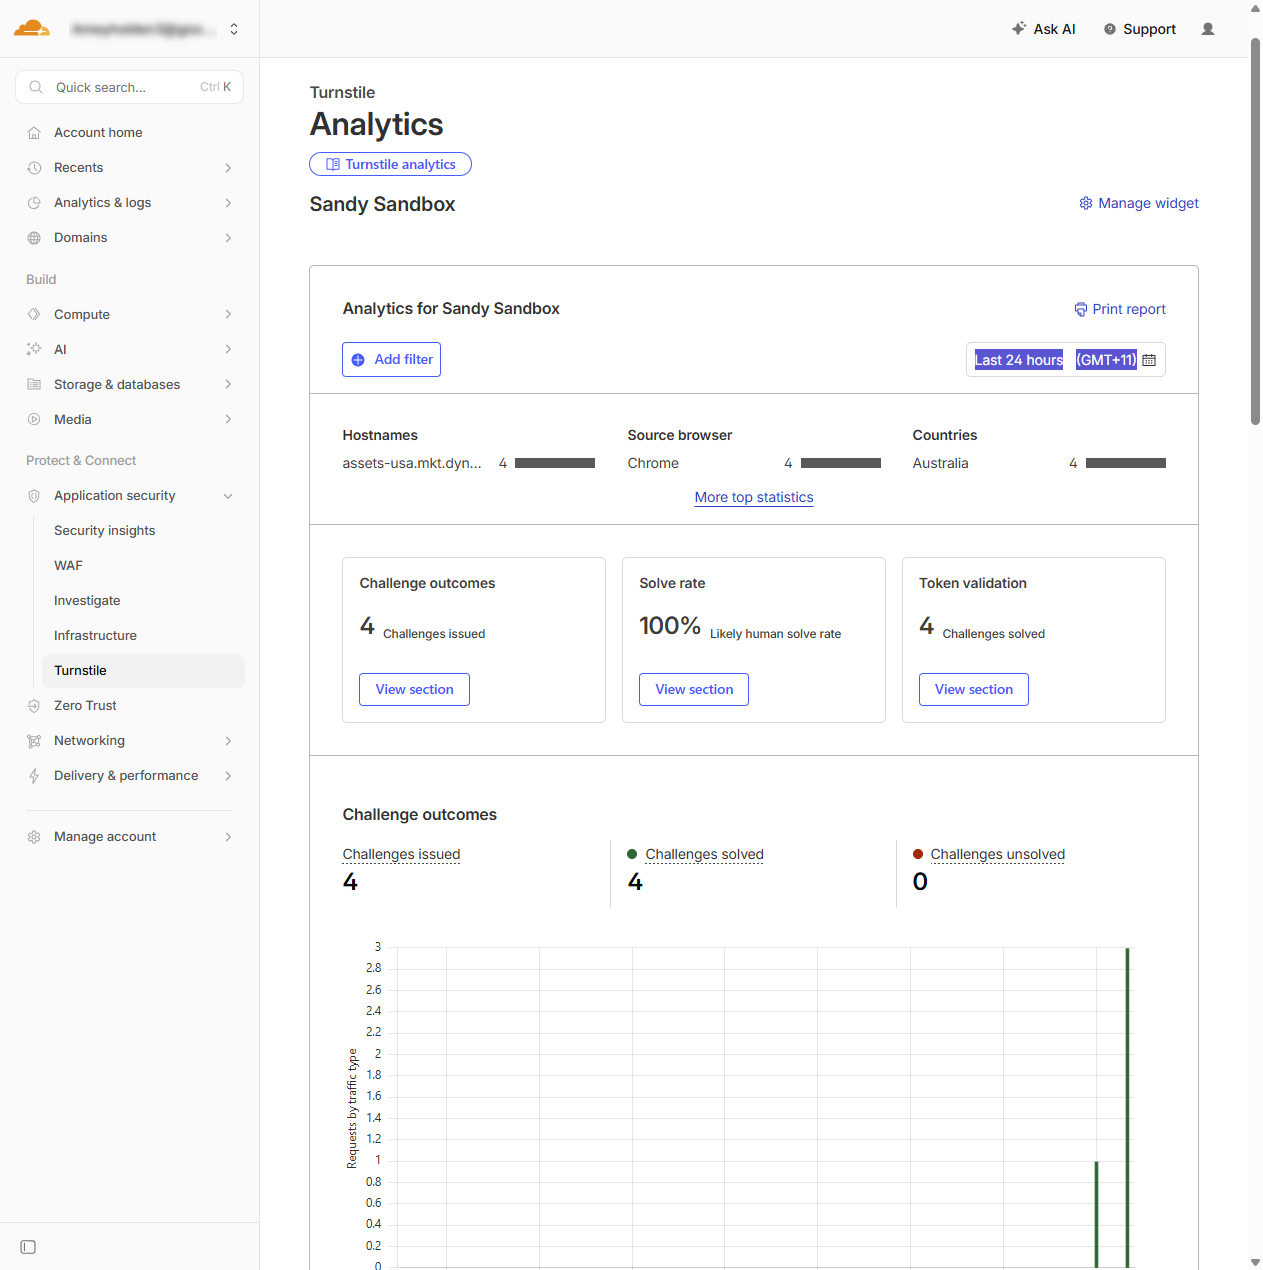
Cloudflare Turnstile Dashboards → https://dash.cloudflare.com/ Application security → Turnstile → View Analytics for your CAPCTHA ‘Widget’
Pretty snazzy hey?
Make sure you say thank you to George for his developer skills, this is seriously cool! Any questions or comments on this, please ask away and I’m looking forward to seeing all your CI-J forms out there with Google ReCAPTCHA and Cloudflare Turnstile soon.