Change the appearance of Marketing and Event forms using URL parameters in Customer Insights - Journeys
This post will show you how to change the appearance of a Customer Insights - Journeys form based on URL parameters. This is really helpful for when you want to (or have to) use the same form for different personas, brands or behaviours. This is most useful as a way to work around the limitation of one form per event for taking registrations.
Thank you to a lovely lady who slid into my LinkedIn DMs with this challenging question, it was a fun one!
Note: apologies in advance that I’m going to use a little bit of JavaScript in the form to do this, but it’s relatively simple and right now there an no alternatives (but conditional form content would be cool hey?).
Example: Hosting an event for partners and their customers
An event will only allow you to use one form for taking registrations, but you may want to change the form visuals based on the person invited. Using separate events would make it difficult to manage capacity, impossible to use streaming in teams and some very disjointed reporting. So lets make a single form work for both!

Set up your event registration form with all the fields etc. in my example I’ve included two images, one that will show for partners and one that will show for everyone else.

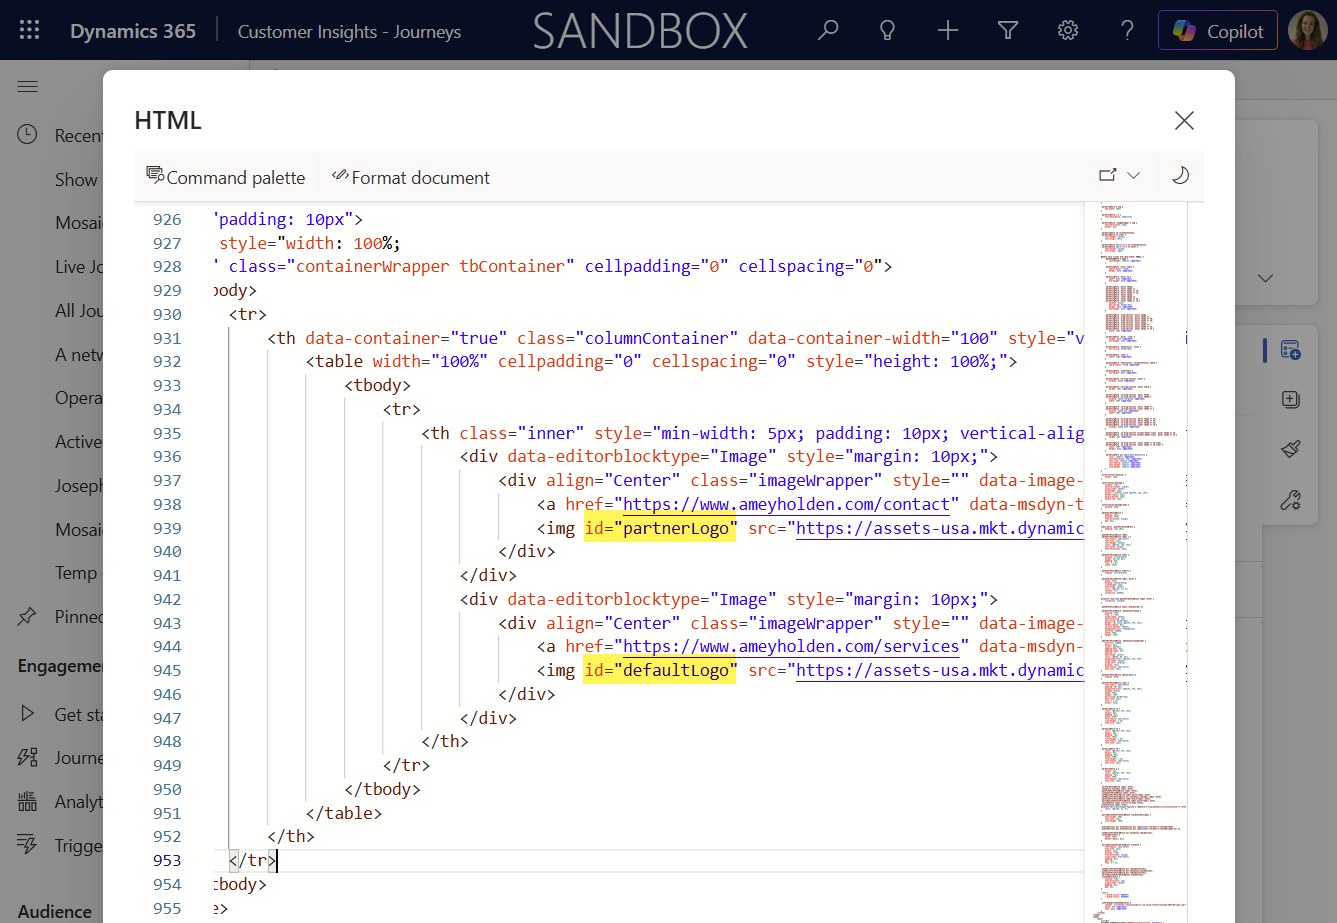
We will allocate an ‘id’ to each of the images. Edit the HTML and include id="defaultLogo" to one image, and id="partnerLogo" to the other. See below image for how to put this into the HTML.
Now we can add the script to show & hide the image, between the <body> and <form… tag - paste in the script below.
        <script>
        document.addEventListener("d365mkt-afterformload", function() {

        const url = location.href;

        // Extract parameter value from URL
        function extractParameter(url, paramName) {
            paramName = paramName.replace(/[\[\]]/g, "\\$&");
            const regex = new RegExp("[?&]" + paramName + "(=([^&#]*)|&|#|$)");
            const results = regex.exec(url);
            if (!results) return null;
            if (!results[2]) return '';
            return decodeURIComponent(results[2].replace(/\+/g, " "));
        }

        // Set form input values
        const formType = extractParameter(url, 'type');
        console.log(formType);
        var partnerLogo = document.getElementById("partnerLogo");
        var defaultLogo = document.getElementById("defaultLogo");

        if (!partnerLogo) return;

        if (formType === "Partner" || formType === "partner") {
            partnerLogo.style.display = "block";
            defaultLogo.style.display = "none";
        } else {
            partnerLogo.style.display = "none";
            defaultLogo.style.display = "block";
        }

        });
        </script>
See below image for how to put this into the HTML.

That’s it! Save and publish the form. Either embed the form into your own website or host on a stand alone page. Append to the end of the url type=anythingelseyouwant or type=partner to see the image content change. When you send your invitations, just include the correct parameter in the links you provide.
If it’s on the standalone page you use & before the parmeter, if its a page on your website without any parameters use ?


This is a more simple example, but it gives you an idea of how show/hide of content based on URL parameters can be achieved. Questions, comments and new challenging questions always welcome!