Navigation bar language & sign in - Transform your Dynamics Marketing Event Portal
Another episode of making configurations to a Dynamics Marketing Event Portal in the name of making it look pretty, branded and a little more stylish. This post will show you how to hide the ‘Change language’ and ‘Sign in’ buttons on your Event Portal navigation bar.
At the start of this ‘series’ I covered the slightly painful set up process for making changes to the event portal - so if you haven’t done that yet and have no idea what I am talking about there is a step by step guide for you here.
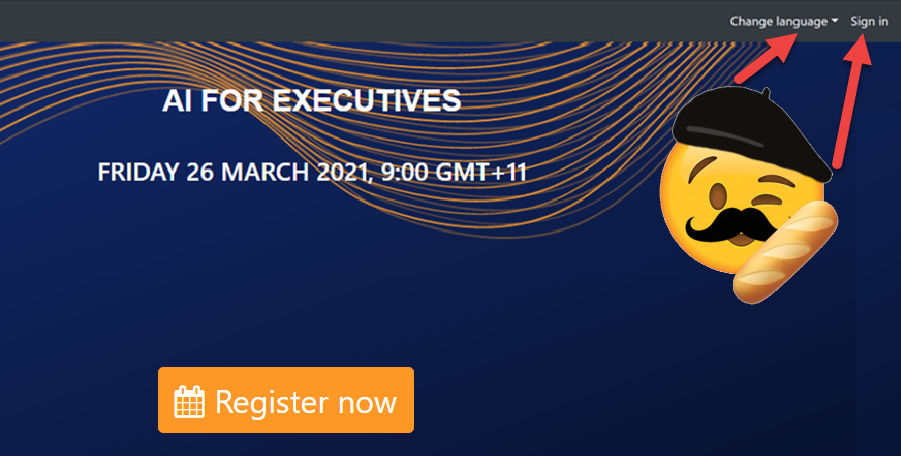
Hide the navigation bar ‘Change language’ and ‘Sign in’ buttons
The Default
Change language - It’s great that the event portal is multi-lingual ‘as standard’. The localised content is limited to specific elements such as the ‘Register now’ button, while the actual event descriptions and content will not be translated. A single Event record can only support text for one language. [1] From my experience customers often want this to be removed from the navigation bar.
Sign in - I have never really understood what the sign in functionality would be used for on a Dynamics Marketing Event Portal, until today. If you want to prevent anonymous registrations and restrict who can/cannot register for the event, then you can require customers to log in before registering for an event. This also creates a nice place for the customer to see, manage and cancel registrations as needed - cool! [2] However it doesn’t allow you to use the ‘marketing form’ for the registration, you cannot allow people to register for sessions and in many cases this is an unwanted feature that should be hidden.
The Dream
Lets make the ‘sign in’ and ‘Change language’ controls mysteriously disappear - without breaking anything!

Making the dream come true
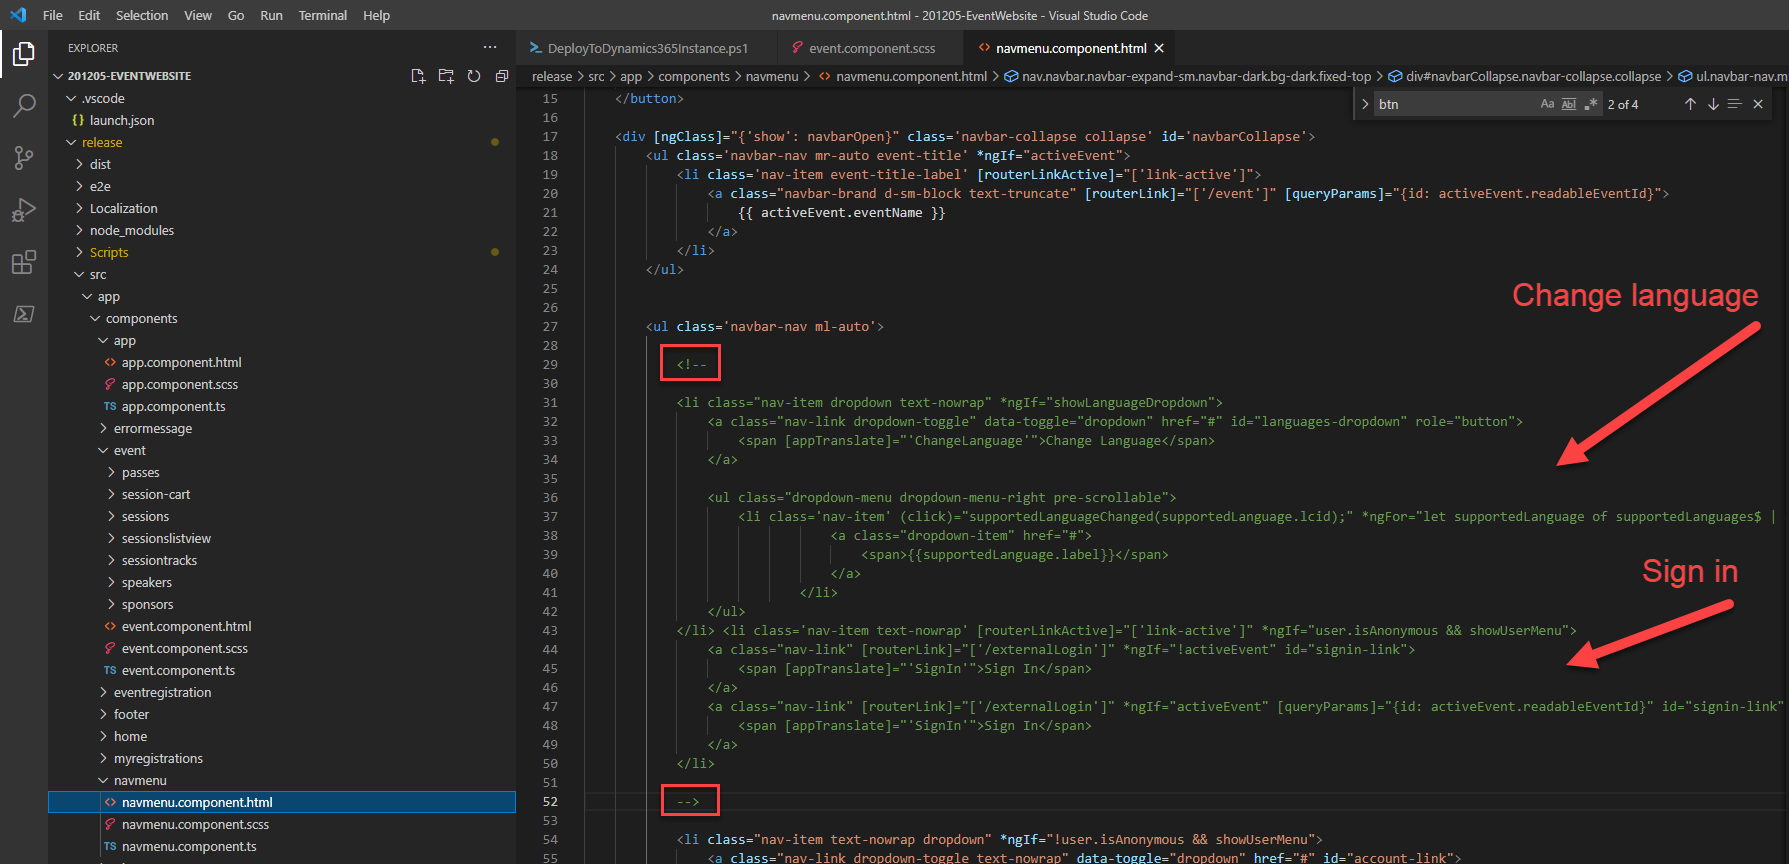
Assuming you completed the steps in my previous article you are ready to hide some navigation bar buttons. The log in and change language controls are stored in the navmenu.component.html file.
1. Open the source code folder in Visual Studio

2. Navigate to the navmenu.component.html file
Obviously we don’t want to delete this - in case we later decide to include all the translations and leverage the log in functionality at a later date
3. Comment out the below snippet of code by putting <!— at the start and —> at the end of the text chunk
Deploy your changes
You are now ready to publish your changes using the DeployToDynamics365Instance.ps1 file - check out my separate reference blog for details on how to do this if you missed it in my previous posts or need a recap -> https://www.ameyholden.com/articles/deploytodynamics365instance-ps1
Admire your work
Go to your portal, do a Force Refresh aka Ctrl + F5 so that it clears the local cache and tadahhhhhh - squeaky clean! Now I wonder what we could use that space for instead… a logo maybe? Watch this space!

Want to do more changes? Have a browse of my other articles in this series and tell me about the magical things you have uncovered too. Or if you are stuck on this journey too, and this doesn’t help just drop me a message or contact below - I cannot promise I’m a professional but I will give it my best shot!
[1] Localizing Dynamics 365 for Marketing Content (campusmanagement.com)
[2] Set up an event website (Dynamics 365 Marketing) | Microsoft Docs