Logos - Transform your Dynamics Marketing Event Portal
Another episode of making configurations to a Dynamics Marketing Event Portal in the name of making it look pretty, branded and a little more stylish. At the start of this ‘series’ I covered the slightly painful set up process for making changes to the event portal - so if you haven’t done that yet and have no idea what I am talking about there is a step by step guide for you here. This post will show you how to add a logo on to your Event Portal.
Add your logo to the portal
The Default
Nothing to see here - no logo, no space for a logo and no real sense of how this portal is part of my company/brand. The usual ‘normal’ Dynamics portal method of adding a logo [1] will do absolutely nothing on your Event portal but it did give me a bit of a clue on where to start! This dream comes in two flavours depending on what you fancy - logo to the right or logo to the left.
The Dream

Making the dream come true
Assuming you completed the steps in my previous article you are ready to add your logo into your Dynamics Event Portal. The file to add this in is navmenu.component.html.
1. Open the source code folder in Visual Studio

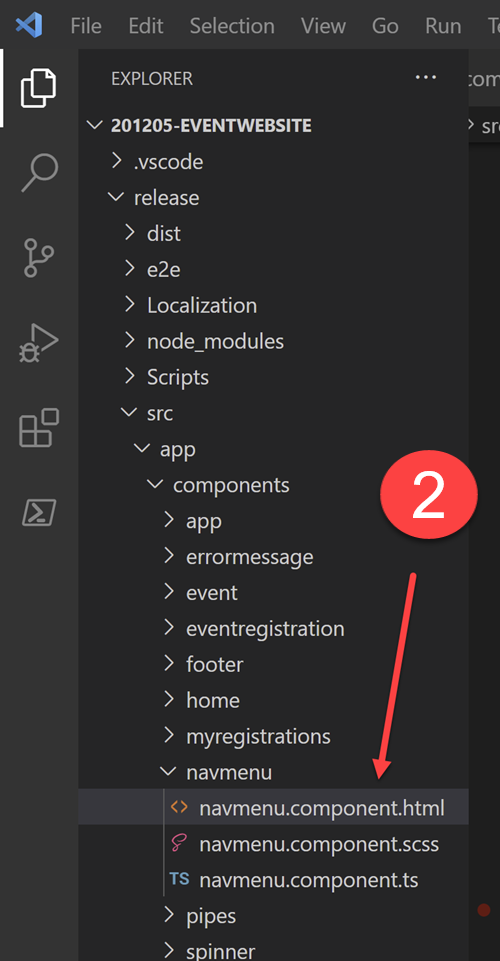
2. Navigate to the navmenu.component.html file
Create your logo file
We need to host the logo image somewhere that the site can find it
3. Navigate to your Portal Management app

4. Open ‘Web Files’
5. Locate the Logo file, if you cant find it - create one as shown below
Name: Logo
Website: Event Portal
Parent Page: Home
Partial Url: logo.png
Publishing State: Published
6. Go to the Notes tab
7. Upload your logo file - recommended height is around 35-50px but you can tinker with this afterwards too
8. Save & Close
From here its a bit of a '“make your own' story” type thing - whether you want your logo on the right or the left, you choose your path.
Logo on the right
Assuming you have previously hidden the ‘Change language’ and ‘Log in’ controls from the right hand side of the nav bar it creates a lovely space your logo instead. Check out this article to see how to hide those.
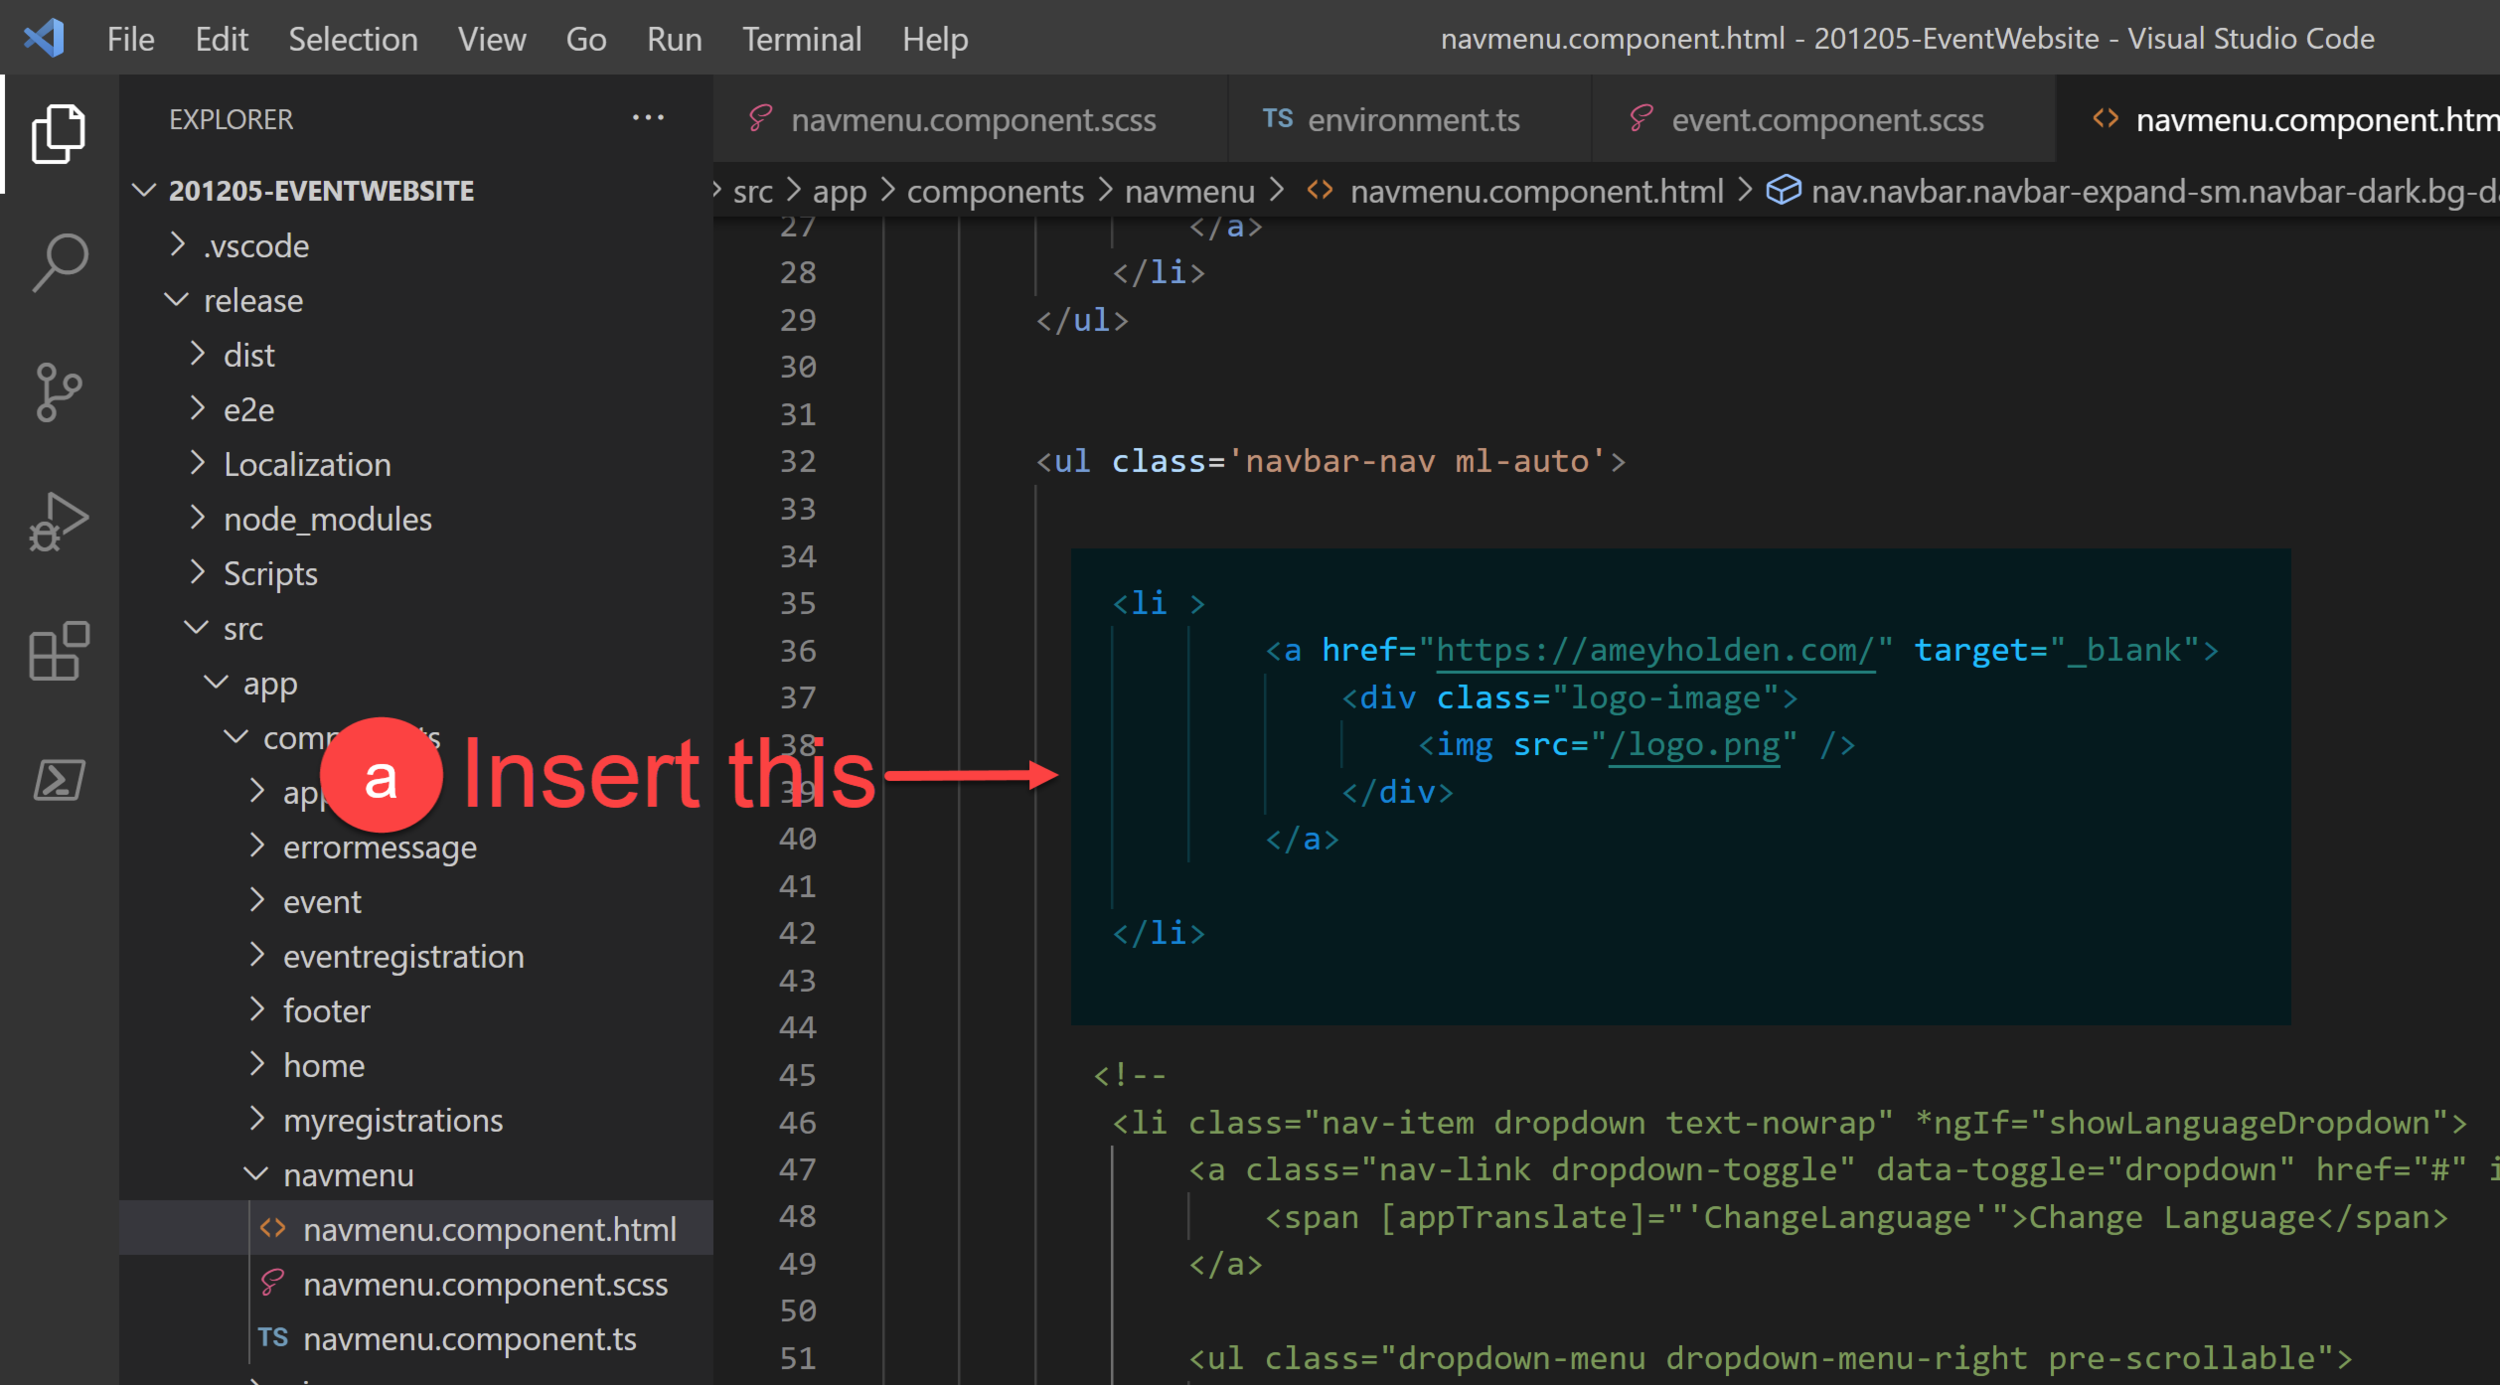
a) Underneath <ul class='navbar-nav ml-auto'> insert the below snippet - ensuring that logo.png matches the web file name in step 5 and that the a href"=”https://… points to your desired website
<li >
  <a href="https://ameyholden.com/" target="_blank">
    <div class="logo-image">
      <img src="/logo.png" />
    </div>
  </a>
</li>
Skip on ahead to Final Touches or maybe add your logo on the left too!?
Logo on the left
Maybe you don’t want to remove the ‘Change Language’ and Sign in’ functions? or you just don’t want to see the word ‘Home’ or maybe your just a top left kind of person. No problemo my friend!
i) On the second line where you find <a class="navbar-brand pr-3 mr-auto"…. delete (carefully) the text for [appTranslate]="'Home'"
ii ) Replace the text ‘Home’ between the tags >< id="home-button">Home</a> with the below snippet - ensuring that logo.png matches the web file name in step 5
<div class="logo-image">
   <img src="/logo.png" />
</div>

Proceed to Final Touches
Final Touches
Depending on the size of the logo you uploaded it might be a little too big or small for your site so lets take control of the logo size and position.
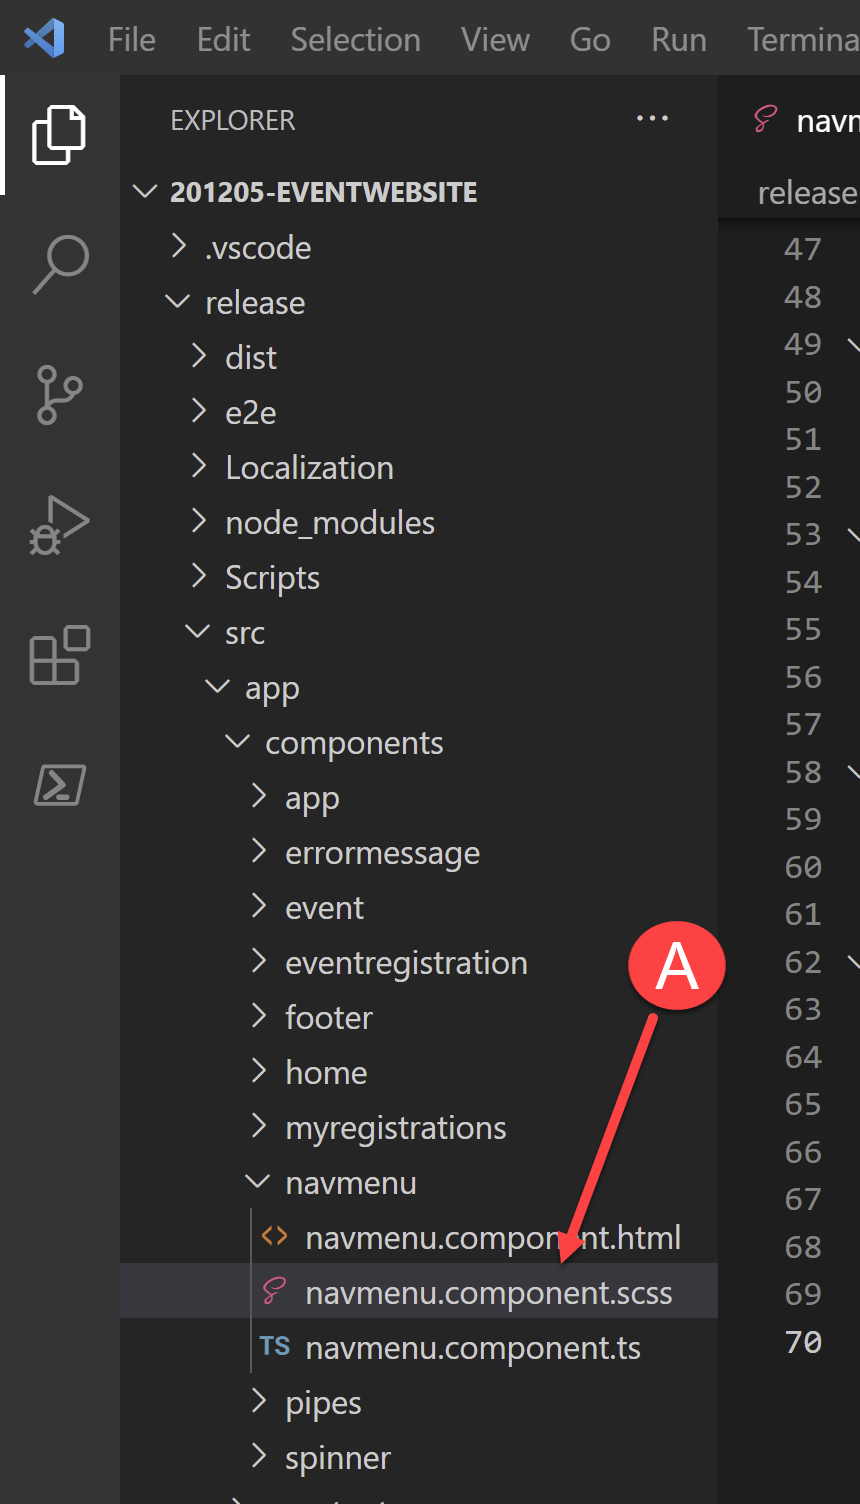
A. Navigate to the navmenu.component.html file
B. Add or update the .logo-image img{ section as below
.logo-image img {
    top: 1px;
    width: 120px;
    height: 37px;
    margin-right: 1px;
    margin-left: 1px;
    float: left;
    position: relative;
}

C. You are now ready to publish your changes using the DeployToDynamics365Instance.ps1 file - check out my separate reference blog for details on how to do this if you missed it in my previous posts or need a recap -> https://www.ameyholden.com/articles/deploytodynamics365instance-ps1
You might want to tweak the settings for height and width parameters of the logo after your first publish depending on your logos’ dimensions
Admire your work
Go to your portal, do a Force Refresh aka Ctrl + F5 so that it clears the local cache and tadahhhhhh!
P.S. It can take a whole for changes made in the data for the portal to surface on the front end - i.e. your logo so if things aren’t looking right try clearing the portal cache. First you need to log in to the portal the check my article here on how to (and how not to) clear the cache.
P.P.S. If you previously hid your log in buttons like me, then you can get to the login page directly here -> https://yourdomain.microsoftcrmportals.com/SignIn

Want to do more changes? Have a browse of my other articles in this series and tell me about the magical things you have uncovered too. Or if you are stuck on this journey too, and this doesn’t help just drop me a message or contact below - I cannot promise I’m a professional but I will give it my best!