Add the Communication Preferences tab for Customer Insights - Journeys to Lead Forms
One of the biggest changes in real-time marketing for Customer Insights - Journeys is how consent is stored and managed. In outbound marketing the ‘Bulk Email’ field on the Contact record was the key determinant of consent. Real-time marketing captures consent as ‘Contact Points’, so each contact detail you have such as an email address, or a phone number; has its own consent of Opted In or Opted Out (or ‘Not Set’). If there are duplicate contacts or leads with the same email address there will still be only one contact point consent for the email address.
The shiny new Communication tab we have all been waiting for
Once you enable the feature switch for ‘Manage consent in contact and lead forms (Preview)’ or the feature comes out of preview and is enabled by default. You will might find a magical new ‘Communication’ tab on the Out of the box Contact and Lead form where you can ‘quickly see and update customer consent’ across multiple compliance profiles, topics and purposes. However custom forms, and customised out of the box forms may be missing the magical new tab.
More feature details here.
Further reading on compliance/consent here, it’s important to understand it -> https://learn.microsoft.com/en-us/dynamics365/customer-insights/journeys/real-time-marketing-compliance-settings


Add to a Lead form
EDIT: You don’t need to fiddle with form XML anymore to add this control, it can be done on the form editor in the Power Apps maker studio YAY!
For obvious reasons - do this in a development environment, test it and check it before sharing your insightful magic with the rest of your users!
If you have XRMToolBox installed, you can edit the form xml using the FormXML Manager tool and just skip to the Tab and Control snippet section, however I know not all organisations allow access to this tool, so the manual solution extraction method is explained below.
Create a new solution into which we will add the Lead form that you want to add the communication control tab on to.
Edit the custom form with the below:

A tab clearly labelled to show that this is where the communication control tab should be (we can change this name later but having an obvious name will help you dig around in the XML a bit more easily in the next step). See below ‘GIVE ME THE MARKETING CONSENT TAB’ as an example.

Add the ‘Do Not Bulk Email’ column to the section, (or any other yes/no column you can find). Configure the ‘Toggle’. Save and publish your changes.
Note: the reason for this is to ensure that the ‘Control'Descriptions’ tags are available in the form XML when you edit later, this toggle will be removed after you complete the XML changes.

If your form looks like this you are ready to go - export as an unmanaged solution.
Edit the Form XML
Download the solution you just exported and in your download file explorer, right click and ‘Extract All…’. Open the customizations.xml file in whatever plain text program you use (I use visual studio code which beats notepad hands down, but entirely optional).

In the customizations.xml file search for the tab that you want to add the insights into (that handy tab name you added earlier becomes very useful now!) Replace everything inside the <tab> tags with the below Tab snippet, note its tab not tabs.

    <tab name="tab_communication" id="{d78572bd-8682-9d9b-382e-151817834950}" IsUserDefined="0" locklevel="0" showlabel="true" contenttype="singleComponent" expanded="true" visible="true">
      <labels>
        <label description="MAGICAL NEW CONSENT TAB" languagecode="1033" />
      </labels>
      <columns>
        <column width="100%">
          <sections>
            <section name="tab_communication_section_communication" showlabel="false" showbar="false" locklevel="0" id="{ee7ac102-3a5a-e1d4-8de0-ad95b9ec83a1}" IsUserDefined="0" layout="varwidth" columns="1" labelwidth="115" celllabelalignment="Left" celllabelposition="Left">
              <labels>
                <label description="Communication Consent" languagecode="1033" />
              </labels>
              <rows>
                <row>
                  <cell id="{287dad47-4183-d622-b4e0-82a351cb6dd3}" showlabel="false">
                    <labels>
                      <label description="" languagecode="1033" />
                    </labels>
                    <control id="ContactabilityGridControl" classid="{F9A8A302-114E-466A-B582-6771B2AE0D92}" disabled="false" uniqueid="{DA8CA1CC-D87E-4ABC-8063-406CFBED93A5}" />
                  </cell>
                </row>
              </rows>
            </section>
          </sections>
        </column>
      </columns>
    </tab>
Replace the Control Description for the donotbulkemail toggle control highlighted in the image, with the Control Description snippet below.

<controlDescription forControl="{DA8CA1CC-D87E-4ABC-8063-406CFBED93A5}">    <customControl formFactor="0" name="Consent.ContactabilityGridControl.ContactabilityGridControl">
    <parameters />
  </customControl>
  <customControl formFactor="1" name="Consent.ContactabilityGridControl.ContactabilityGridControl">
     <parameters />
   </customControl>
  <customControl formFactor="2" name="Consent.ContactabilityGridControl.ContactabilityGridControl">
    <parameters />
 </customControl>
</controlDescription>
Import your changes
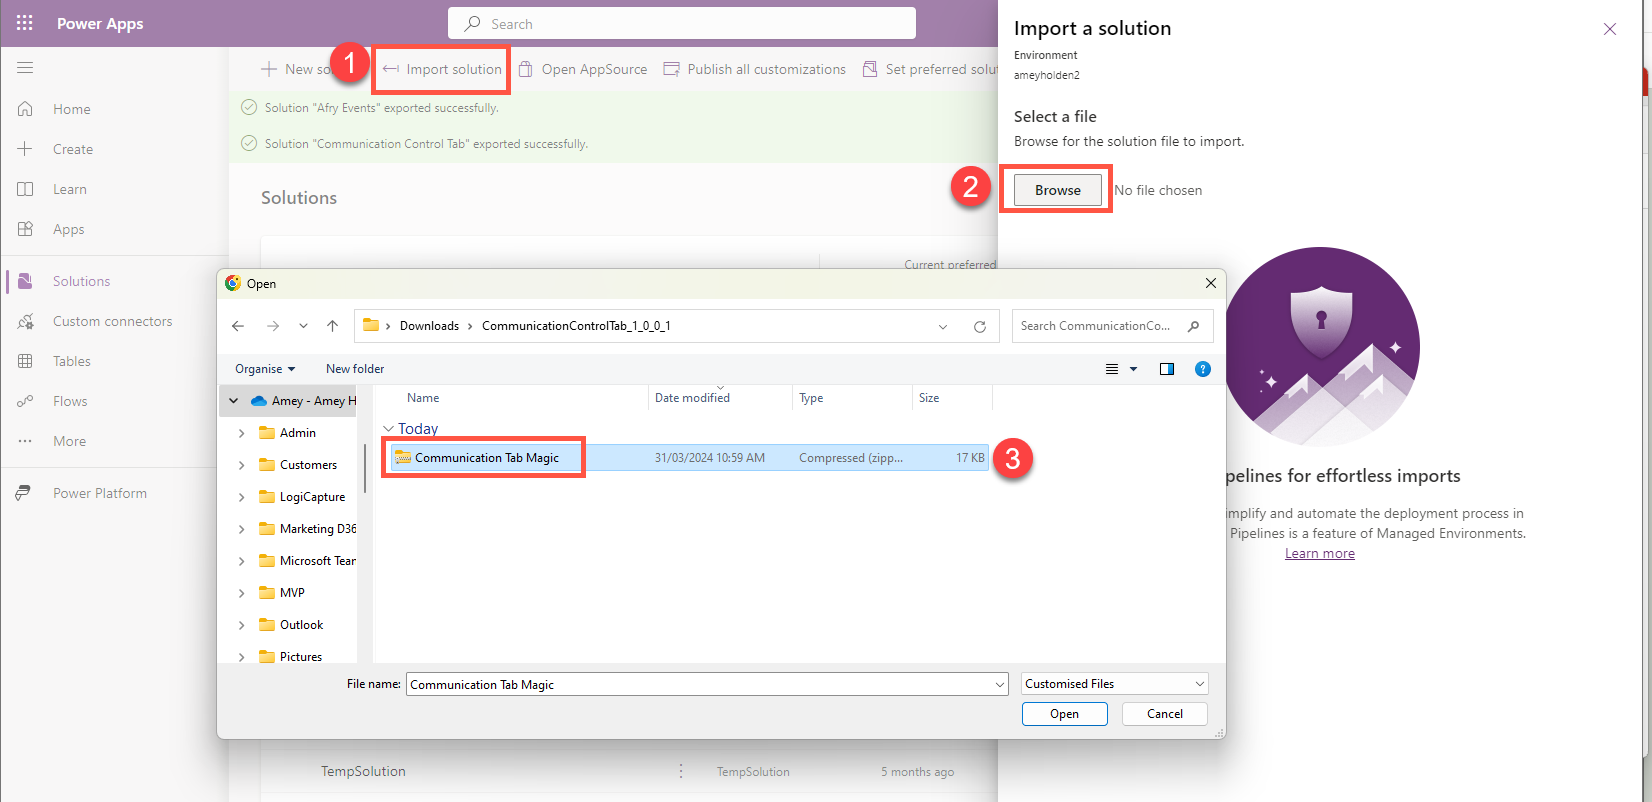
Save your changes from above then navigate into your extracted folder from earlier. Select the three files (customizations,solution,[Content_Types]), right click and ‘Compress to zip file’. The name of the folder doesn’t really matter so call it something useful e.g. ‘Communication Tab Magic’.

Return to the Power Apps maker studio and import your solution, ensuring you select the new zipped folder you created.
Publish your changes and admire your handy work.

Of course you can now open the Lead form from the maker studio to edit your tab label accordingly, publish. Go forth and consent manage!
Add to a Contact form & Further Reading

How to use the control, security role configuration and how to add to a Contact form which is possible without editing the XML can be found here (thanks Megan!)
Bonus Tip: Hide the ‘default’ profile

I strongly recommend to never use the default compliance profile, and also to hide it from the communication tab too

In the ‘Setting’ area of the Customer Insights - Journeys app - Deactivate the ‘default’ compliance profile (please!)