Set Dataverse Choices in Power Automate dynamically - without a switch statement!
Choices are hard, especially when it comes to setting the value of a Dataverse choice option set or choices multi-select option set column field in Power Automate.
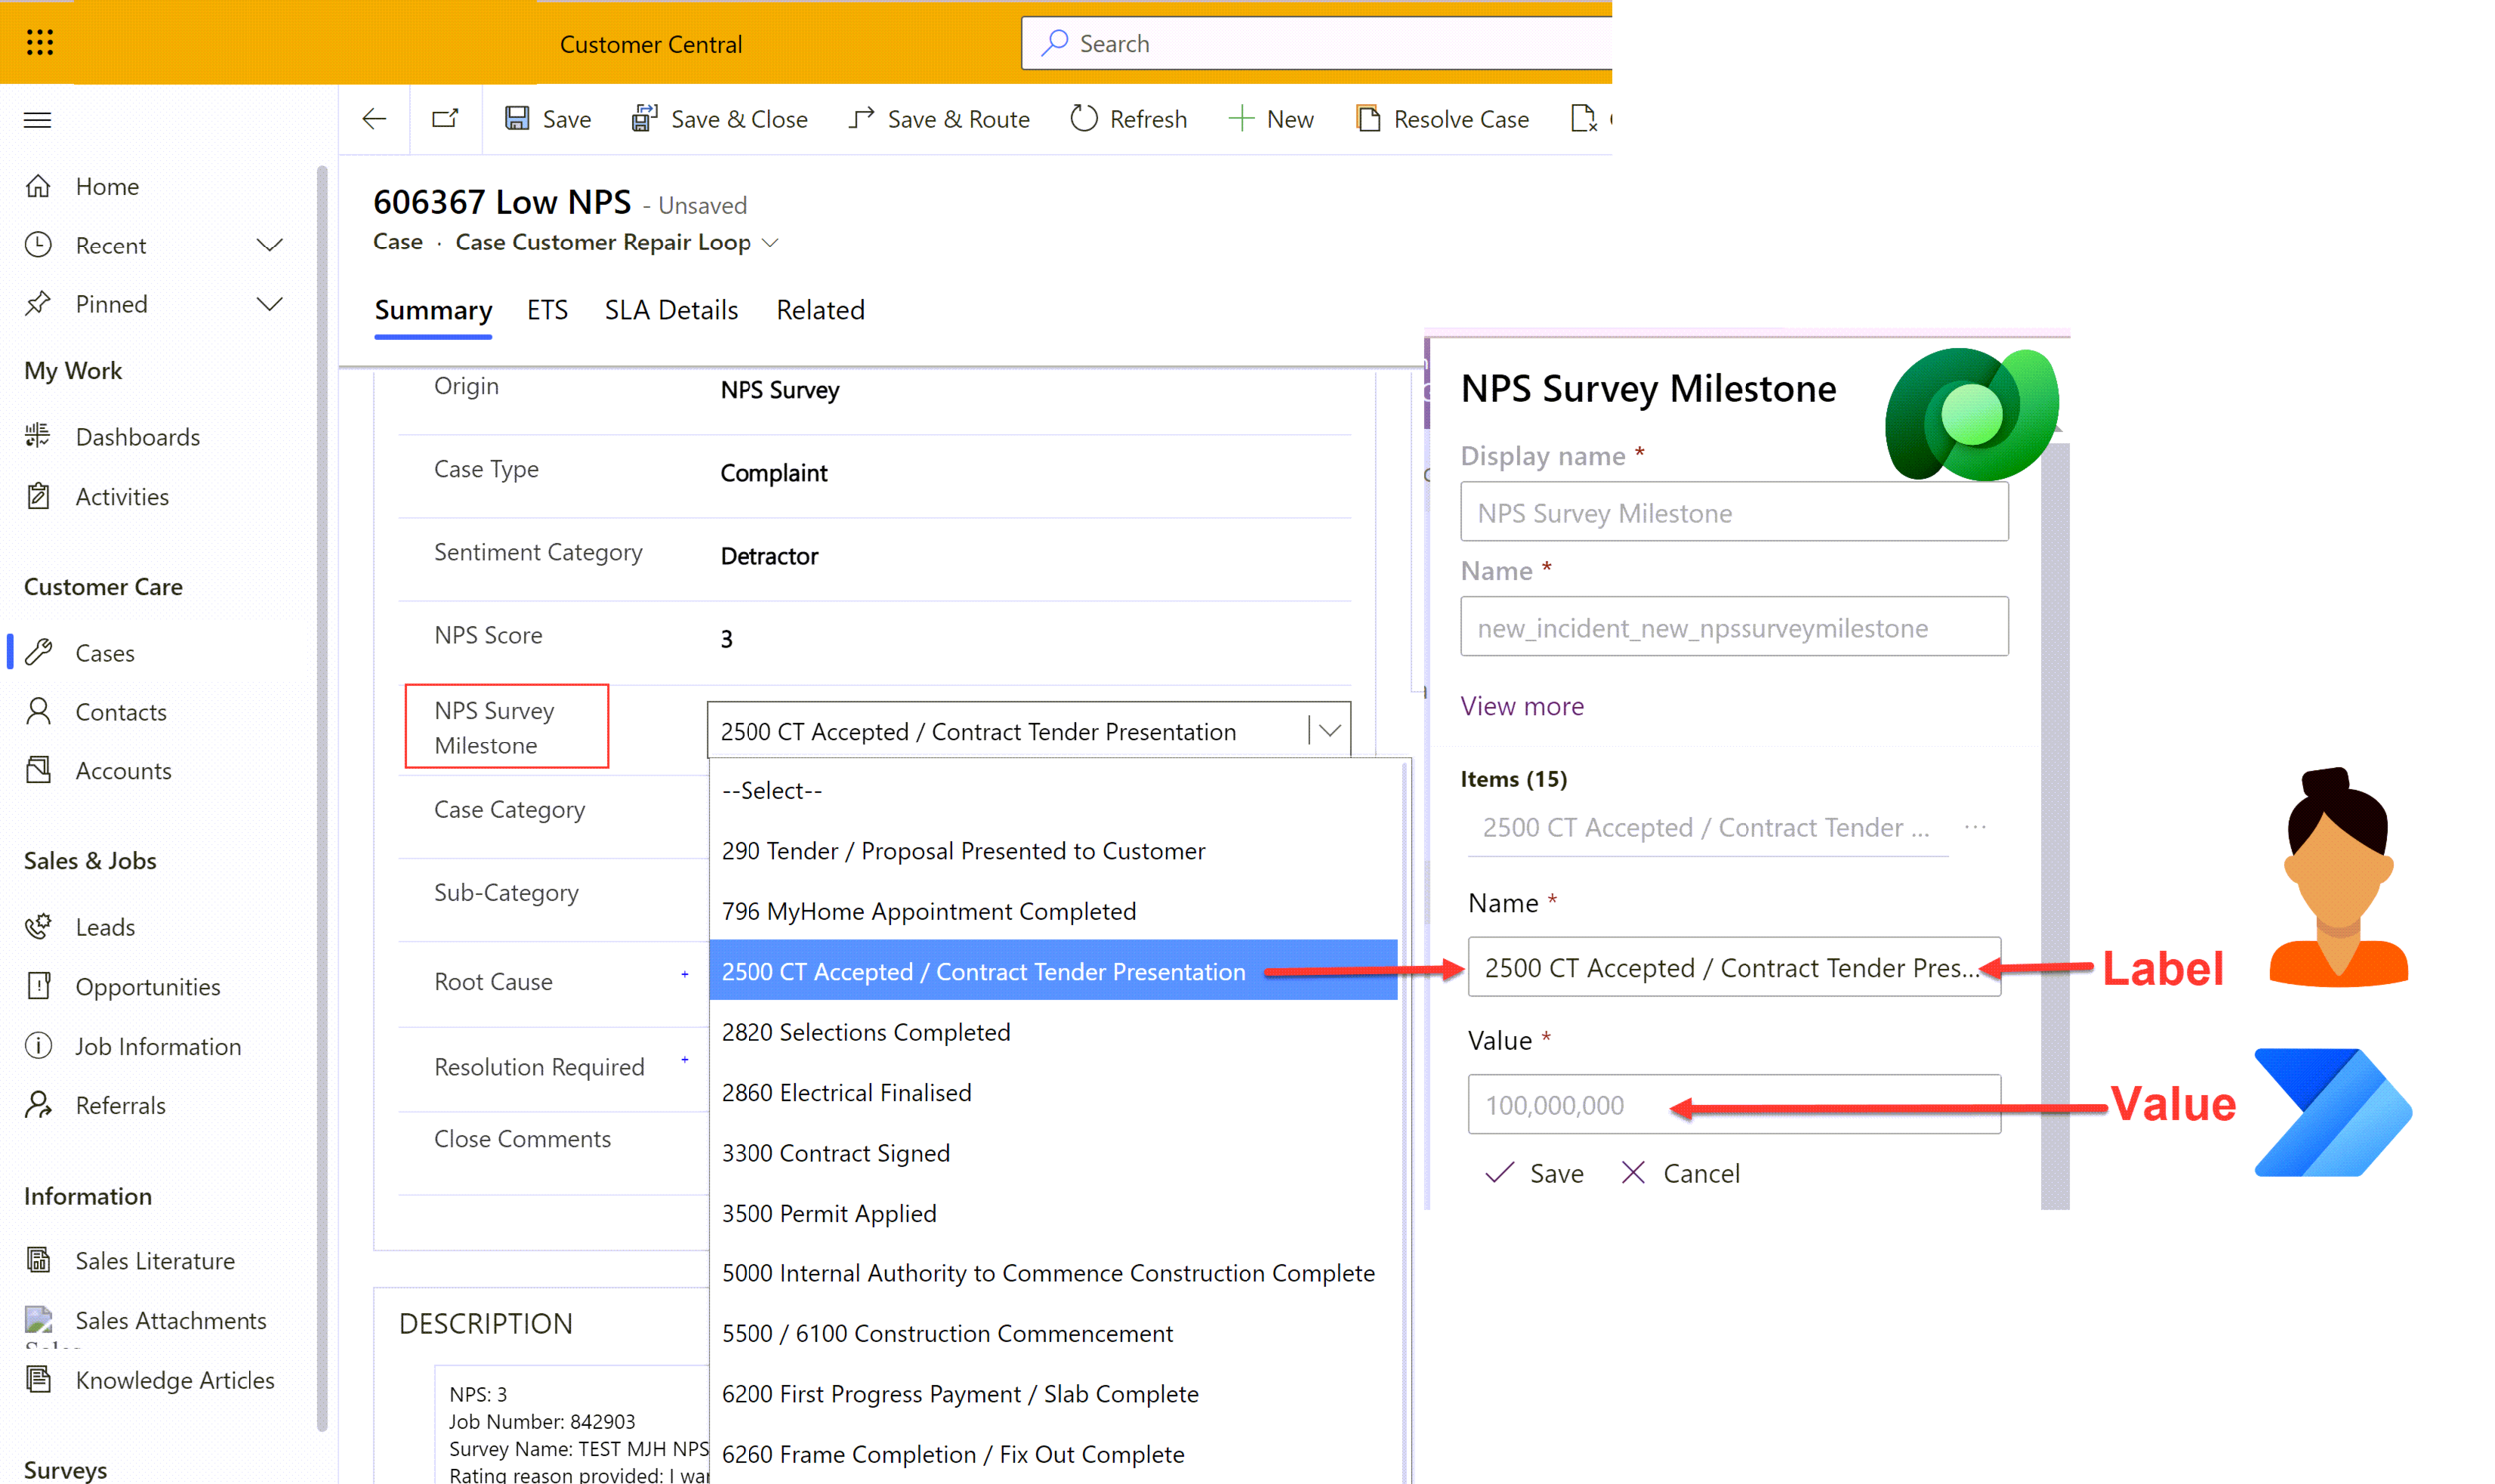
In your Dynamics 365 or Model-driven app you see a list of labels, but behind the scenes each label has an integer ‘Value’ assigned. If you are using power automate to set a choice/choices value in a create or update row action you have the option to choose a static value from the human readable list or if the value is dynamic, maybe based on inputs from a previous action or trigger then you can enter a ‘custom value’. In this case the flow expects the choice ‘Value’ rather than the ‘Label’.
Disclaimer: I am not responsible for creating the column with the prefix new_. I die inside a little bit every time I see it, I hope it doesn’t cause you too much distress. My advice is that every time you see new_ read it as ROOKIE-ERROR_.
Option 1: Switch Statement
Nothing new or novel here and a method I have used often in the past. Example here -> https://d365demystified.com/2020/04/29/switch-case-in-a-flow-power-automate/ plus also make sure you implement coalesce() as seen here -> https://sharepains.com/2018/05/29/switches-coalesce-power-automate/ to handle null values more gracefully.
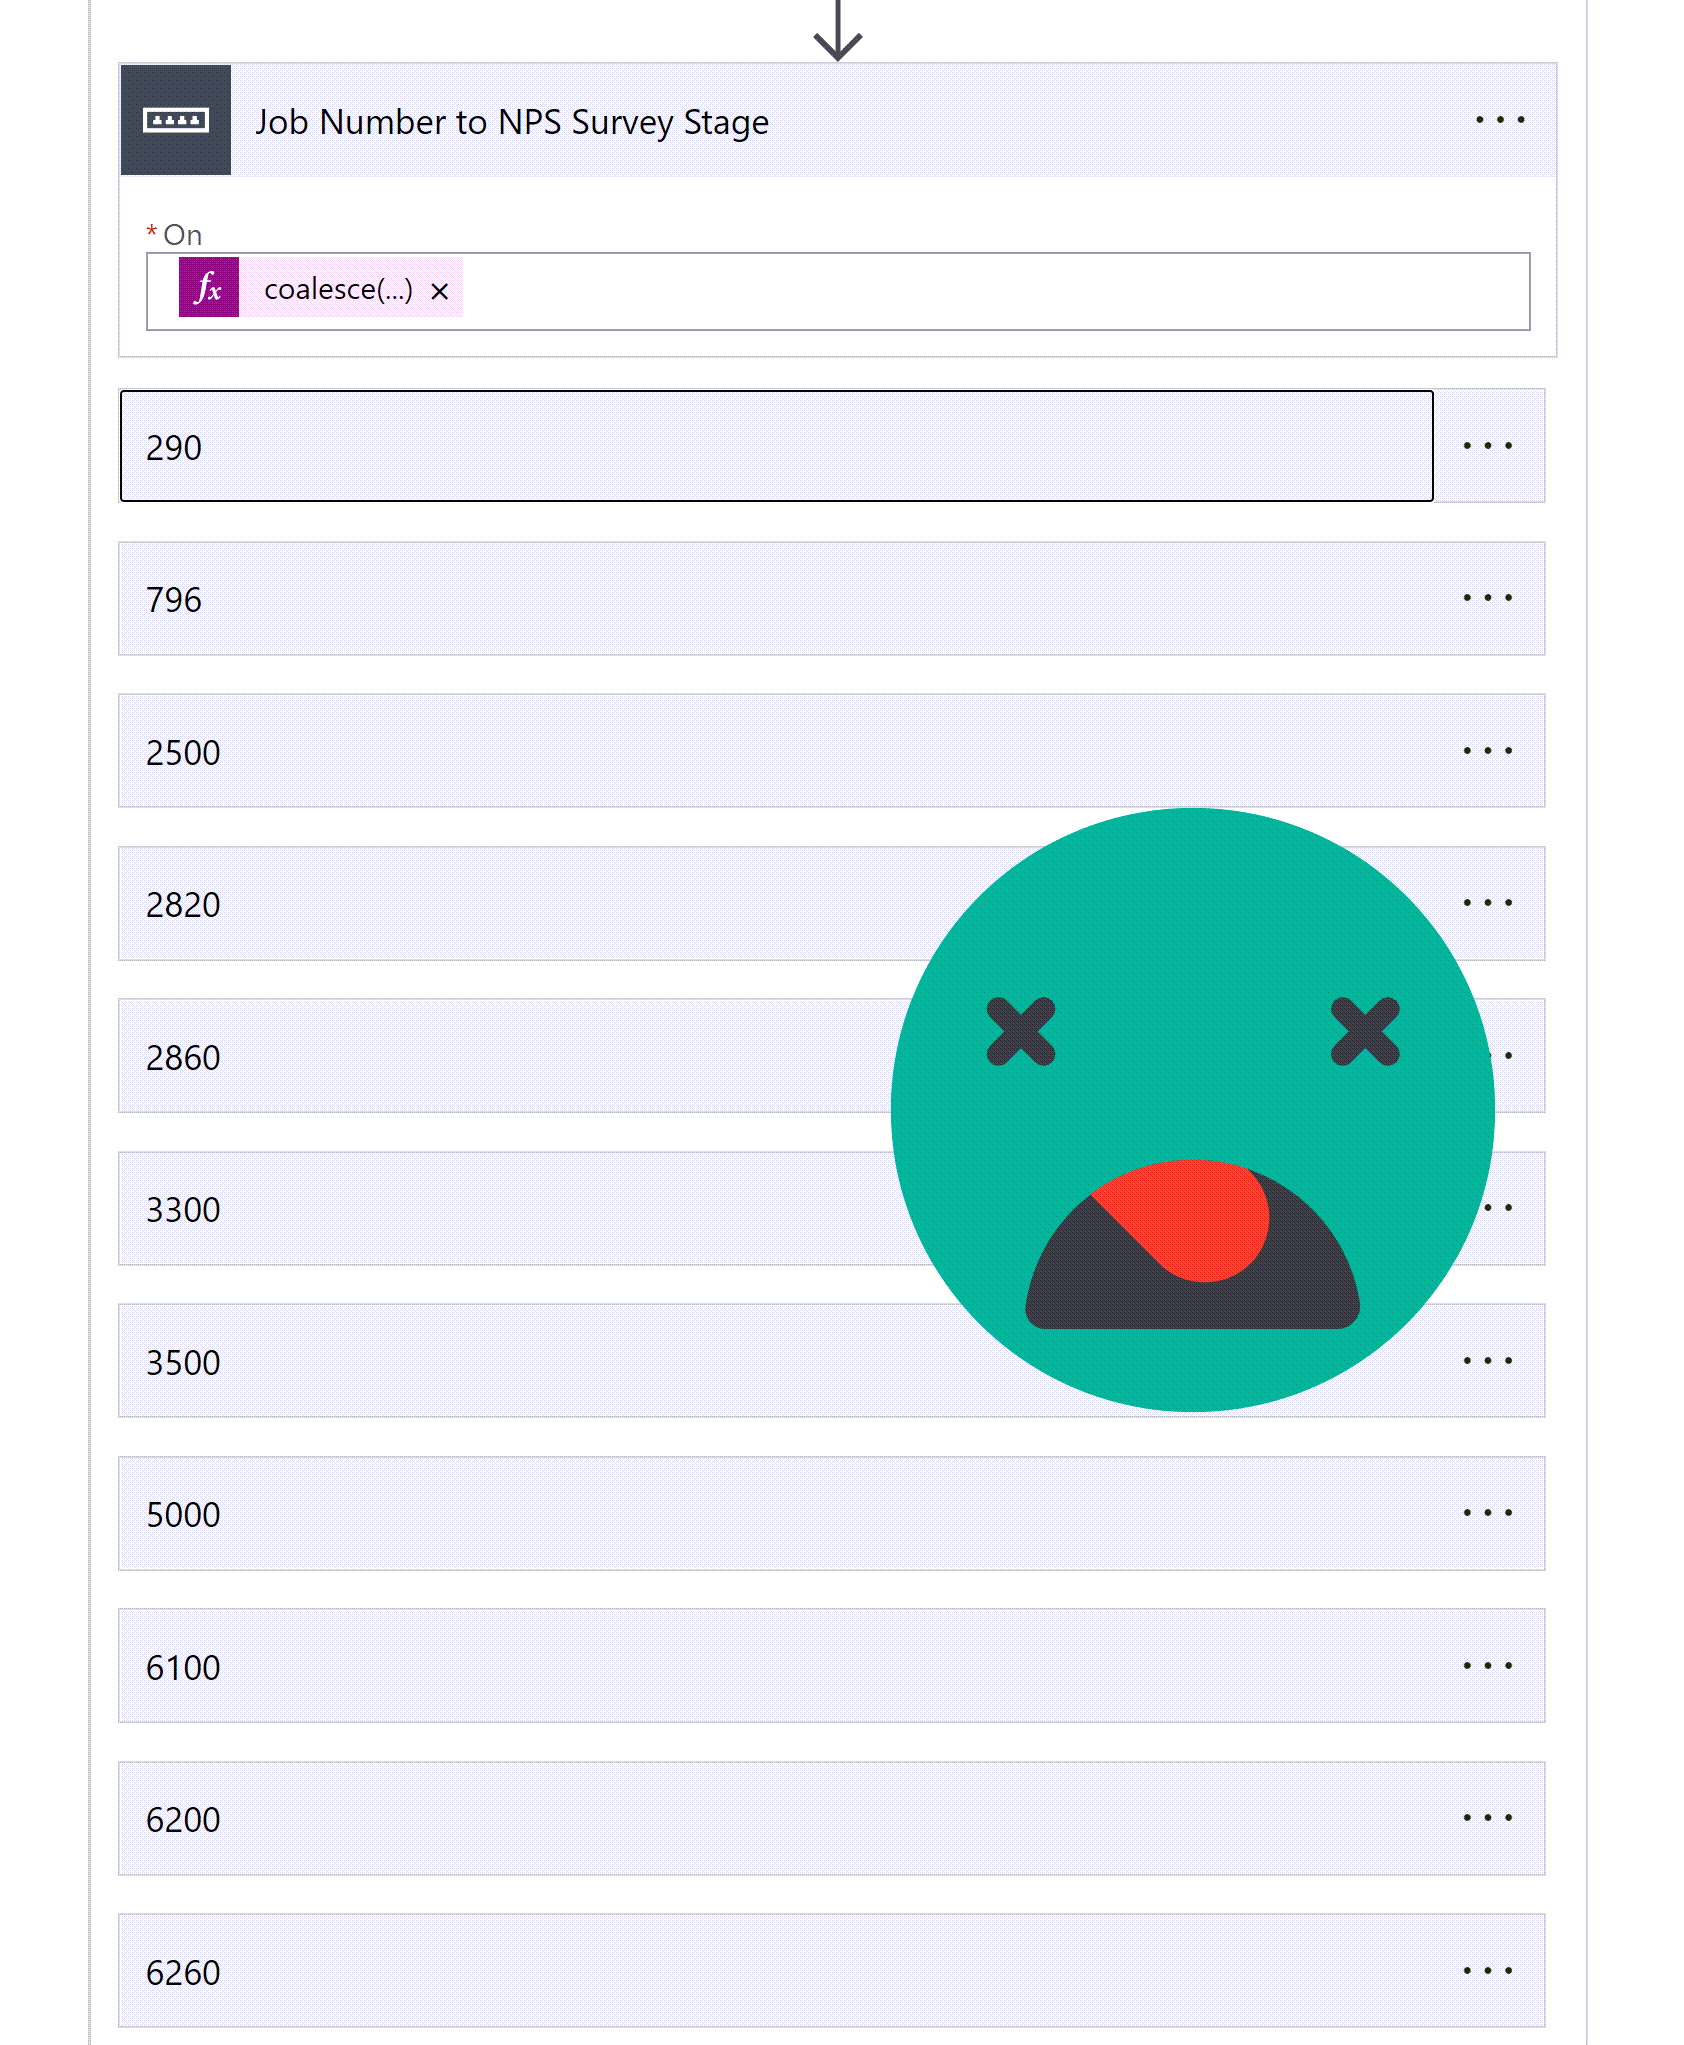
It works nicely for smaller choice sets but it’s the kind of ‘hard-coding’ that makes me feel a little bit dirty every time I do it. I don’t really like switch statements they are hard to work with and such flaky little creatures. When I came across a choice scenario with 10+ options, I decided there MUST be an easier way to do this!?
Option 2: GET the choice values
Enter ‘The Enabler’ George Doubinski - he’s not scared of a HTTP Request and big, long, complicated URLs. I take no credit for this solution, I am simply the inspiration, awkward question asker and pretty picture drawer. We are going to create the following flow, scroll on down for step by step instructions.
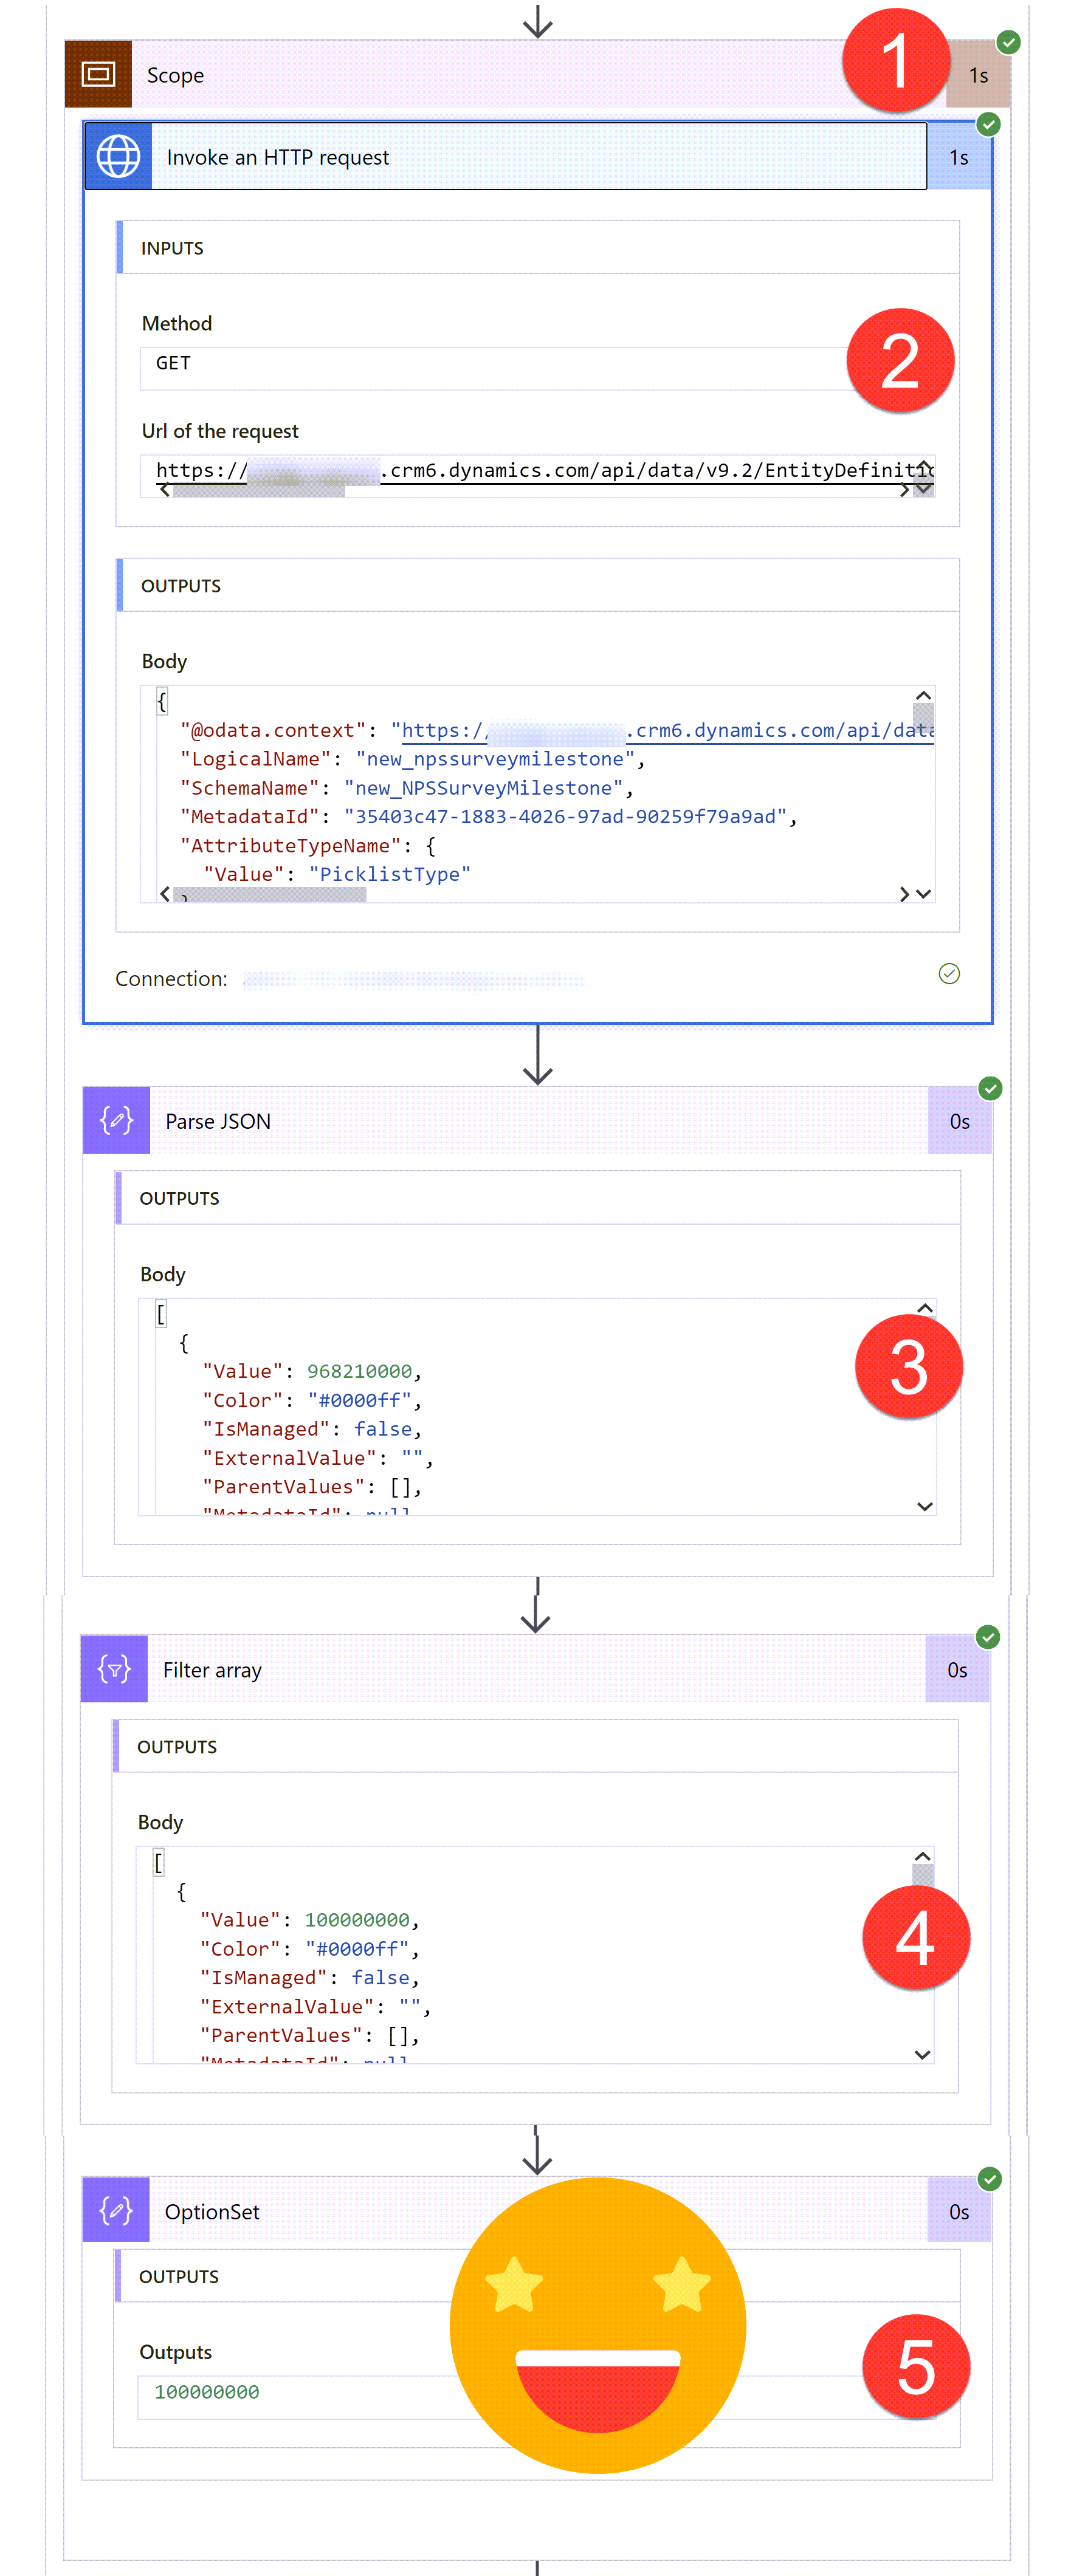
1) Scope It
All the following steps will live in a ‘Scope’ as they are a set of steps that relate to getting the choice value. Completely optional but apparently it makes things look a bit tidier and seems like good practice https://www.blueshiftco.com/blog/keep-your-flows-organized-using-scopes-in-power-automate
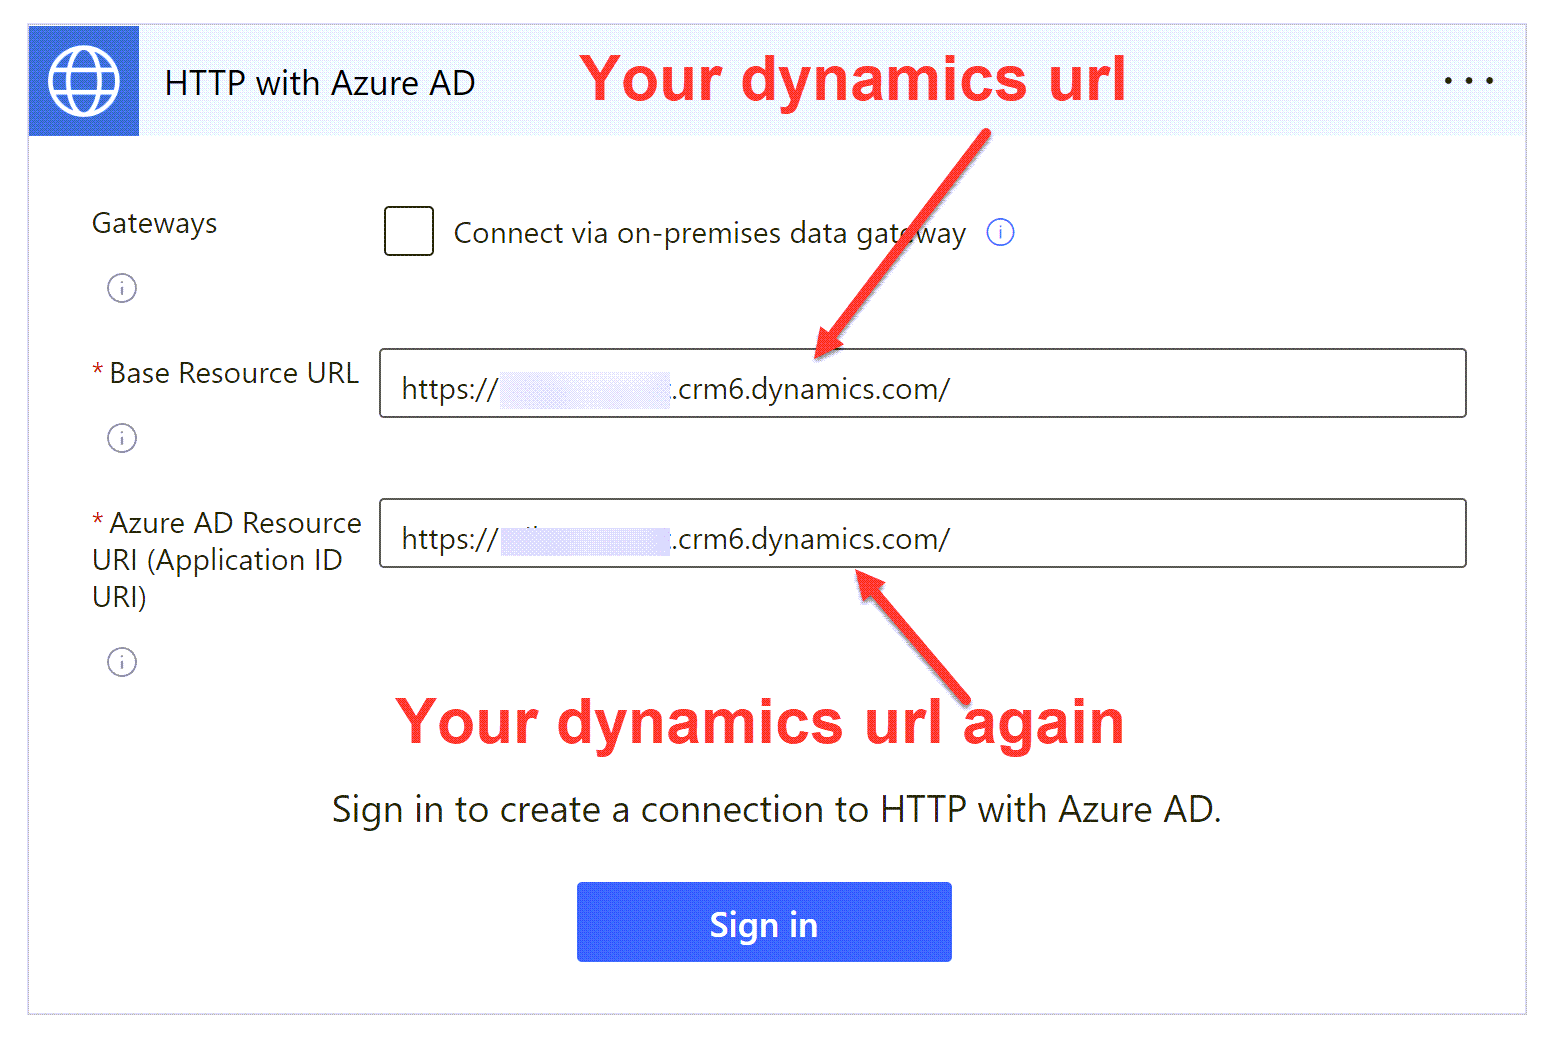
2a) Connect to HTTP with Azure AD
Don’t panic - you do not need to create an Azure App or anything else - just use your Dynamics/Power Apps URL for both the ‘Base Resource URL’ and the “Azure AD Resource URI’
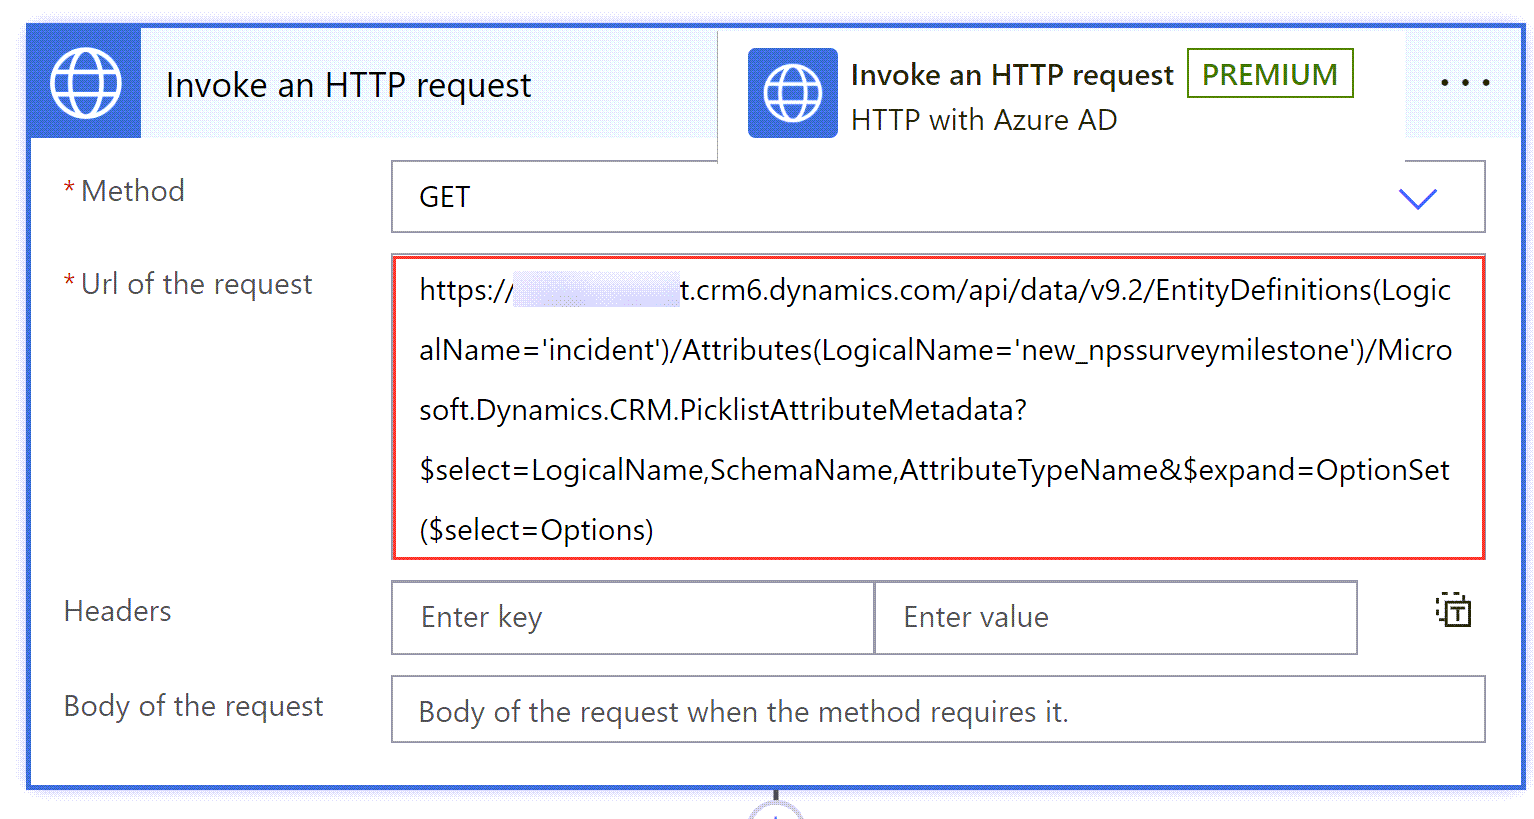
2b) HTTP GET Request
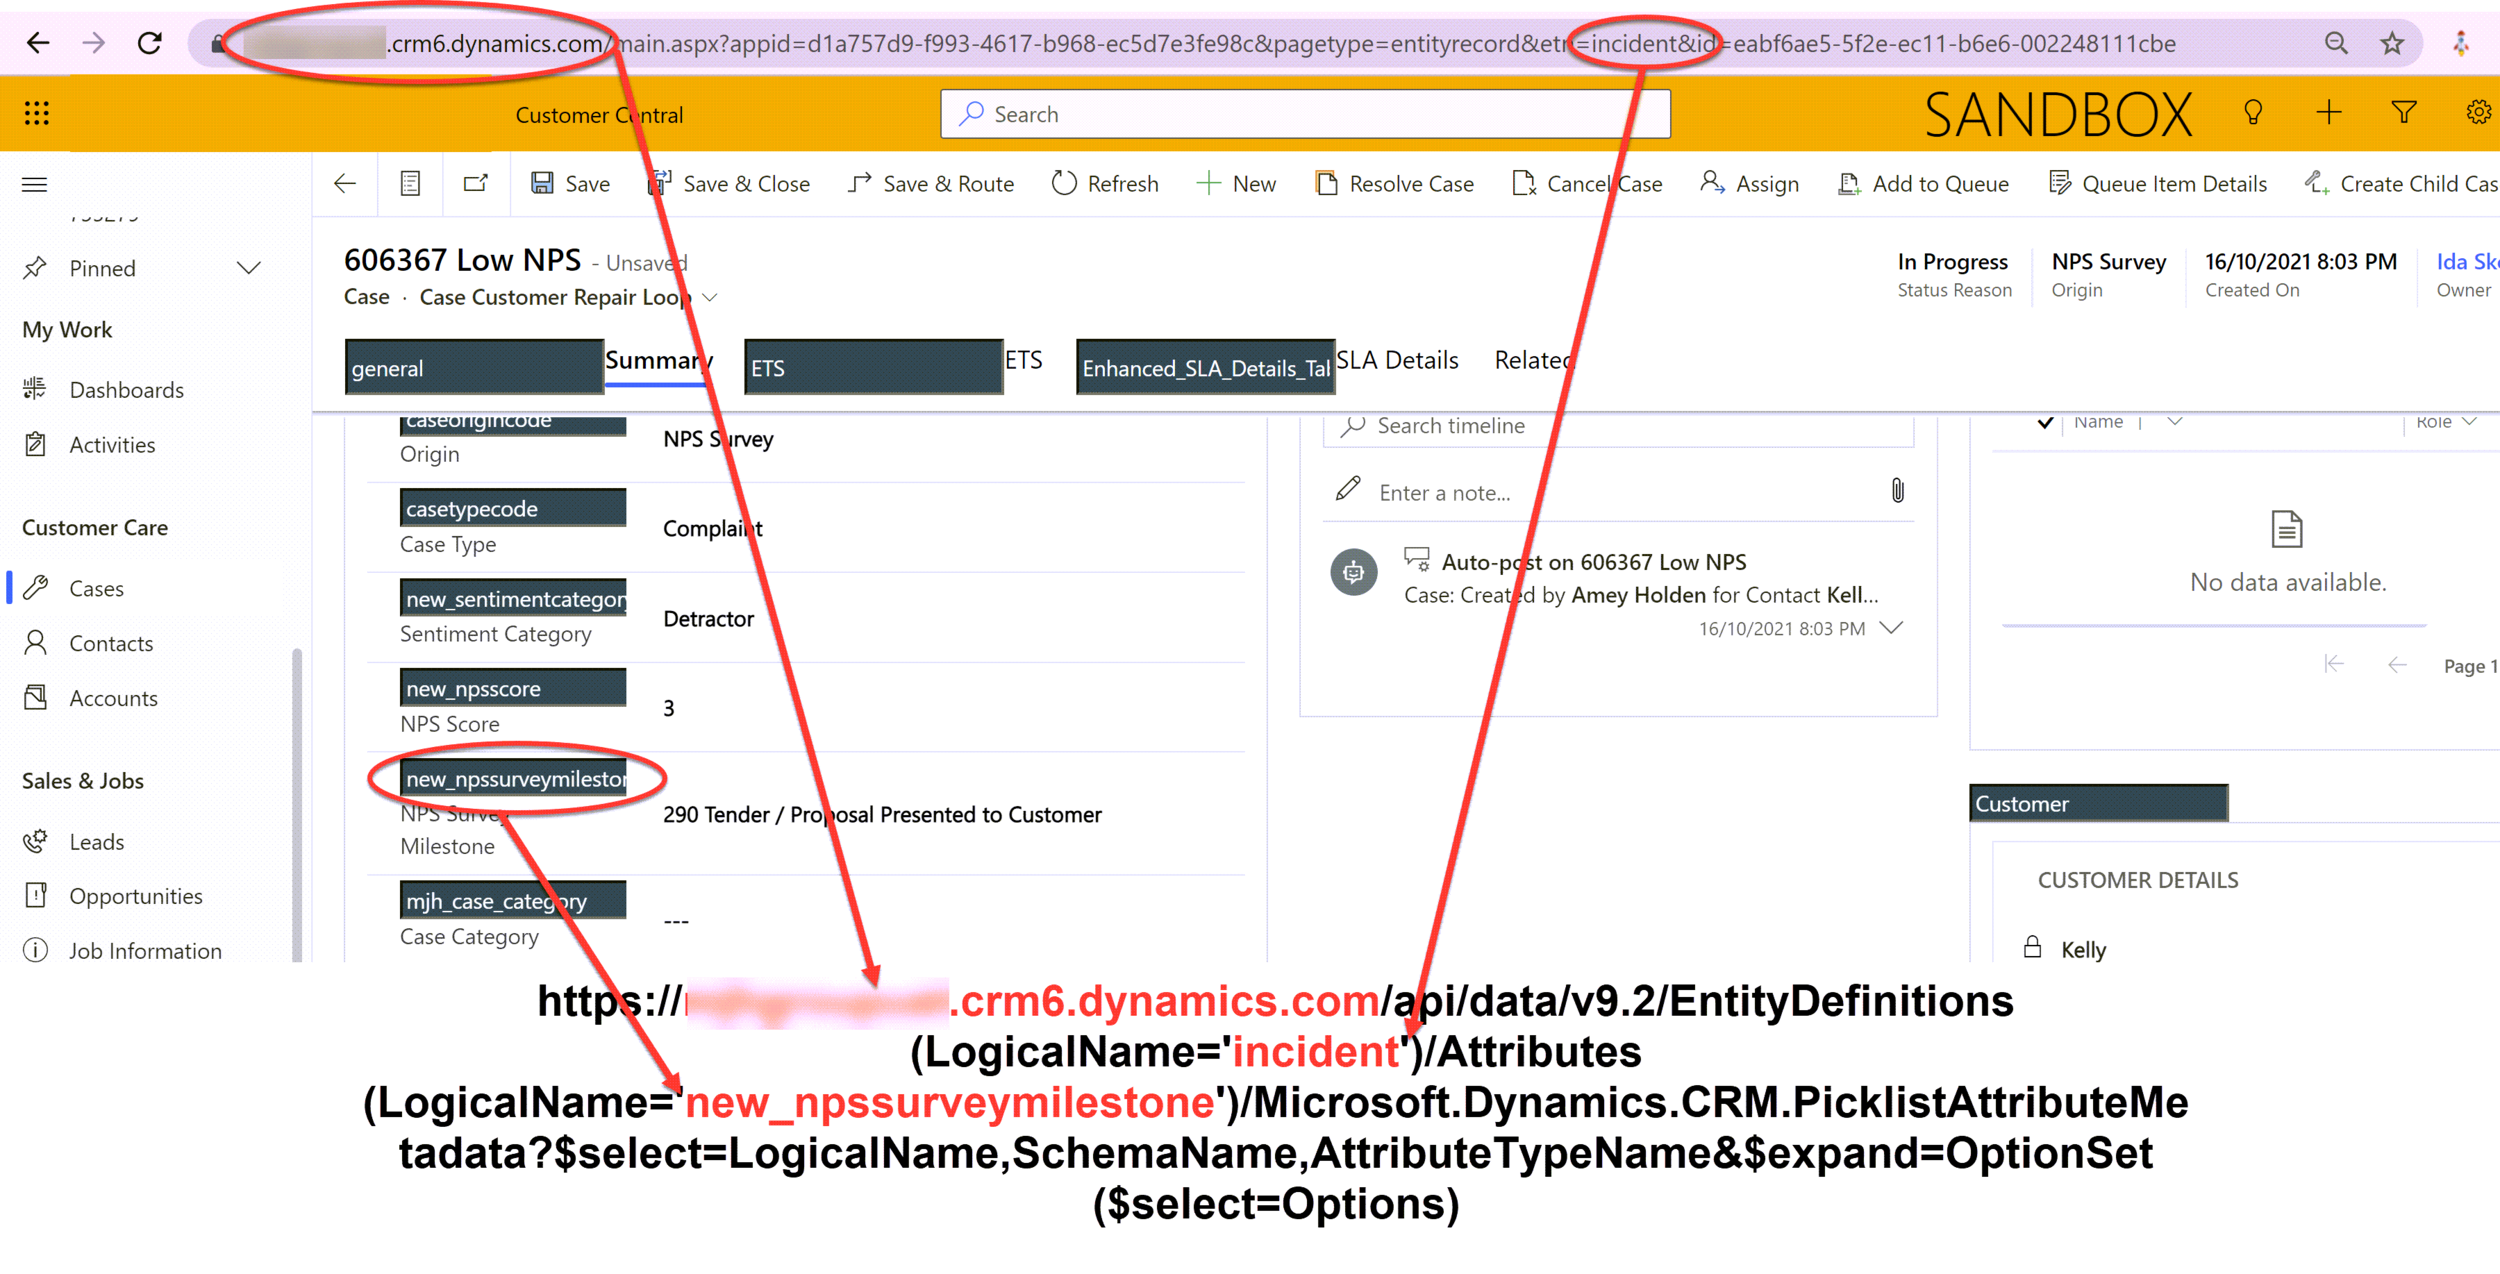
The Method is GET then you need to use this lovely big long scary URL. Most of it you can leave ‘as is’, but you do need to update it in three places to add your Dynamics/Power Apps URL, the table name and the column name of the choice column you want to get values from.
https://YOUR-DYNAMICS-URL.crmX.dynamics.com/api/data/v9.2/EntityDefinitions(LogicalName='TABLE-NAME')/Attributes(LogicalName='COLUMN-NAME')/Microsoft.Dynamics.CRM.PicklistAttributeMetadata?$select=LogicalName,SchemaName,AttributeTypeName&$expand=OptionSet($select=Options)
Copy the above snippet and update the section in red below + guidance on how to easily find them. You can check it’s right by running the flow, if the action is unsuccessful - it will let you know why.
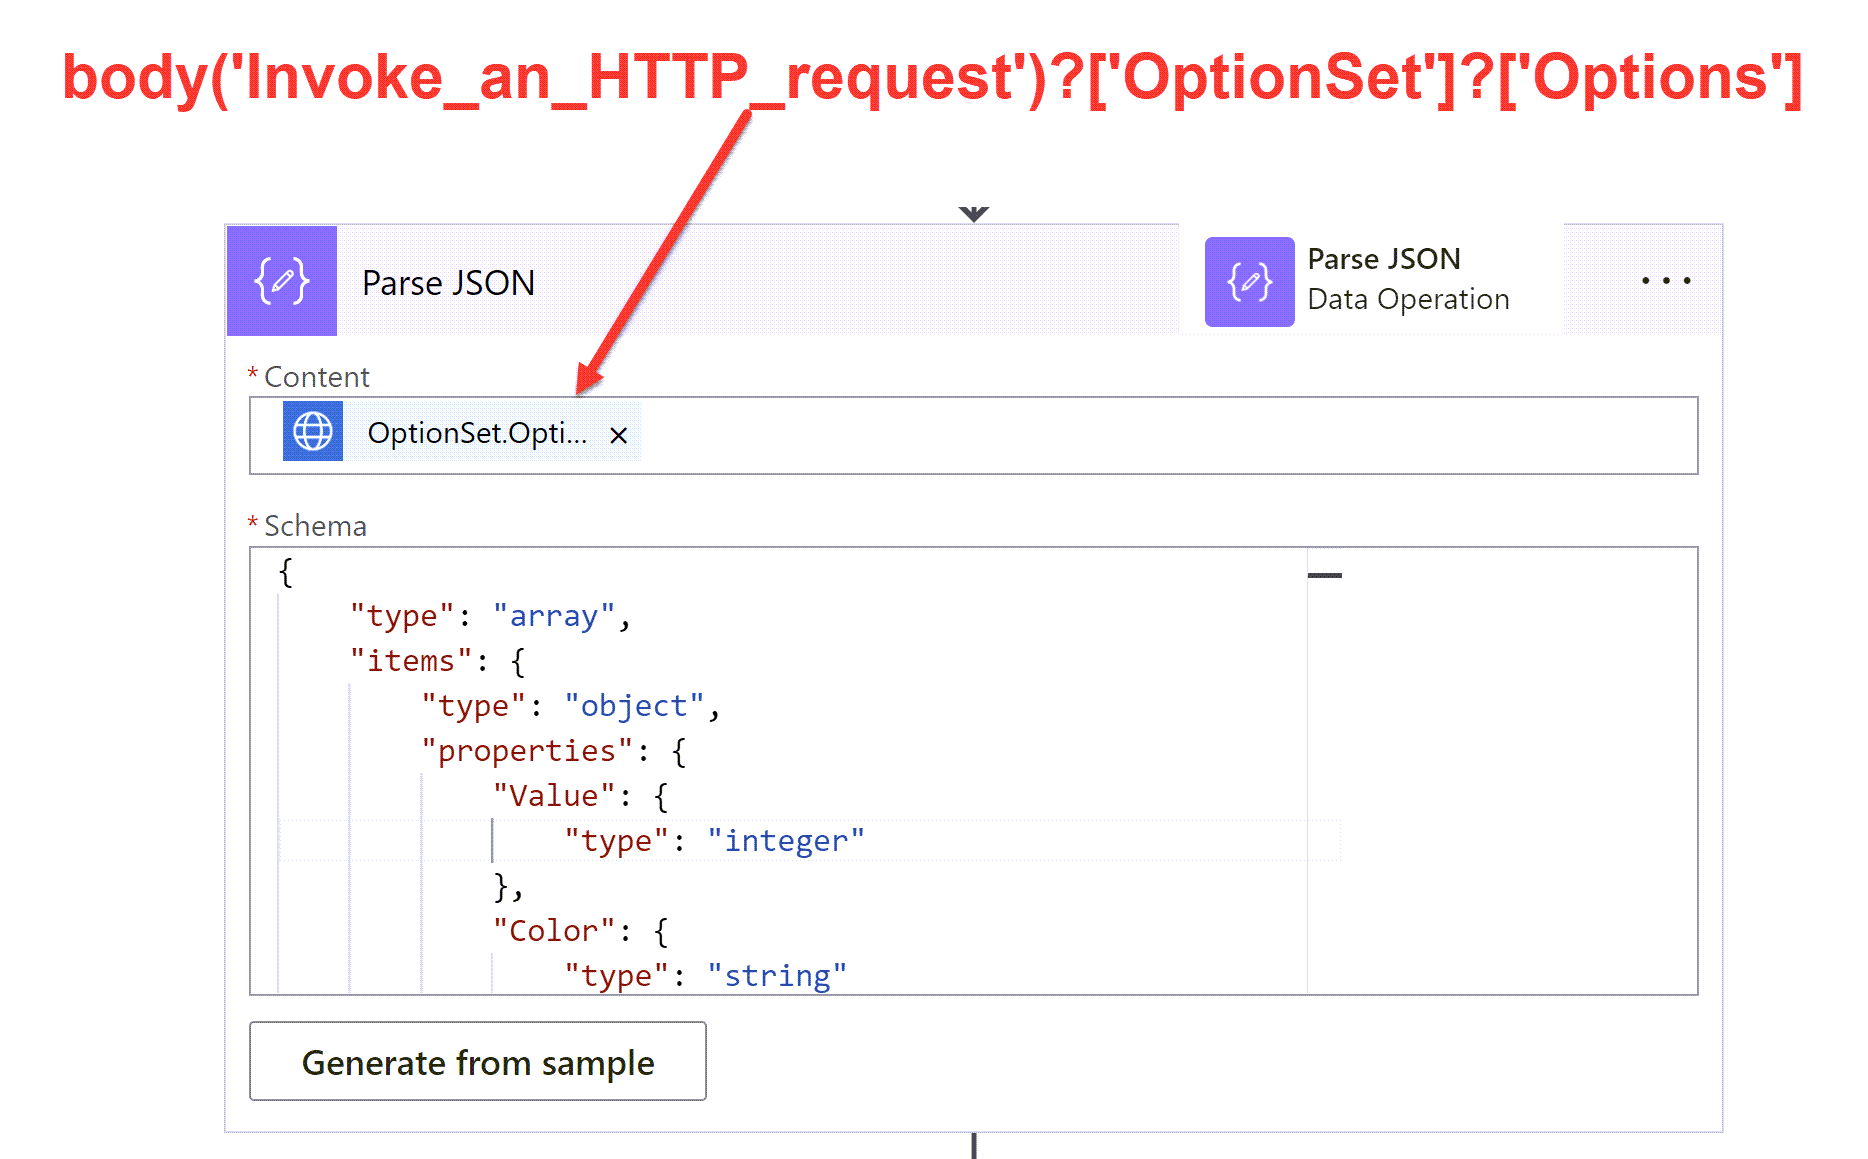
3) Parse JSON
We are going to use a ‘Parse JSON’ action to make some sense of our HTTP GET request. The content selects just the ‘Options’ from what was returned, we don’t need the rest. Scroll down to the bottom of this post for the Schema snippet.
body('Invoke_an_HTTP_request')?['OptionSet']?['Options']
Filter the array & get the choice value
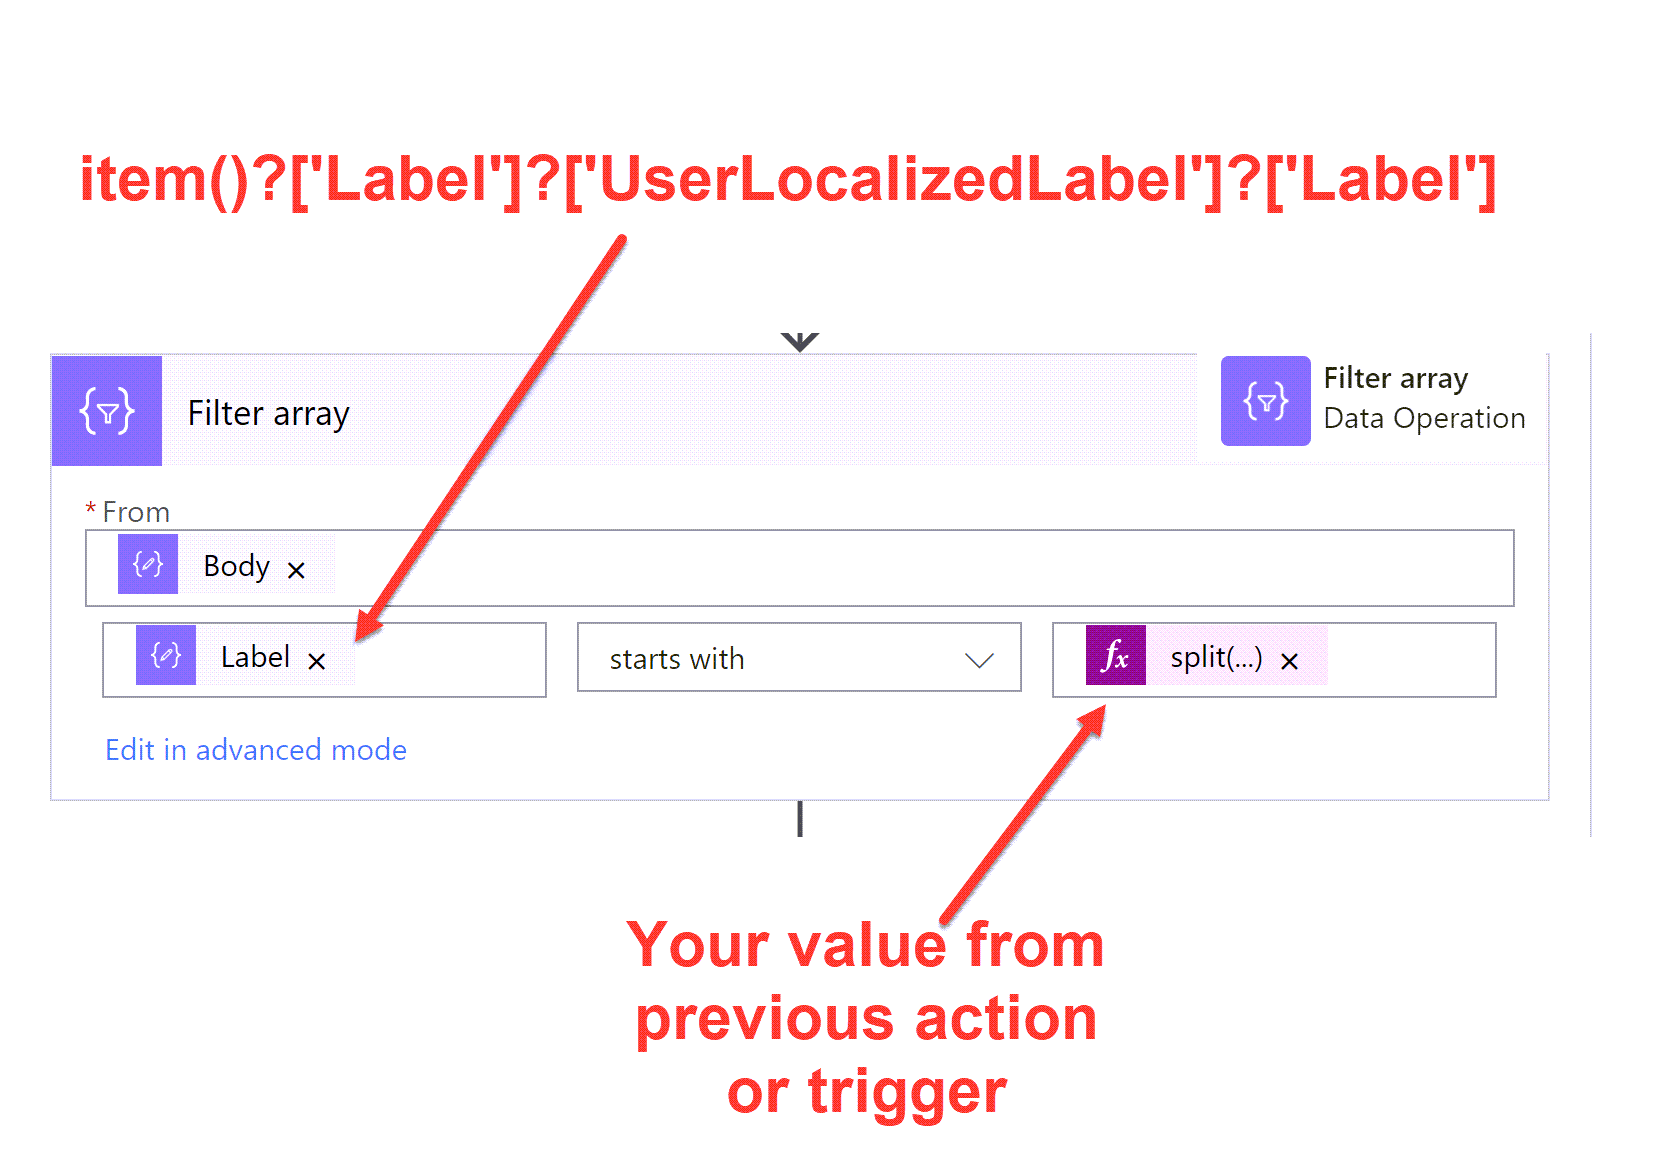
4) Filter Array
The outputs from the Parse JSON contains all of the choice labels and values + lots of other stuff, so now we need to filter it down to get the value we want. This is where you will use a value from a previous action/trigger in your flow. Using any of the standard condition statements such as ‘equals’ or ‘starts with’. In this case I have the start of the label to match.
item()?['Label']?['UserLocalizedLabel']?['Label']
body('Filter_array')?[0]?['Value']
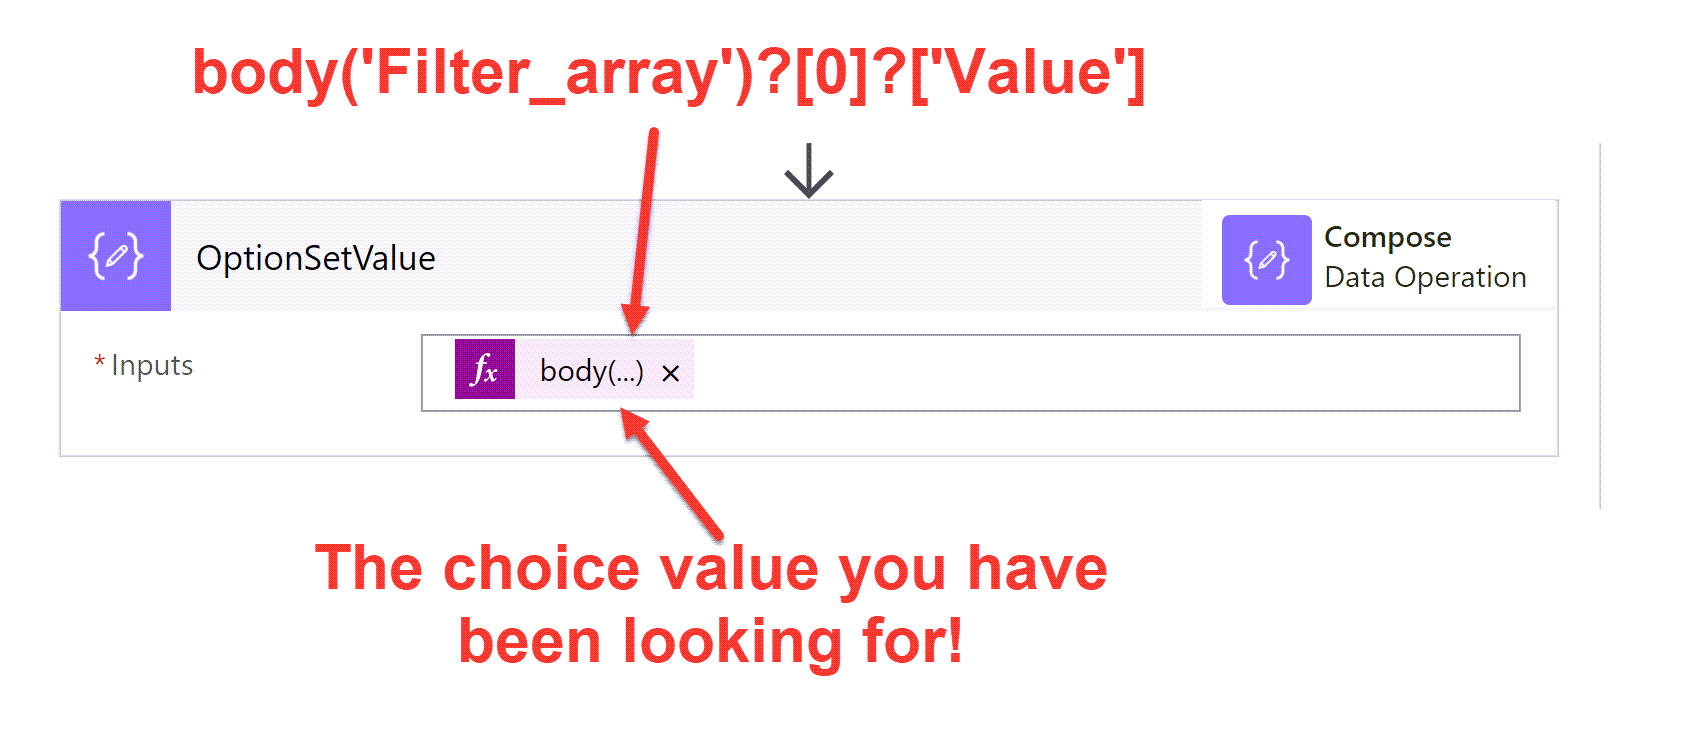
5) Get Choice Value
Even though we have filtered the array to only one value, it is still an array so if you just take the ‘Value’ as a variable you will get sucked into another unwanted loop. instead we can use the [0] action to get the first item in the array then ask for the specific part of the array item - the ‘Value’.
NOTE: I am making the assumption that I will only get one match because the filter I passed will always match to a single choice, if this is not the case - create some better filter conditions 😉
I never thought I would be so happy to see a number rather than words but my flow is happy and I’m free from the rusty chains of a Switch statement. Happy choice making!
If you would rather watch a video and listen to the angelic voice of George Doubinski with occasional interruptions from me, feast your eyes on this episode of Citizen Can -> https://youtu.be/AHB03NV73aE
{
    "type": "array",
    "items": {
        "type": "object",
        "properties": {
            "Value": {
                "type": "integer"
            },
            "Label": {
                "type": "object",
                "properties": {
                    "LocalizedLabels": {
                        "type": "array",
                        "items": {
                            "type": "object",
                            "properties": {
                                "Label": {
                                    "type": "string"
                                }
                            }
                        }
                    },
                    "UserLocalizedLabel": {
                        "type": "object",
                        "properties": {
                            "Label": {
                                "type": "string"
                            }
                        }
                    }
                }
            },
            "Description": {
                "type": "object",
                "properties": {
                    "LocalizedLabels": {
                        "type": "array"
                    },
                    "UserLocalizedLabel": {}
                }
            }
        }
    }
}