Colour, position and style the event title & date/time - Transform your Dynamics Marketing Event Portal
Another episode of making configurations to a Dynamics Marketing Event Portal in the name of making it look pretty, branded and a little more stylish. At the start of this ‘series’ I covered the slightly painful set up process for making changes to the event portal - so if you haven’t done that yet and have no idea what I am talking about there is a step by step guide for you here.
This post will show you how to change the change the colour, position and style of the event title & date/time on your Event Portal.
Style your event title
The Default
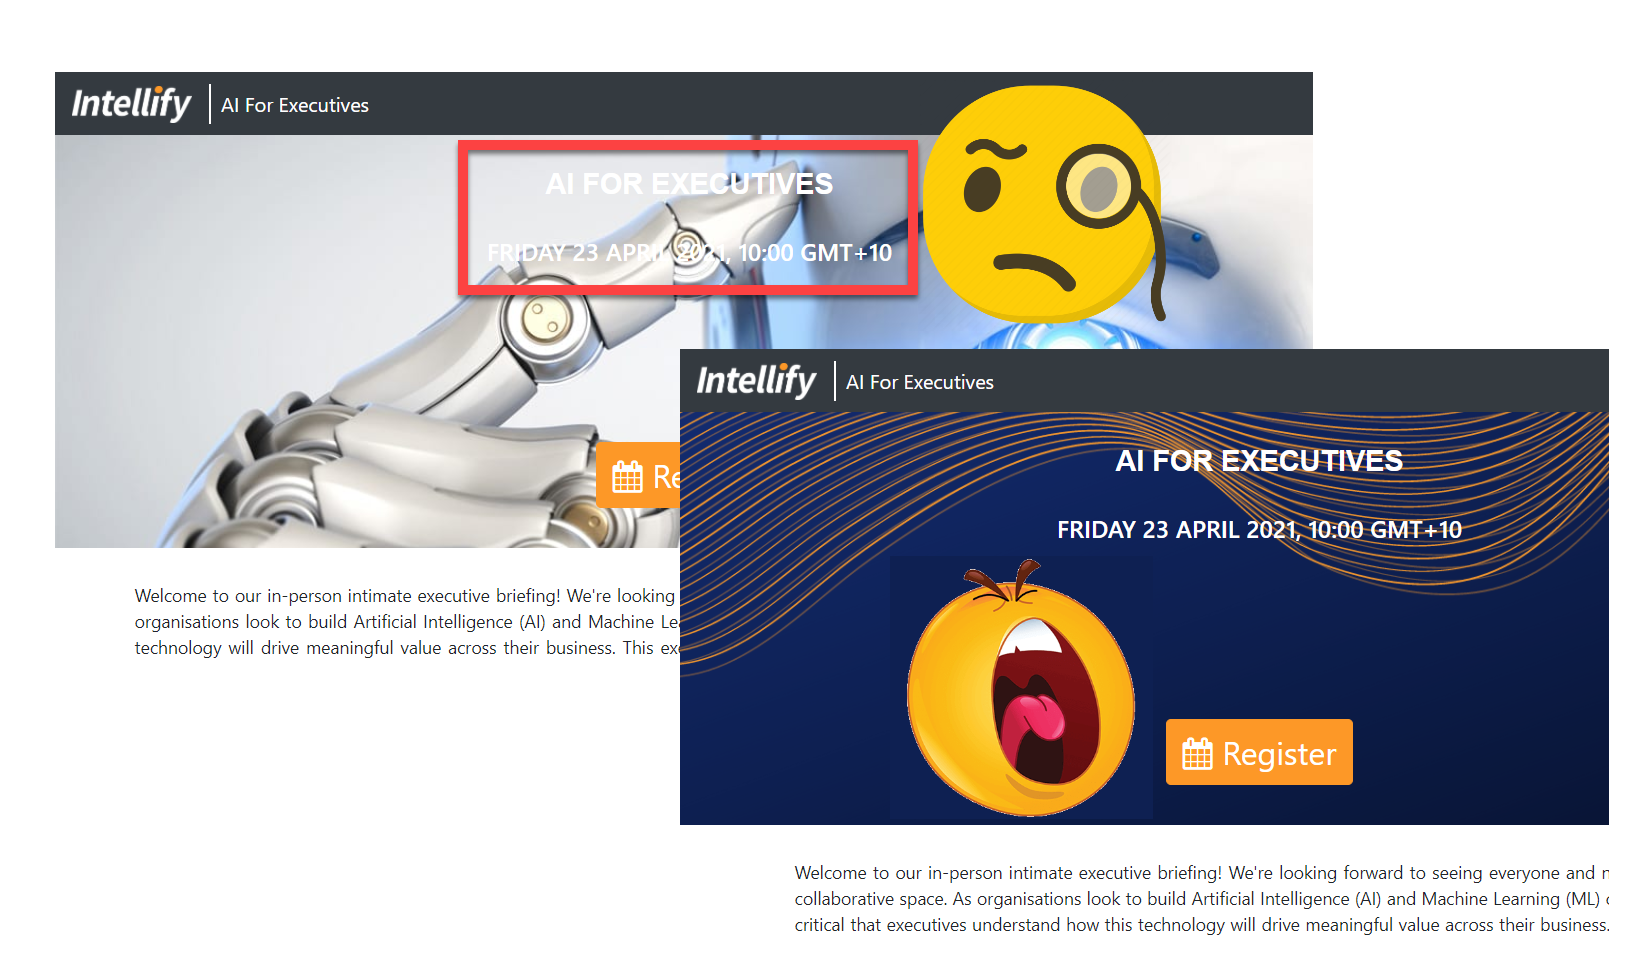
Problem 1: White text positioned awkwardly
Problem 2: Capitals
WHY ARE YOU SHOUTING AT ME!? I really dislike the capitals, I guess it might convey ‘excitement’ but to me it just looks like angry keyboard shouting. In the Dynamics Marketing event record its not in capitals - so why does it have to be capitals here? It’s also always white - if my image has a light background - this really doesn’t work
The Dream
It is really quite hard to design an image which wont interrupt the text readability of centered text as it shows in different locations depending on the device you are using. By adding highlight and positioning the text on the left it makes it a bit easier to work around with creating background images. This is something you can play with depending on what suits your style but here’s an example of how to make it a little easier and more accessible on the eye.

Making the dream come true
Assuming you completed the steps in my previous article you are ready to hide some navigation bar buttons. The event title & date/time styling are stored in the event.component.scss and event.component.html files.
1. Open the source code folder in Visual Studio

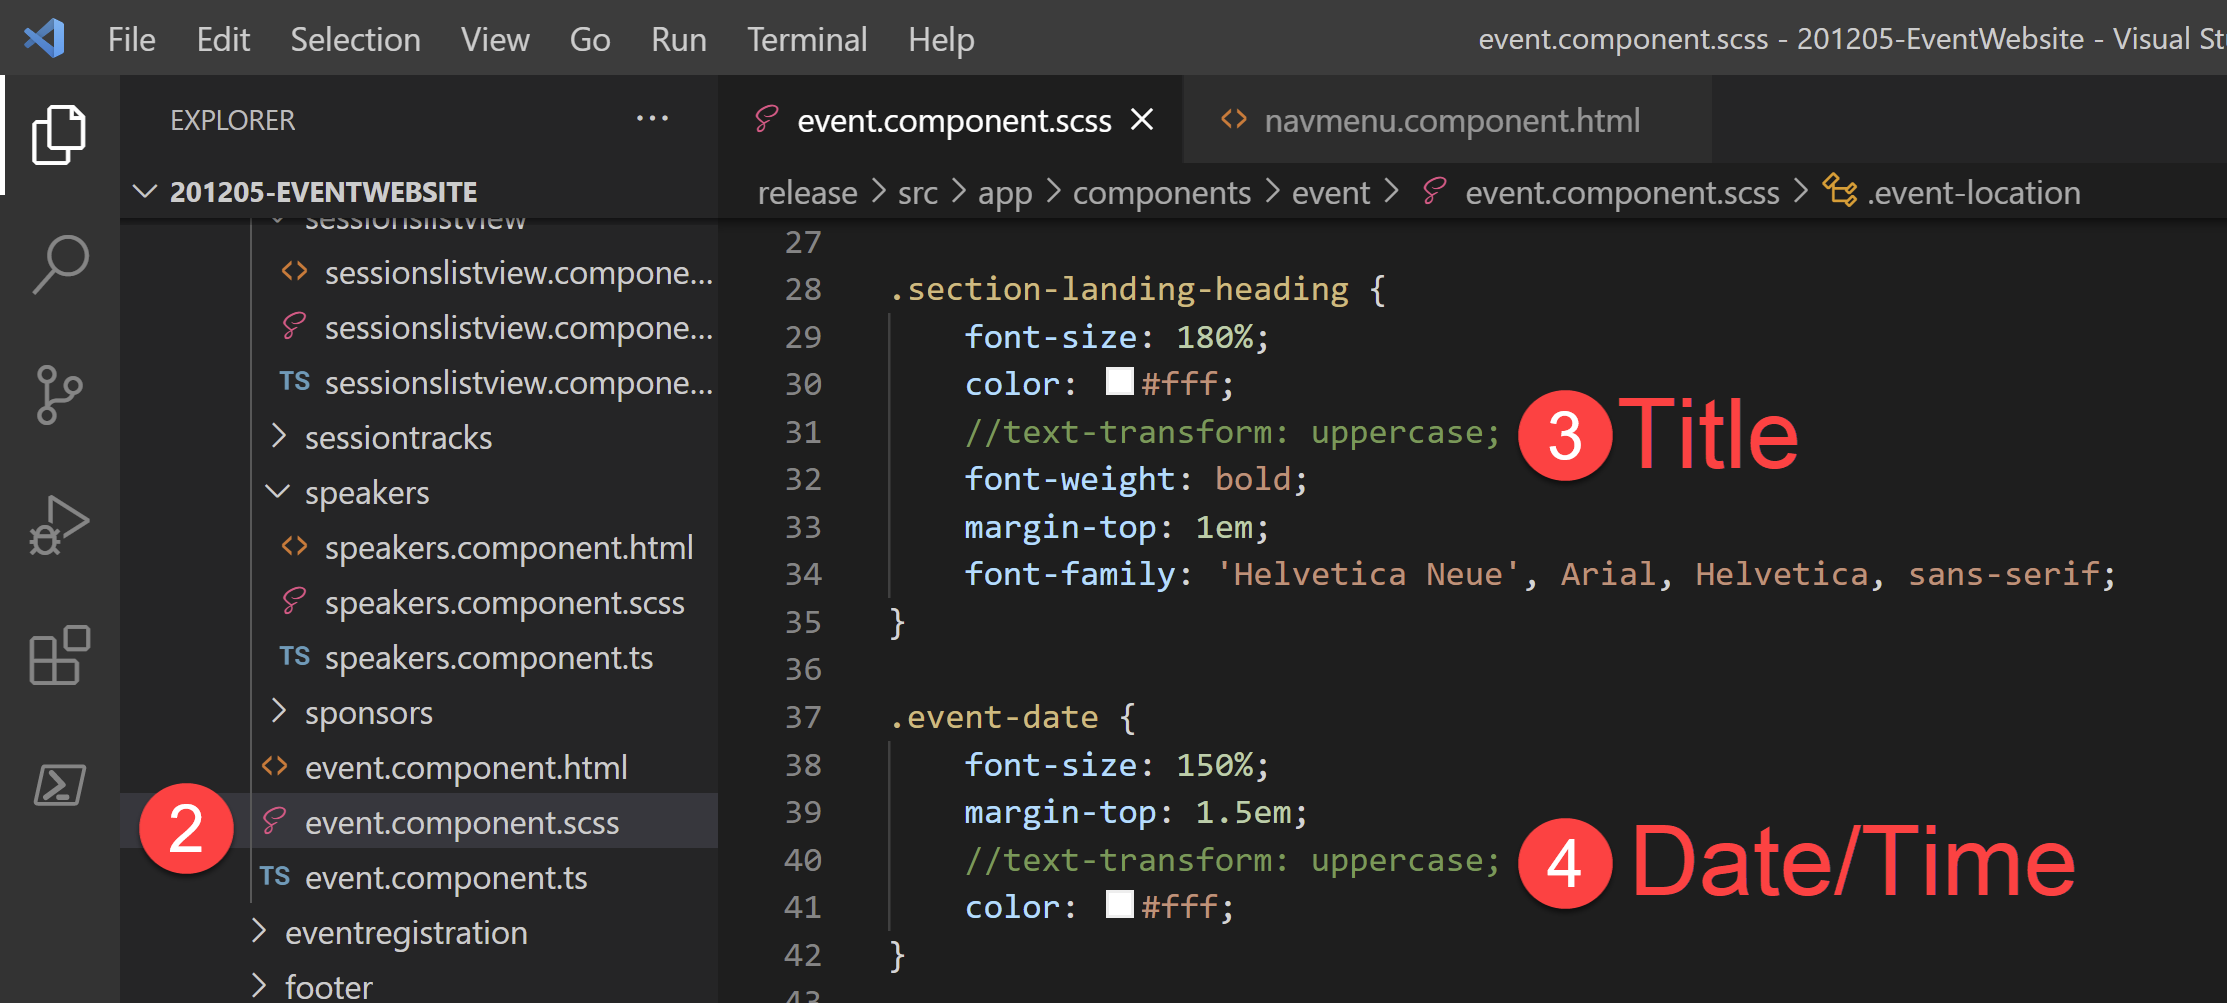
2. Navigate to the event.component.scss file
Stop the capitalisation
3. In the .section-landing-heading { section comment out text-transform: uppercase; using a simple // - this updates the event title
4. In the .event-date { section comment out text-transform: uppercase; using a simple // - this updates the event date/time
Change the position
5. Add the below snippet in the .section-landing-heading { section
6. Add the below snippet in the .event-date { section
    float: left;
    width: 100%;
    text-align: left;

Change the colour & highlight
7. Update the .section-landing-heading { color: to your desired colour using the hex code e.g. black is #000000
8. Repeat the above steps on the .event-date { color:
9. Add the below snippet to the event.component.scss
.highlight {
    background-color: #fff;
}

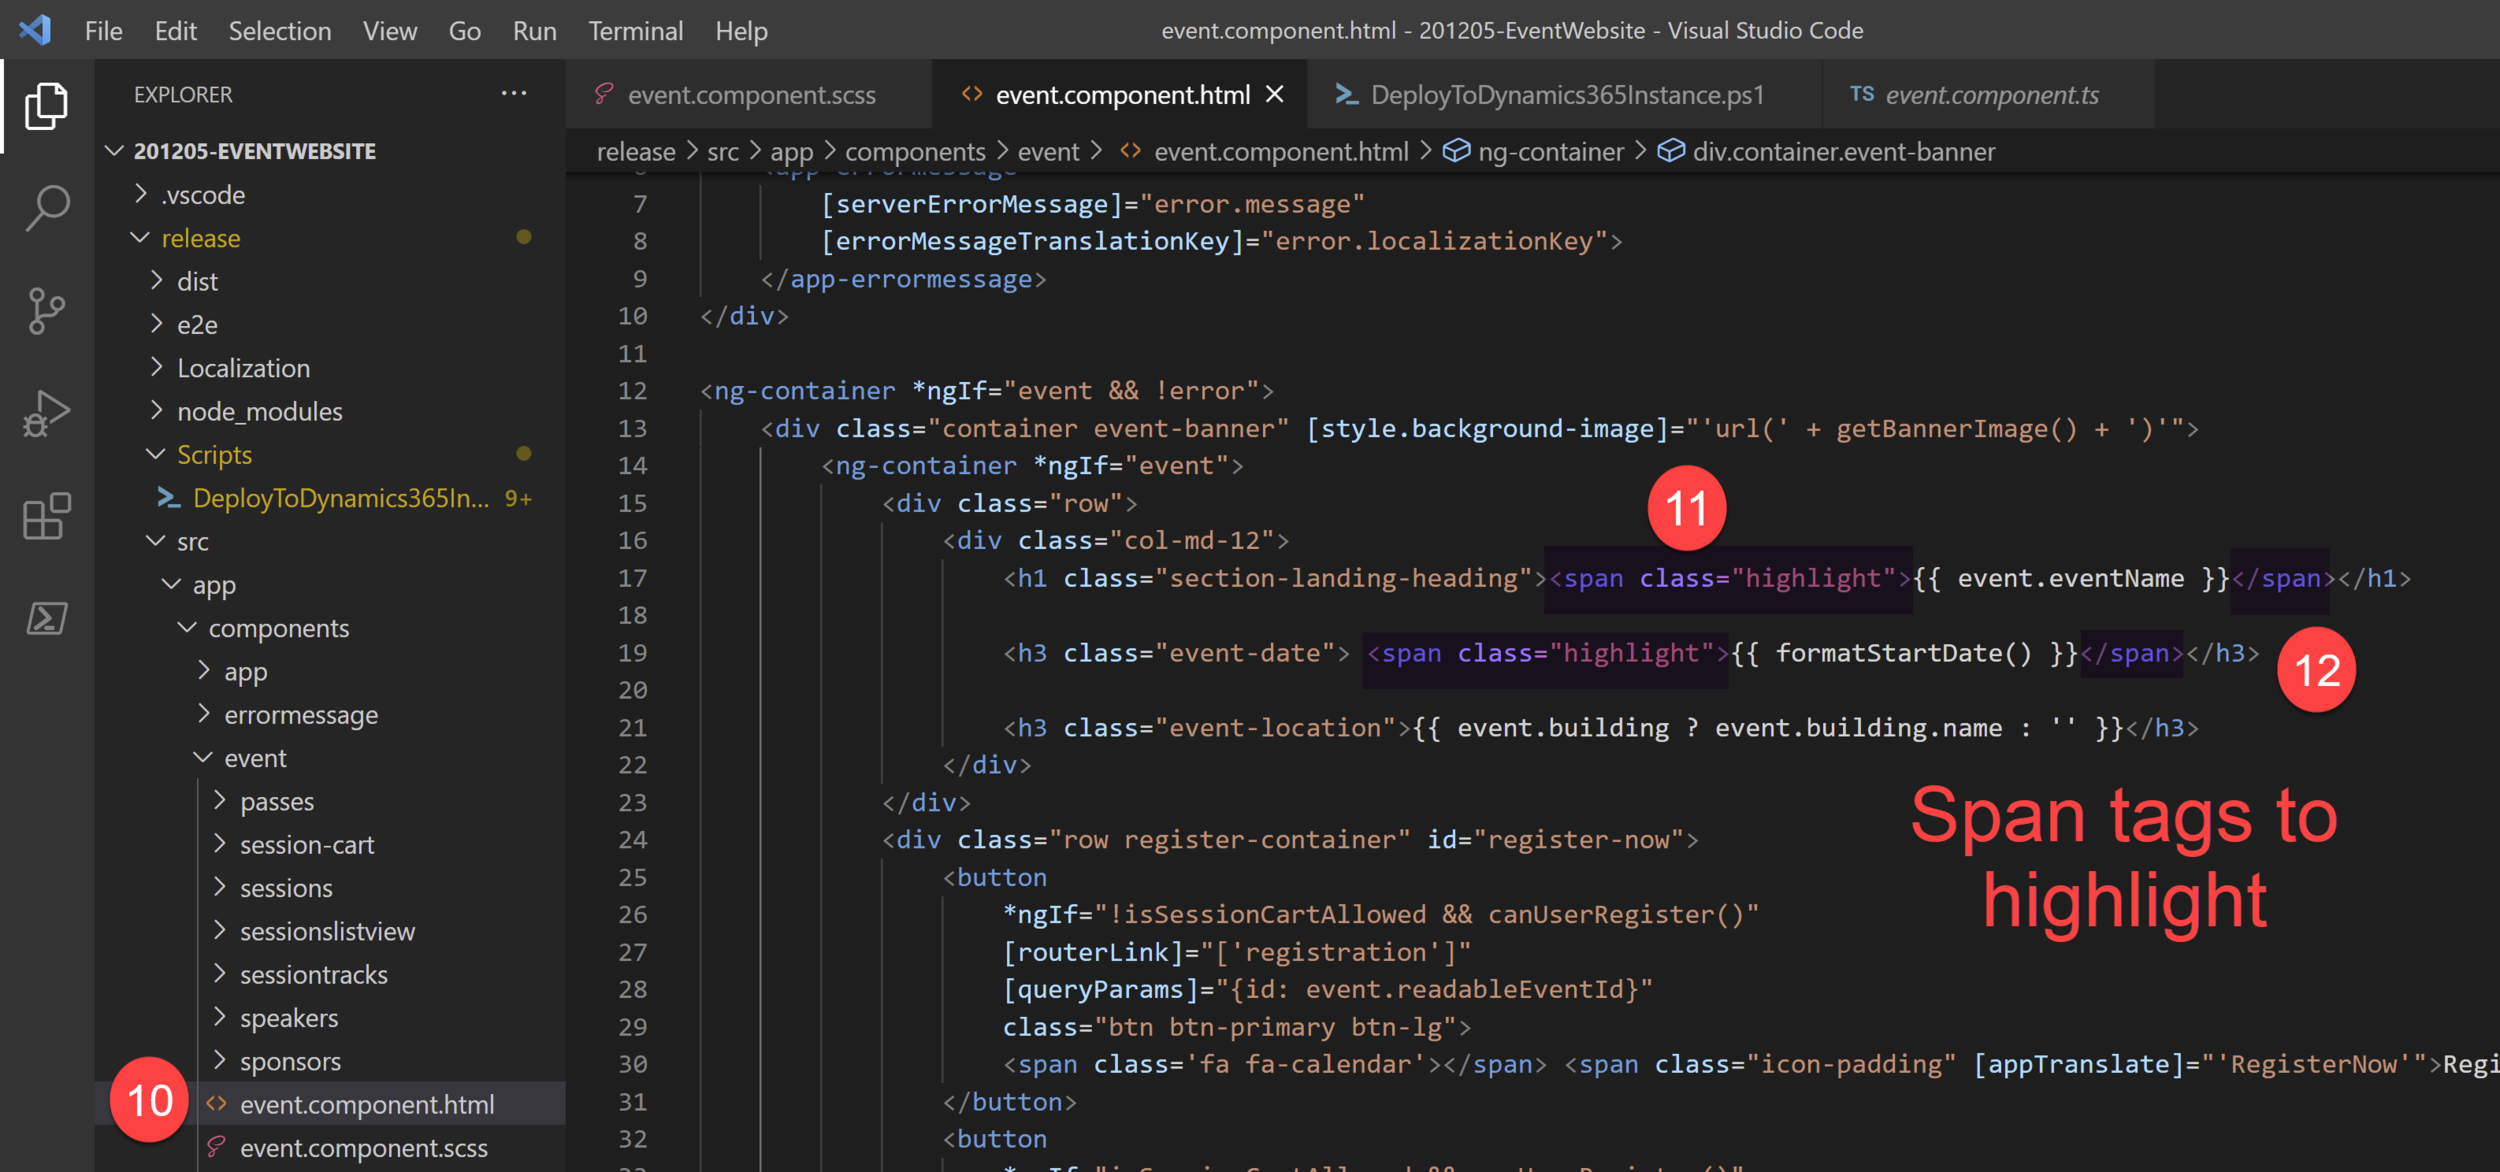
10. Navigate to the event.component.html file
11. Add the span tags below around {{ event.eventName }}
12. And also around {{ formatStartDate() }}
<span class="highlight"> {{ event.eventName }} </span>
<span class="highlight"> {{ formatStartDate() }} </span>
13. You are now ready to publish your changes using the DeployToDynamics365Instance.ps1 file - check out my separate reference blog for details on how to do this if you missed it in my previous posts or need a recap -> https://www.ameyholden.com/articles/deploytodynamics365instance-ps1
Admire your work
Go to your portal, do a Force Refresh aka Ctrl + F5 so that it clears the local cache and tadahhhhhh! No more shouty shouty and you can actually read the event title and date/time.

Want to do more changes? Have a browse of my other articles in this series and tell me about the magical things you have uncovered too. Or if you are stuck on this journey too, and this doesn’t help just drop me a message or contact below - I cannot promise I’m a professional but I will give it my best!