Customise Double Opt-In Confirmation Email {{OptedInPurposeTopic}} - Customer Insights - Journeys
Inspired by a question from a lovely person via my ‘Contact’ form and an old blog post of mine ‘Double opt-in email formatting in Dynamics 365 Outbound Marketing‘.
‘Could you write an article about the current double opt-in? The current placeholder {{OptedInPurposeTopic}} displays an ugly list of purpose and topics in a semicolon separated string. An article of yours on this seems outdated to me; I don't see {{FormDoiSubmission.SubscriptionListNames}} anywhere in the template. Thanks in advance and see you at the webinar on June 24th.‘
Double opt in allows you to send a single email where the subscriber they can confirm all of their subscriptions by clicking a confirmation button, more info on configuring double opt in for Customer Insights - Journeys can be found here.
The problem
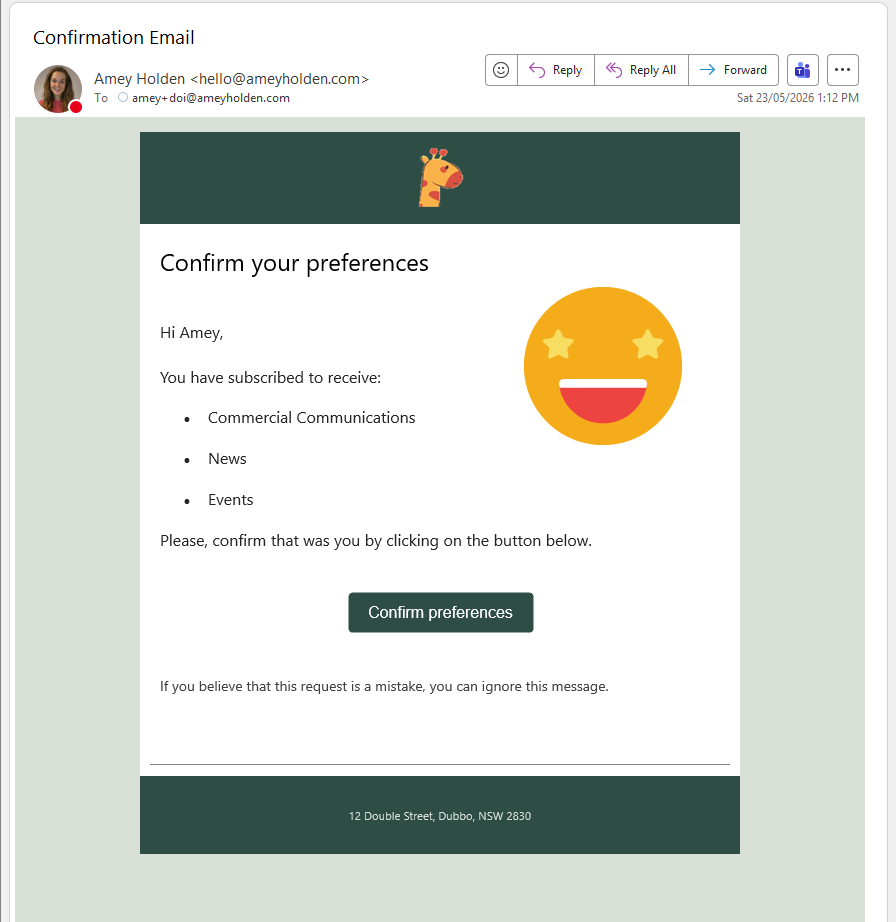
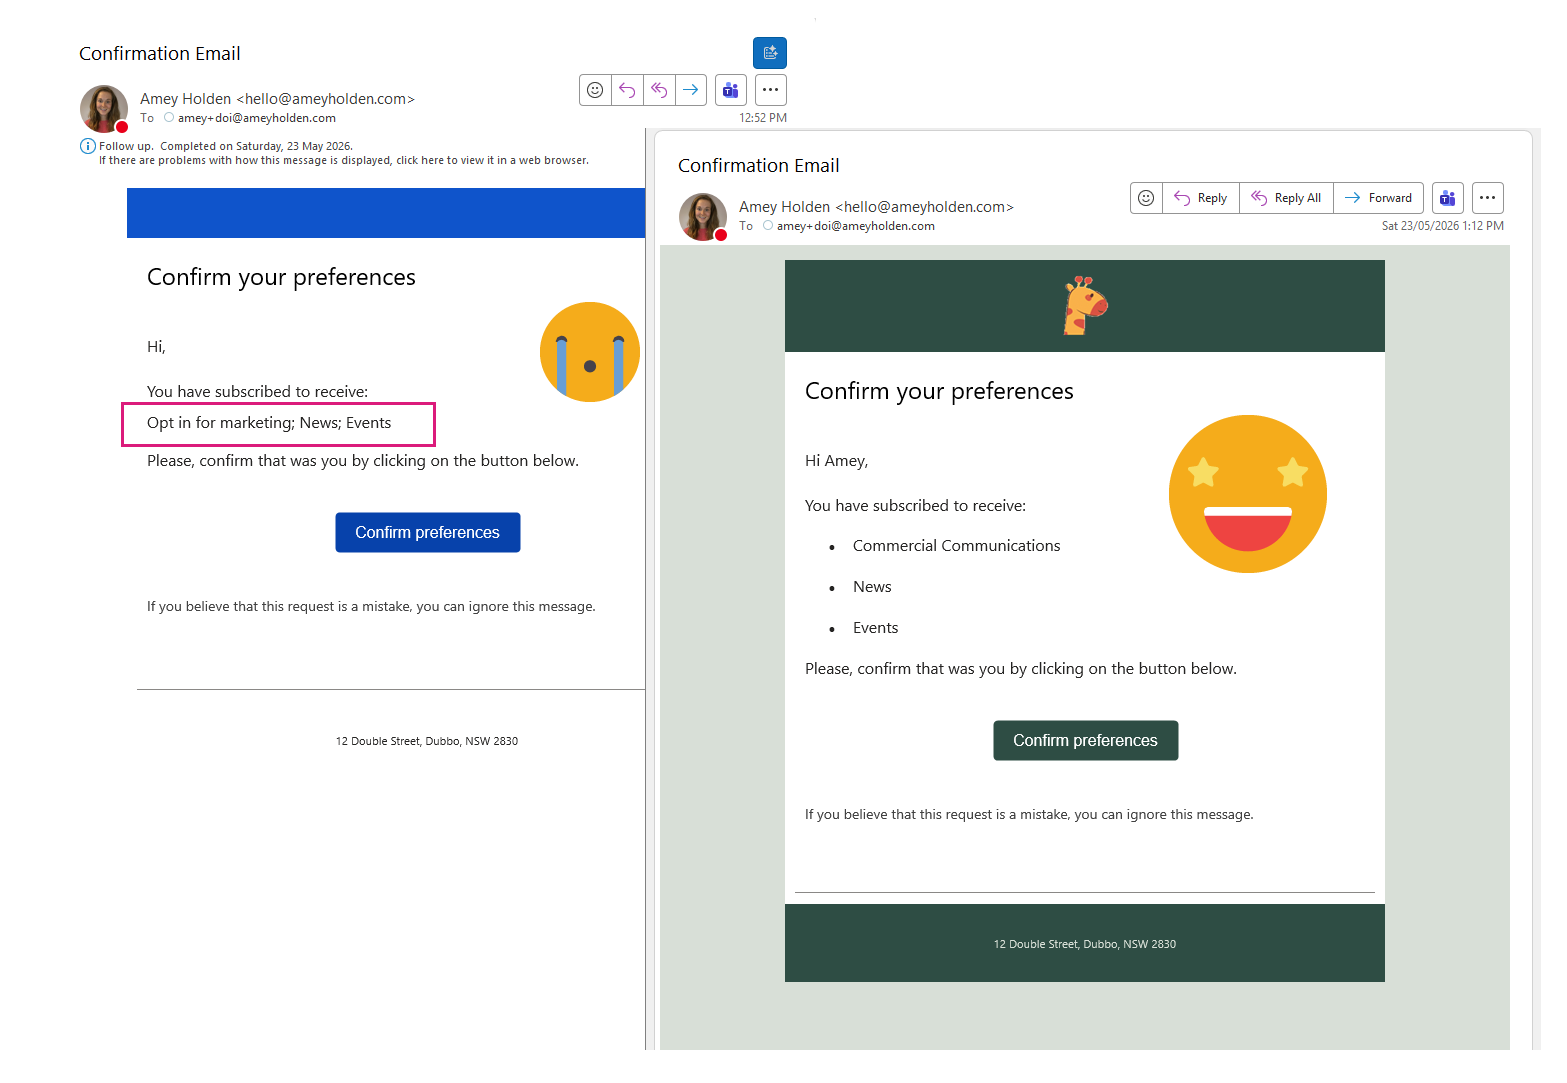
When you send the ‘Confirm your preferences email, The list of topics/purposes comes out in the email as semicolon separated line of text for all purpose/topics which were opted in to as you can see below… icky!

Goodbye problem
A stunning and informative double opt in confirmation email is possible with the help of some little enhancements.
Credits to a blog from Pauline Kolde ‘Customize Double Opt-In in Dynamics 365 Customer Insights’ where she shows how to include personalisation for the name of the persons submitting the form, which gave me the inspiration on how to solve this icky issue of semi colon separated strings in email content.
NOTE: you need to enable double opt in before you can find the ‘DOI Journey’ and ‘DOI Email’
How?
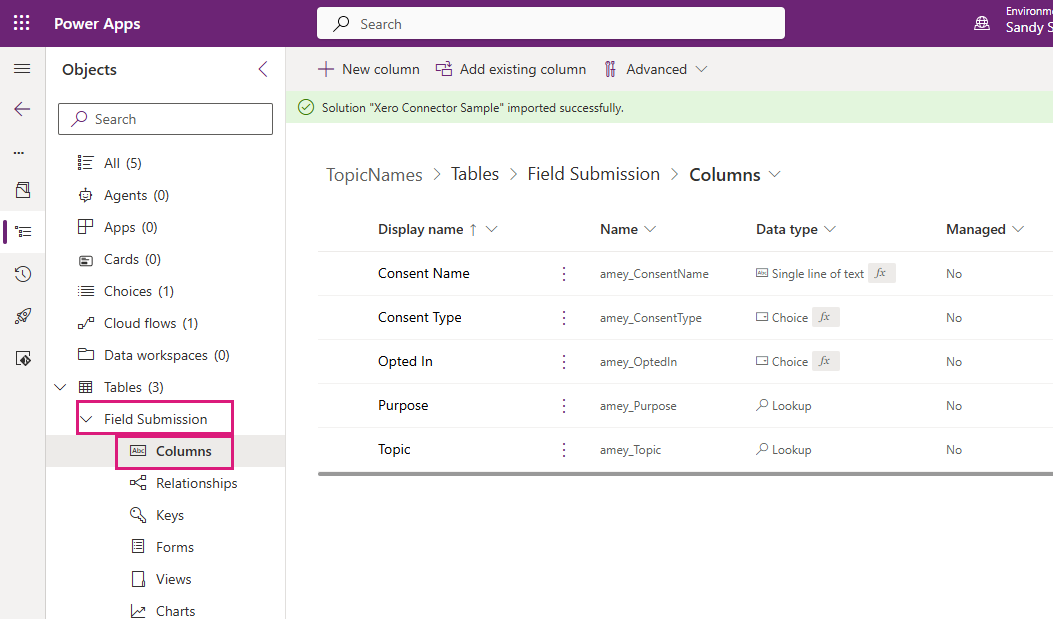
Add new columns on the ‘Field Submission’ table
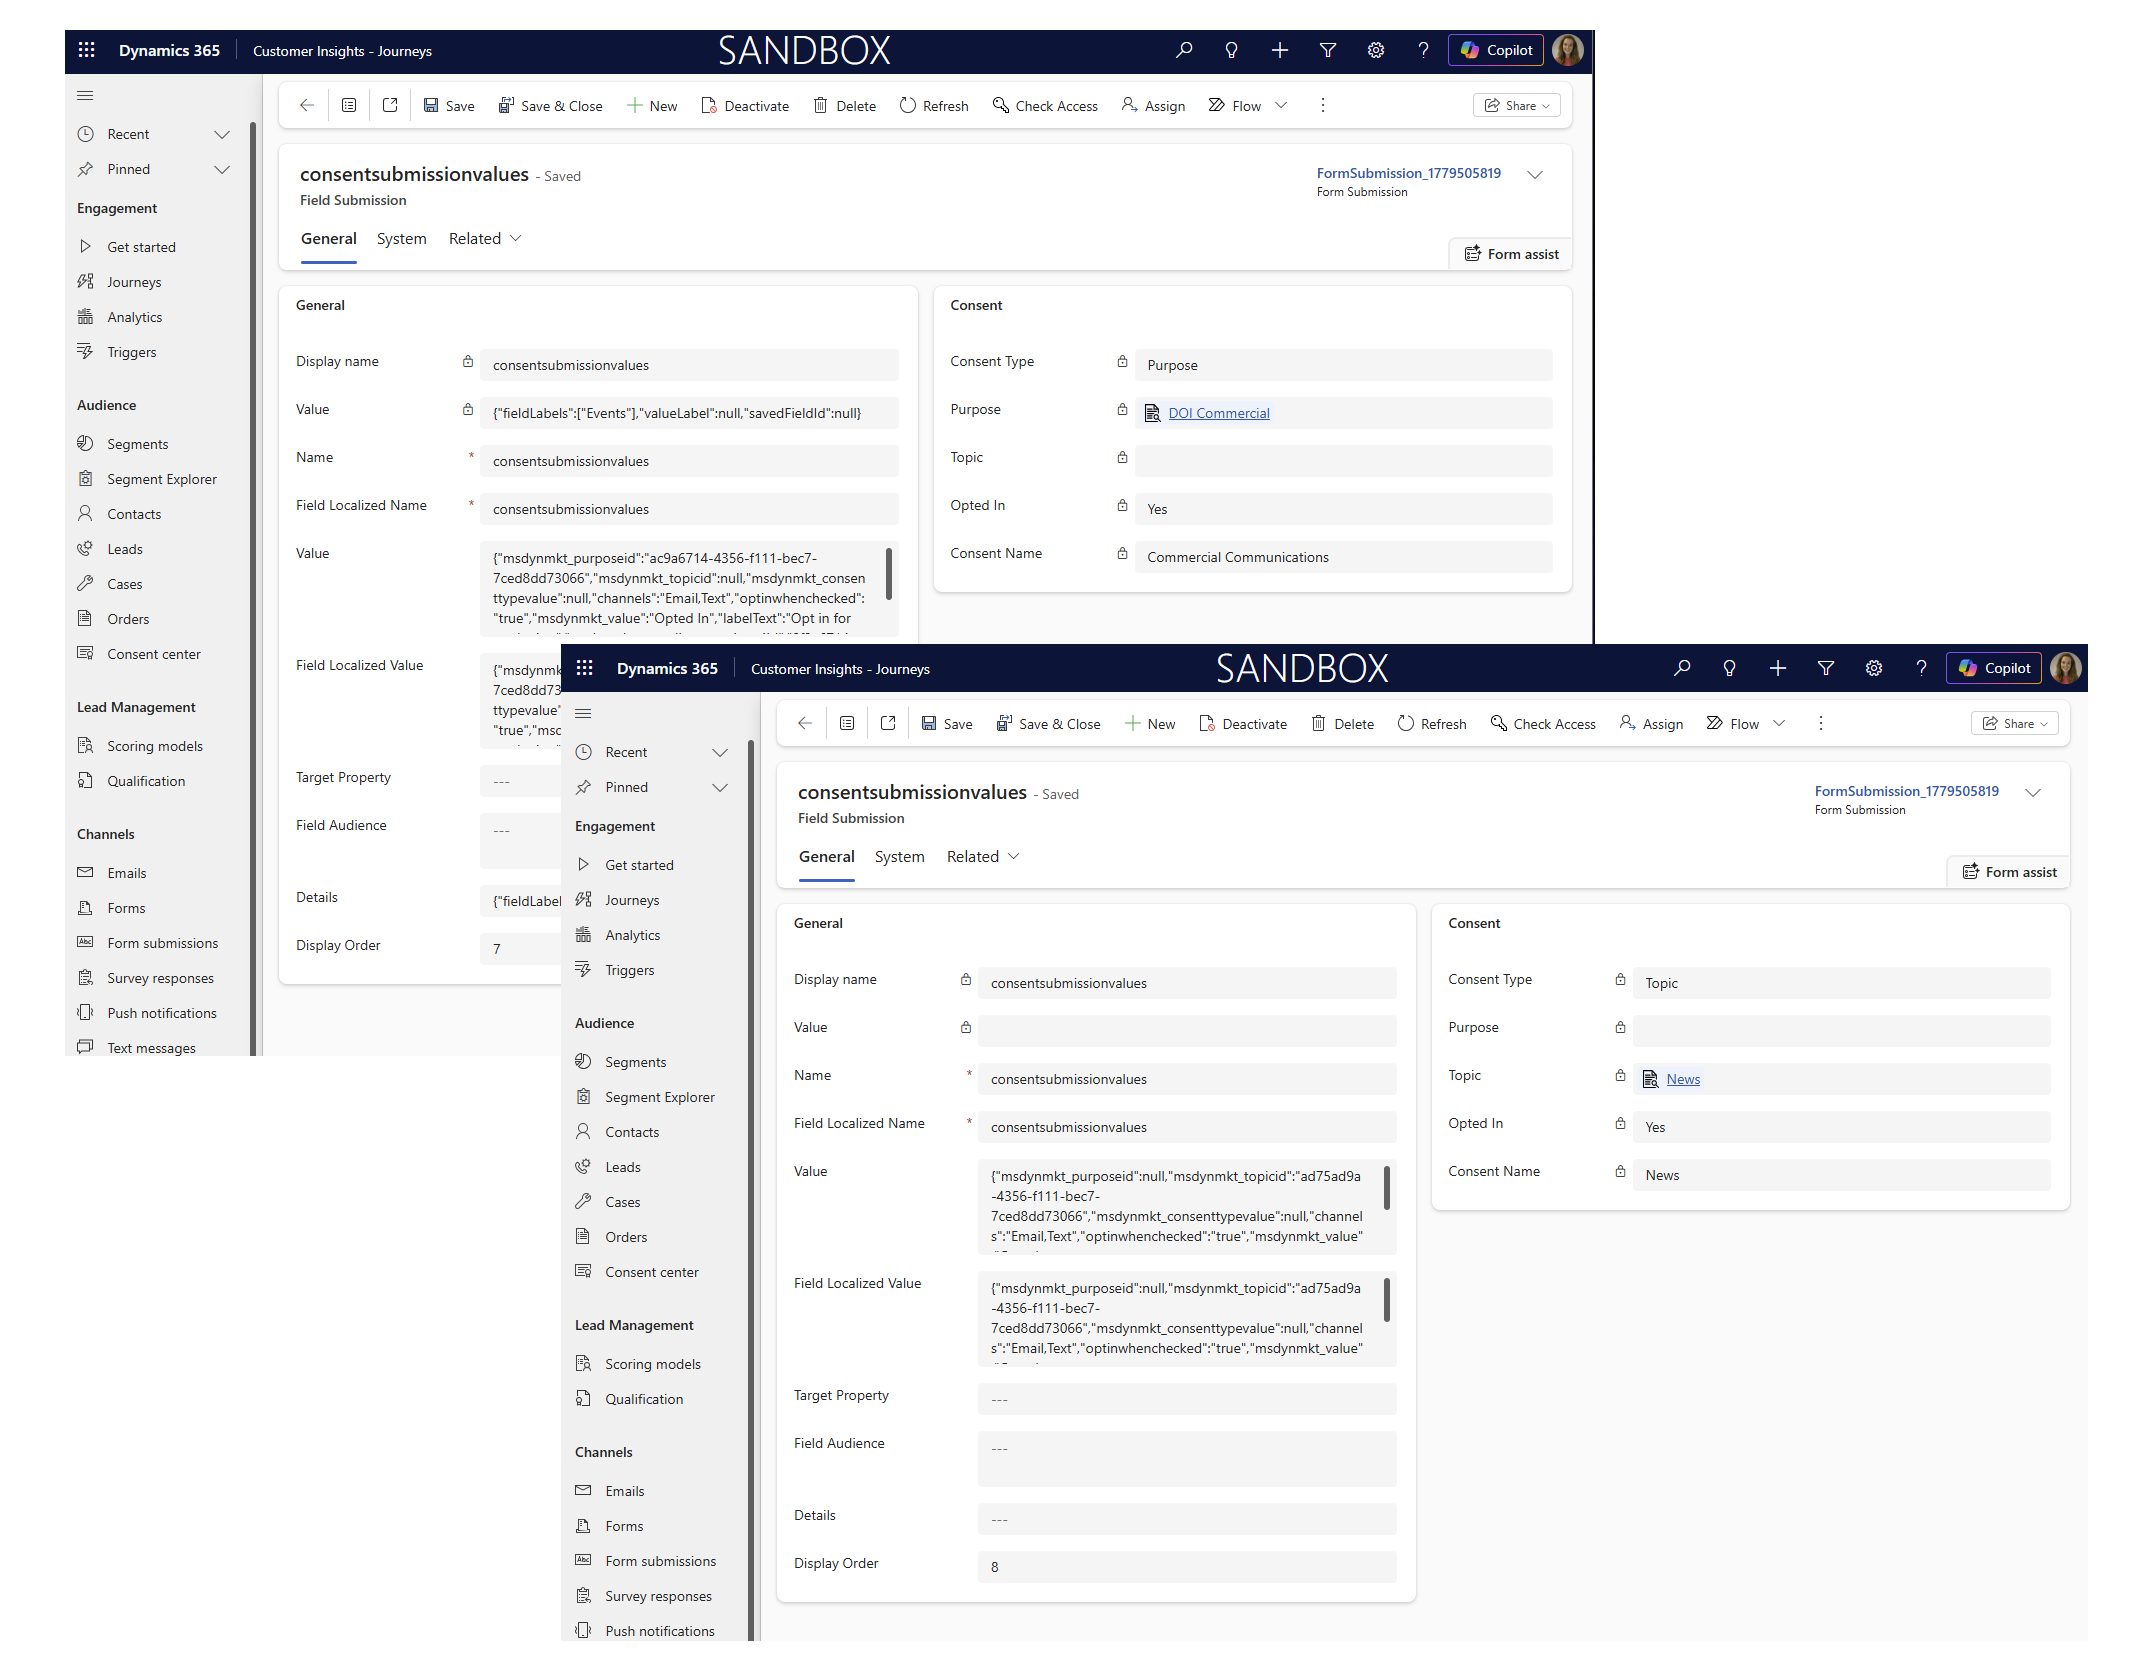
The field submission columns hold all the information we need, it’s just formatted in a rather non user friendly lump of JSON. We are going to add some helpful calculated columns to the ‘Field Submission’ table so we can use these inside the email as dynamics content.
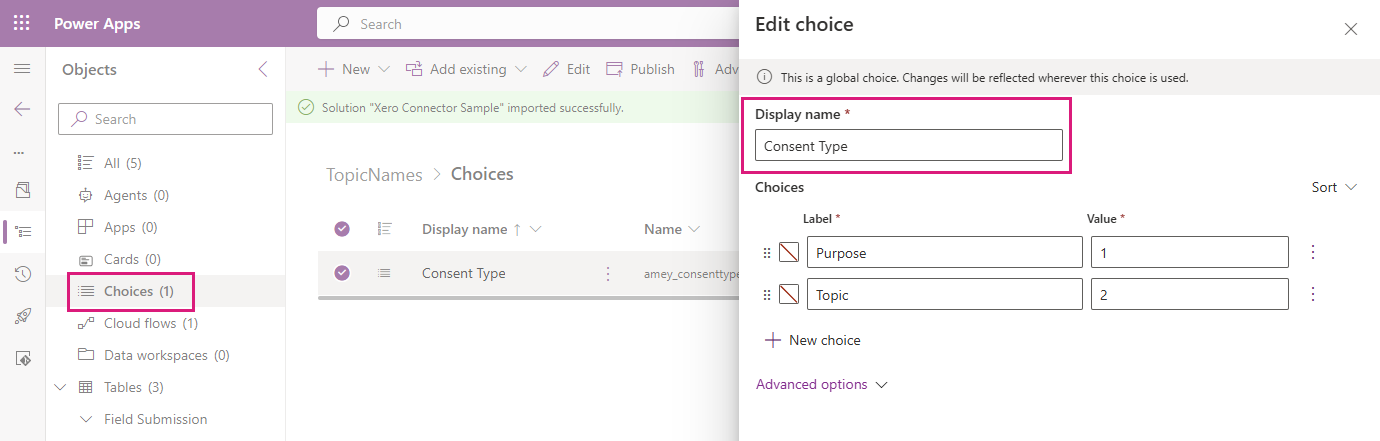
Create a global choice called ‘Consent Type’ with options ‘Topic’ and ‘Purpose’ and publish it
Create the new columns on the Field Submission table as shown below
Purpose
Type: Lookup → Purpose
Topic
Type: Lookup → Topic
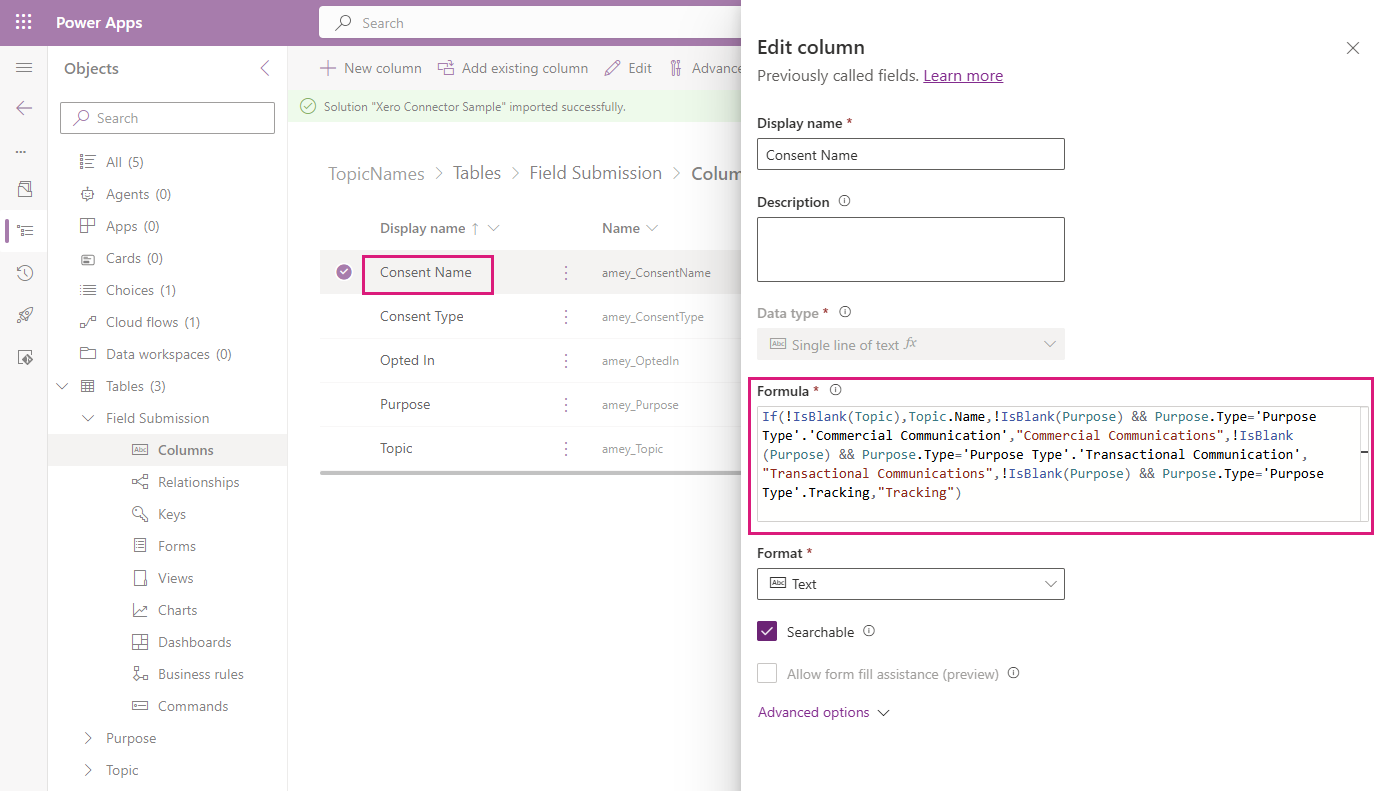
Consent Name
Type: Formula (Text)
If(!IsBlank(Topic),Topic.Name,!IsBlank(Purpose) && Purpose.Type='Purpose Type'.'Commercial Communication',
"Commercial Communications",
!IsBlank(Purpose) && Purpose.Type='Purpose Type'.'Transactional Communication',"Transactional Communications",
!IsBlank(Purpose) && Purpose.Type='Purpose Type'.Tracking,"Tracking")
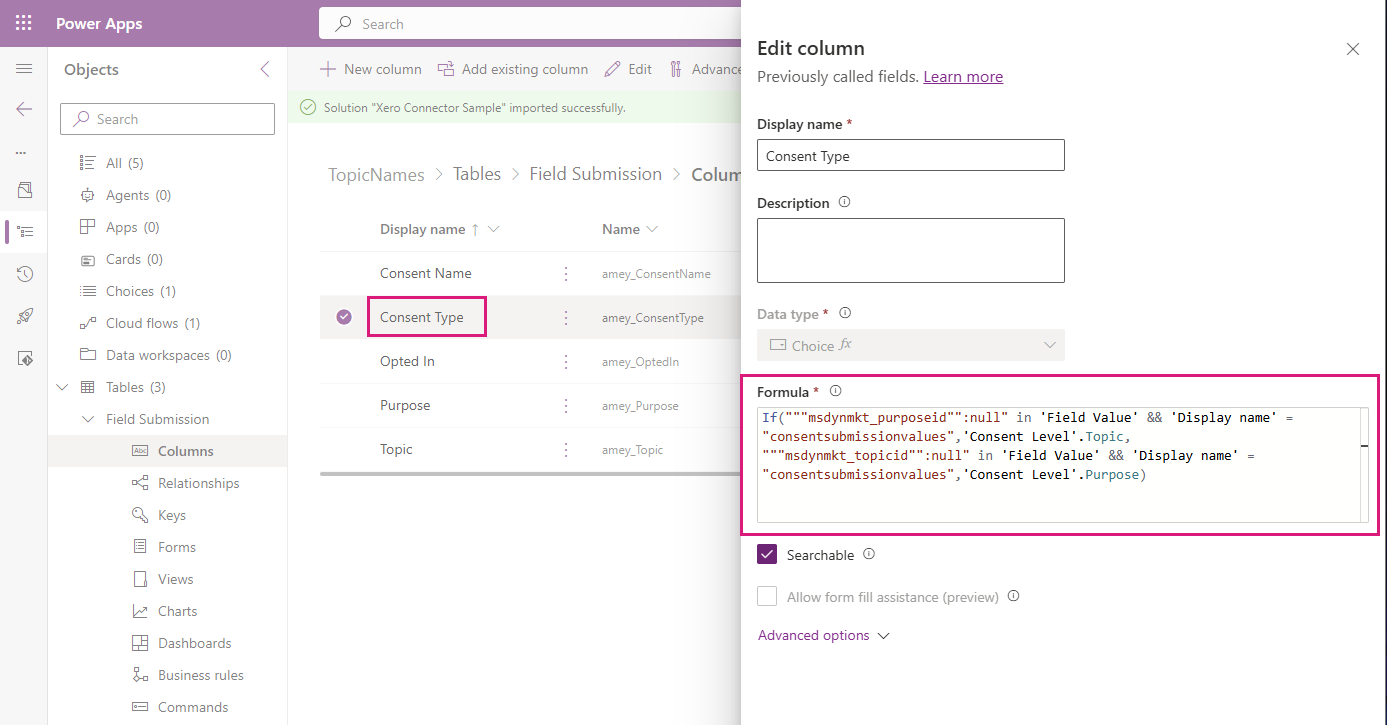
Consent Type
Type: Formula (Choice)
If("""msdynmkt_purposeid"":null" in 'Field Value' && 'Display name' = "consentsubmissionvalues",'Consent Level'.Topic,
   """msdynmkt_topicid"":null" in 'Field Value' && 'Display name' = "consentsubmissionvalues",'Consent Level'.Purpose)
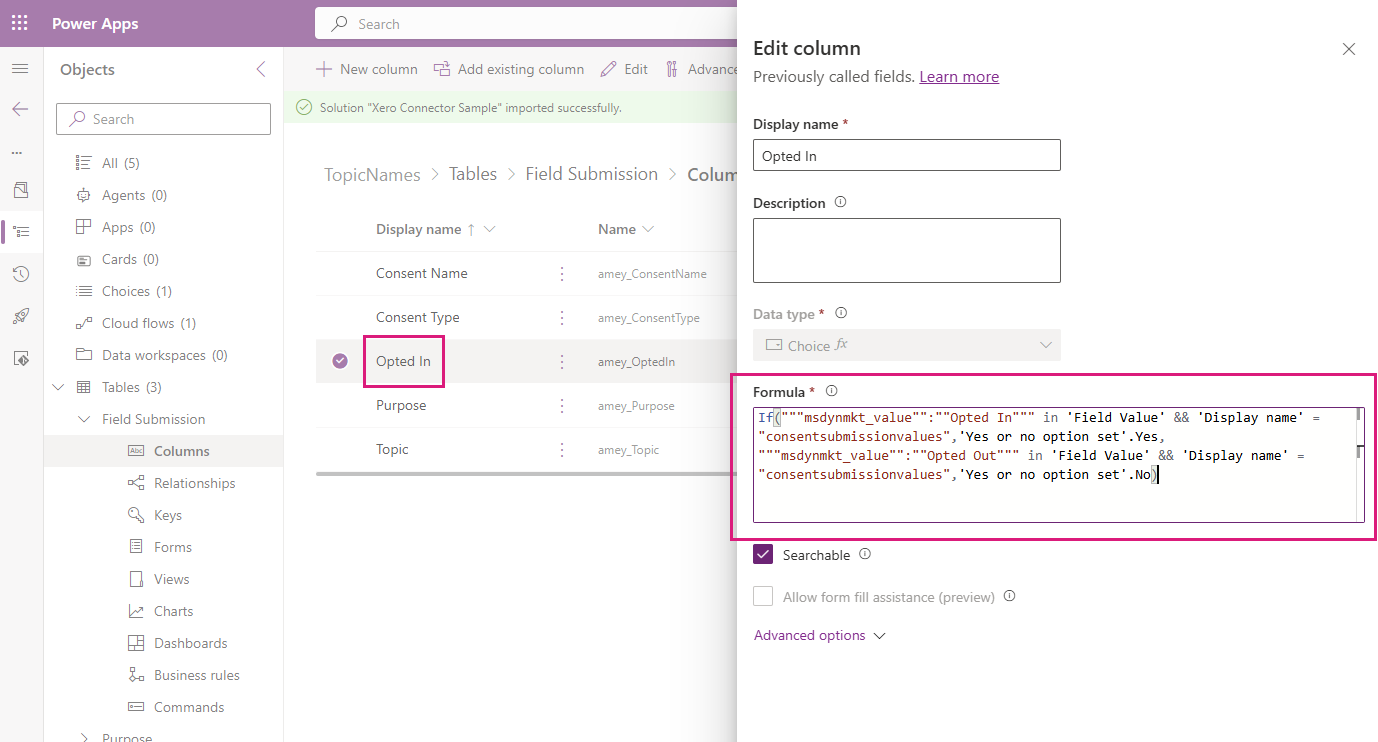
Opted In
Type: Formula (Choice)
If("""msdynmkt_value"":""Opted In""" in 'Field Value' && 'Display name' = "consentsubmissionvalues",'Yes or no option set'.Yes,
   """msdynmkt_value"":""Opted Out""" in 'Field Value' && 'Display name' = "consentsubmissionvalues",'Yes or no option set'.No)
Optional but would be useful if you put them on the form too!
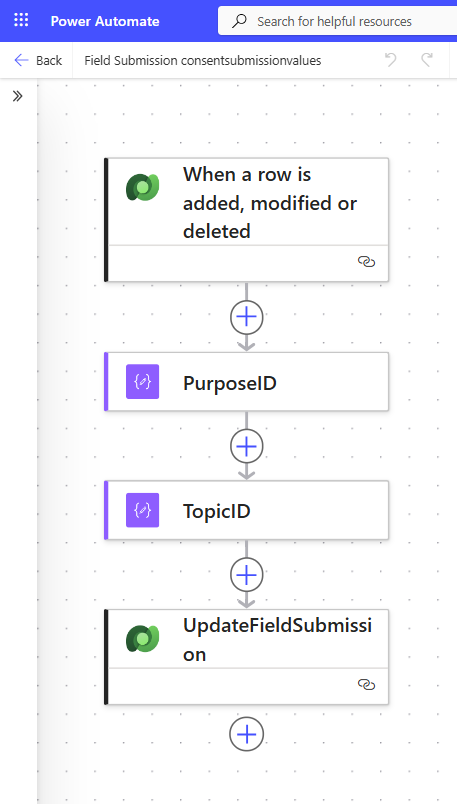
Create a flow to populate ‘Topic’ and ‘Purpose’
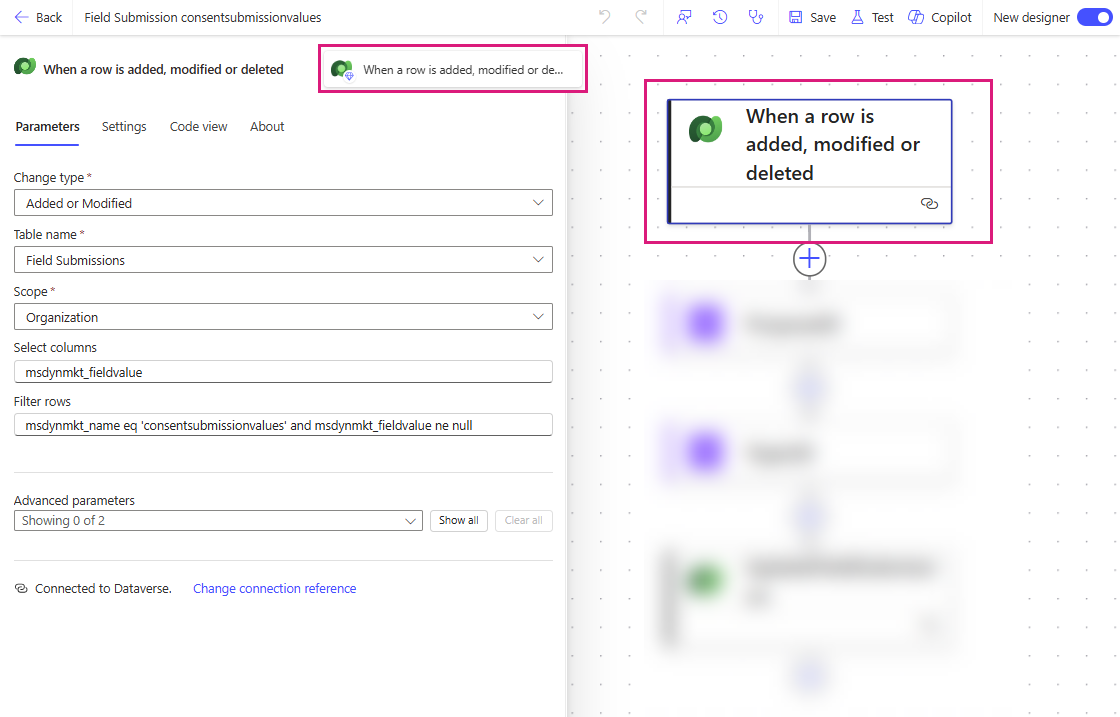
When a field submission includes consent, this flow will be triggered
Dataverse - When a row is added, modified or deleted
Change type: Added or Modified
Table name: Field Submissions (msdynmkt_marketingfieldsubmission)
Scope: Organization
Select columns: msdynmkt_fieldvalue
Filter rows: msdynmkt_name eq 'consentsubmissionvalues' and msdynmkt_fieldvalue ne null
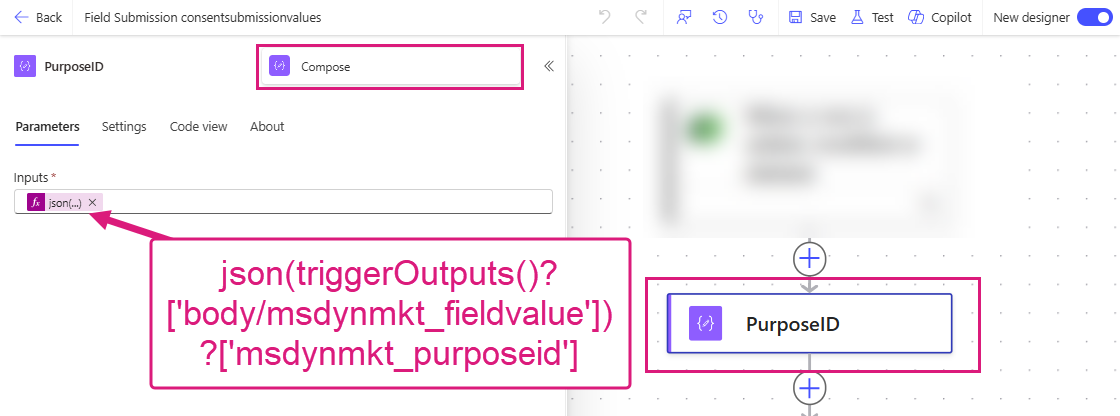
Data Operation - Compose ‘PurposeID’
Inputs: json(triggerOutputs()?['body/msdynmkt_fieldvalue'])?['msdynmkt_purposeid']
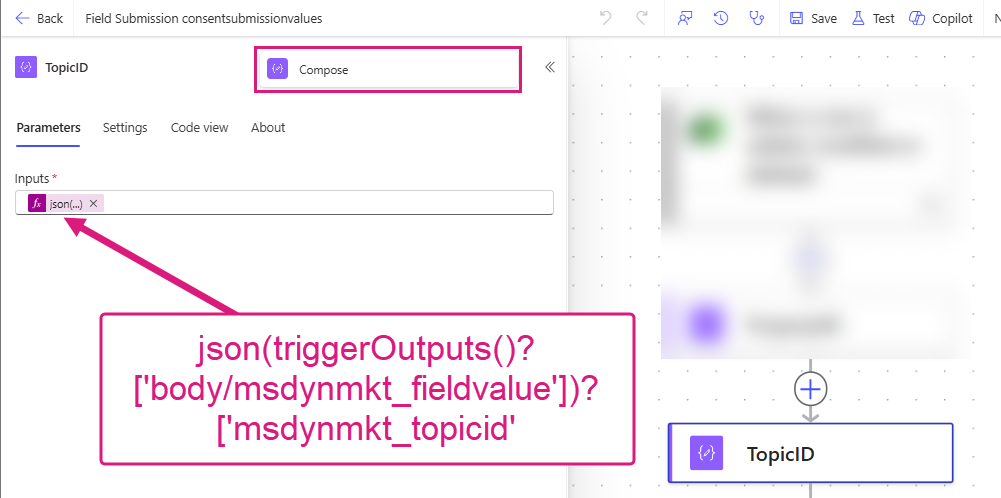
Data Operation - Compose ‘TopicID’
Inputs: json(triggerOutputs()?['body/msdynmkt_fieldvalue'])?['msdynmkt_topicid']
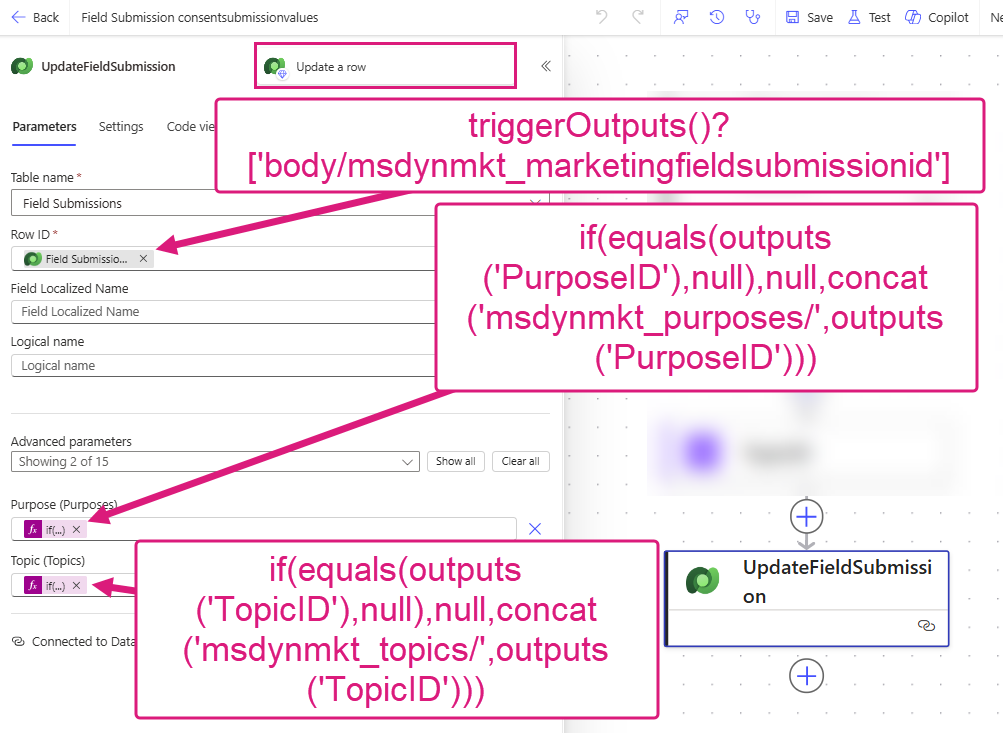
Dataverse - Update a row ‘UpdateFieldSubmission’
Table name: Field Submissions (msdynmkt_marketingfieldsubmission)
Row IDtriggerOutputs()?['body/msdynmkt_marketingfieldsubmissionid']
Purpose (Purposes): if(equals(outputs('PurposeID'),null),null,concat('msdynmkt_purposes/',outputs('PurposeID')))
Topic (Topics): if(equals(outputs('TopicID'),null),null,concat('msdynmkt_topics/',outputs('TopicID')))
Update the ‘DOI Email’ dynamic content (carefully)
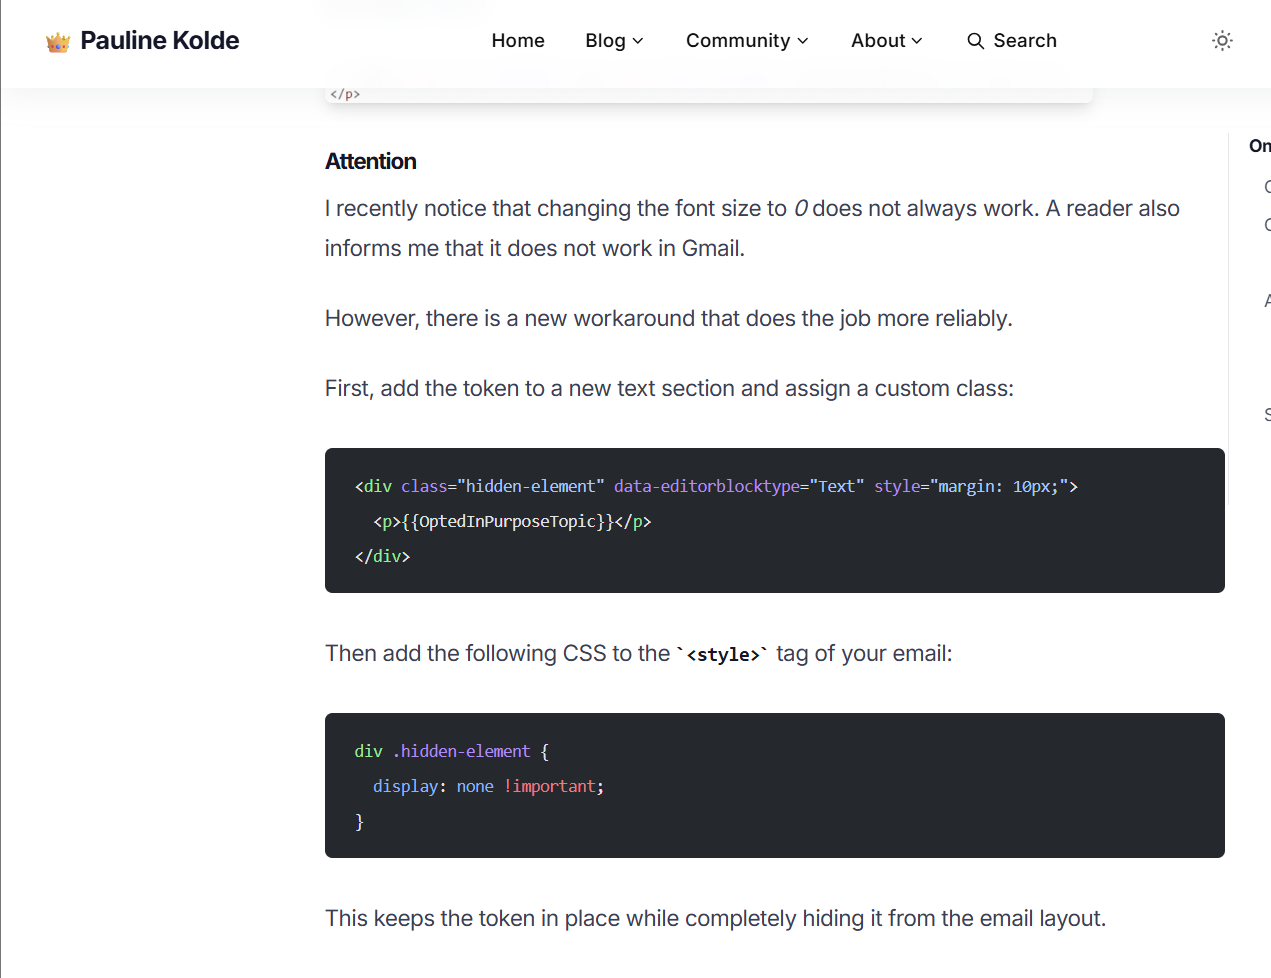
Make sure as part of these changes that you do not accidentally (or intentionally) delete the {{OptedInPurposeTopic}} placeholder from the email otherwise the email will break and there is no fun UI driven method to fix it. Instead hide the content using the method shown by Pauline on her blog under the ‘Attention’ heading.
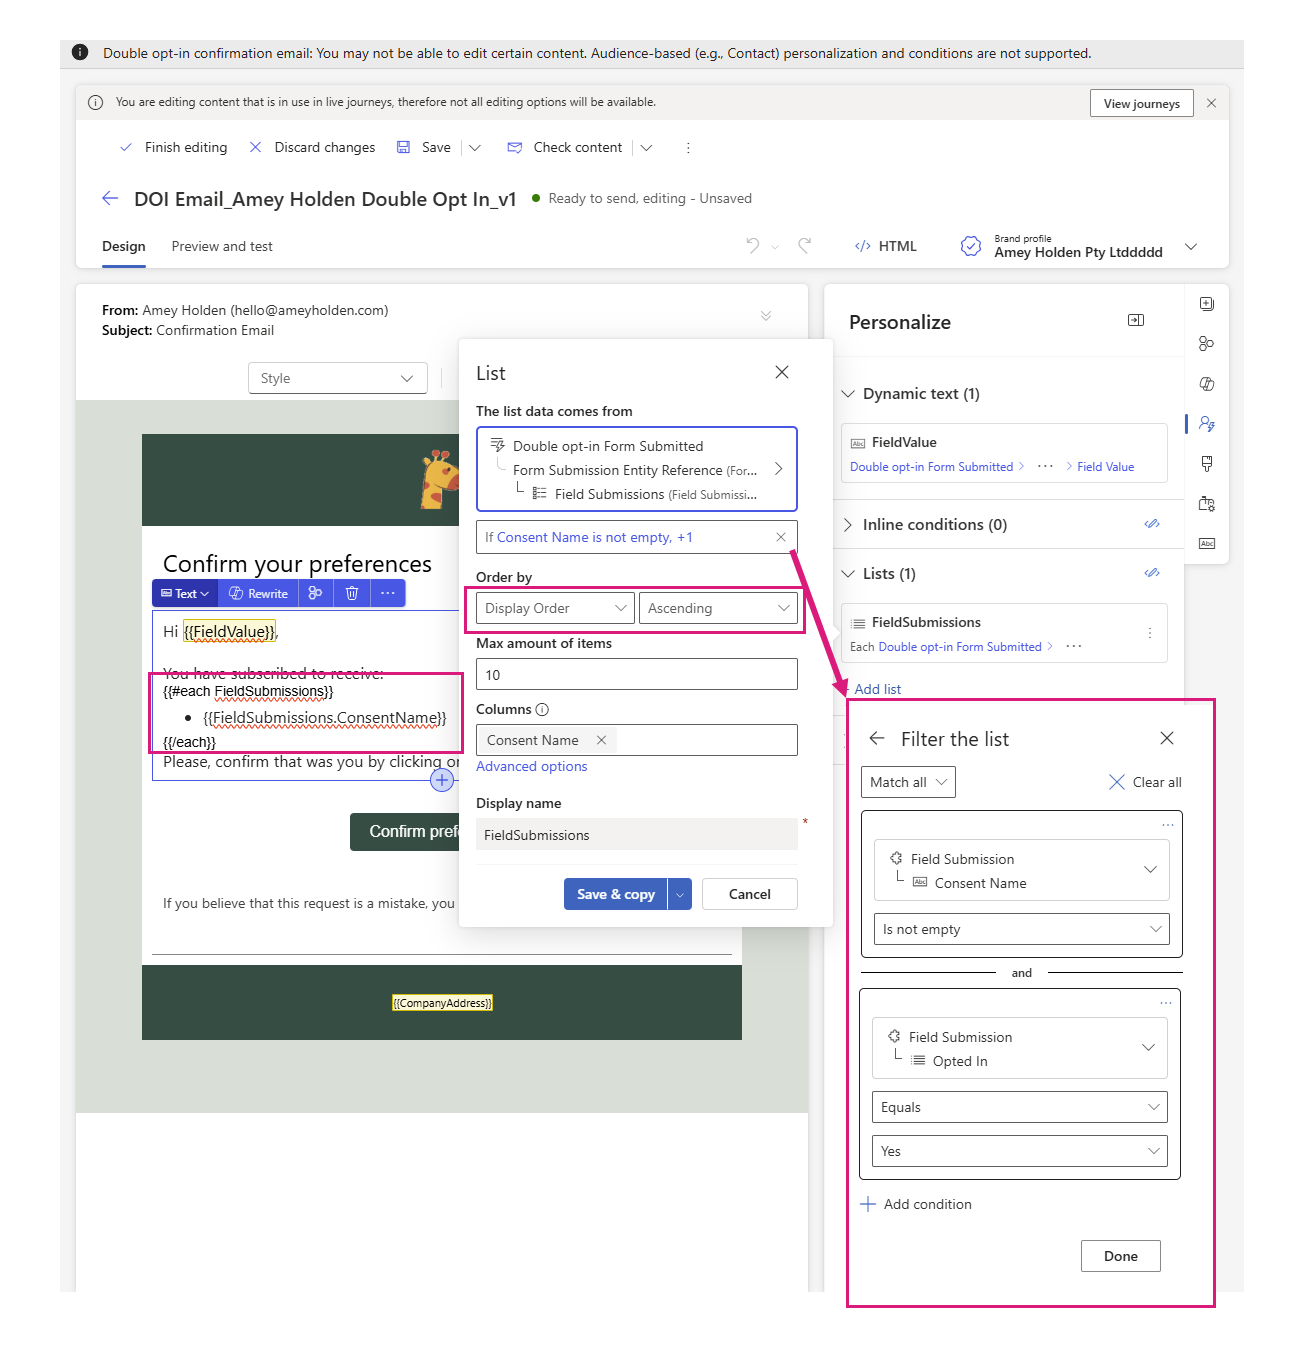
Add a dynamic content list for Field Submissions
As shown below: Double opt-in form submitted → Form Submission Entity Reference → Field Submissions
Filter: Consent Name is not empty AND Opted In equals Yes
Order by: Display Order Ascending
Columns: Consent Name
This allows you to show the data from the opted in field submissions, using the values from the fields you created.
Style the list
I added a bulleted list to the {{FieldSubmissions.ConsentName}} placeholder, and also used the CSS below to style it appropriately.
ul {
            font-family: "Segoe UI", Frutiger, "Helvetica Neue", Arial, sans-serif;
            font-size: 16px;
            color: rgb(37, 36, 35);
            line-height: 5px;
            list-style-type: inherit;
        }
Add dynamic content for the ‘First Name’
Using a similar approach to the blog I mentioned above but I filtered on the ‘Target Property’ as ‘firstname’ to ensure it will be reliable across multiple languages and resilient to any form or system customisations on the column label.
Add Dynamics text Double opt-in form submitted → Form Submission Entity Reference → Field Submissions → Field Value
Filter: Target Property equals firstname
Order by: Display Order Ascending
Default value: there

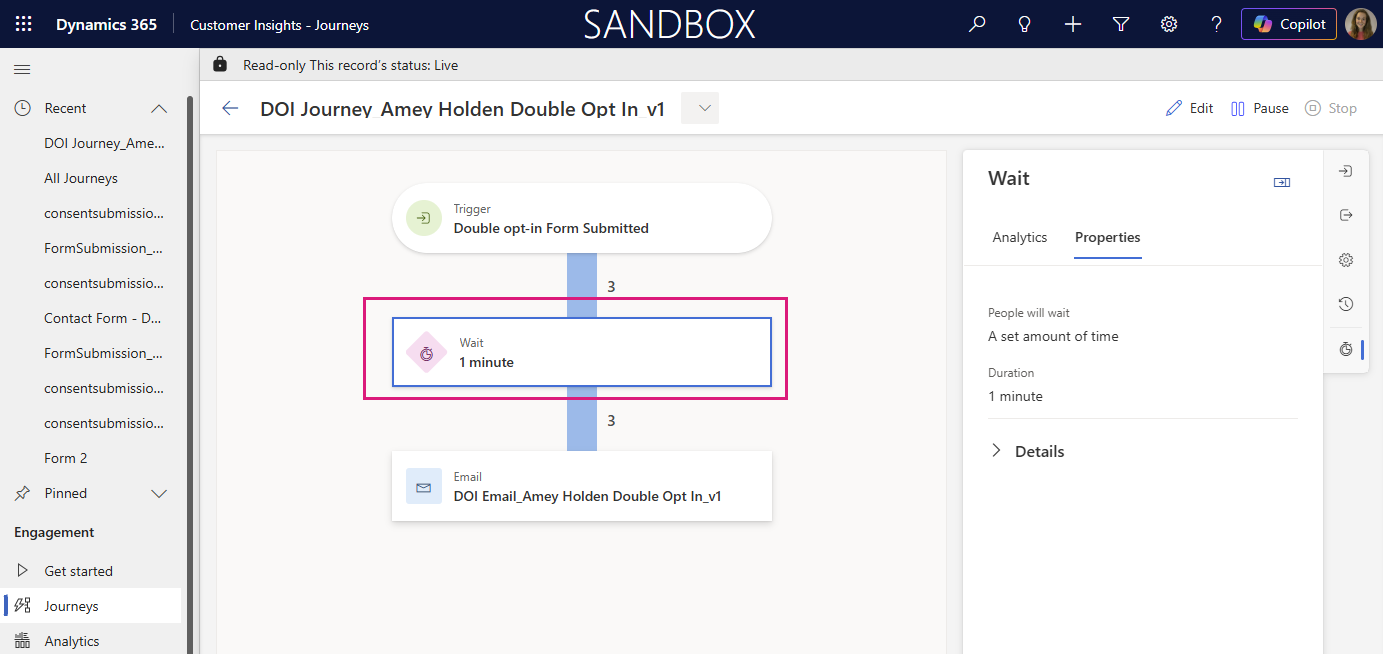
Add a delay to the ‘DOI Journey’
I’m not 100% sure you need this, and I don’t love that its relying on a race condition but its better than the semi colon nightmare… ideally you would use formula fields to determine the Topic/Purpose name but the functions such as LookUp() and ParseJSON() are not supported functions in PowerFX formula columns yet. So add a little one minute delay to your DOI Journey to be on the safe side!
Give it a try
You can admire the beautiful double opt in confirmation email by filling out this form → https://assets-usa.mkt.dynamics.com/5e604e4d-79d4-4ffc-801a-ba7334dbfc9c/digitalassets/standaloneforms/8cda5173-4356-f111-bec7-7ced8dd73066
I love these difficult little questions/challenges for blog inspiration so if you have something you are stuck with in the world of Power Automate or Customer Insights - Journeys - drop me a message or a comment!